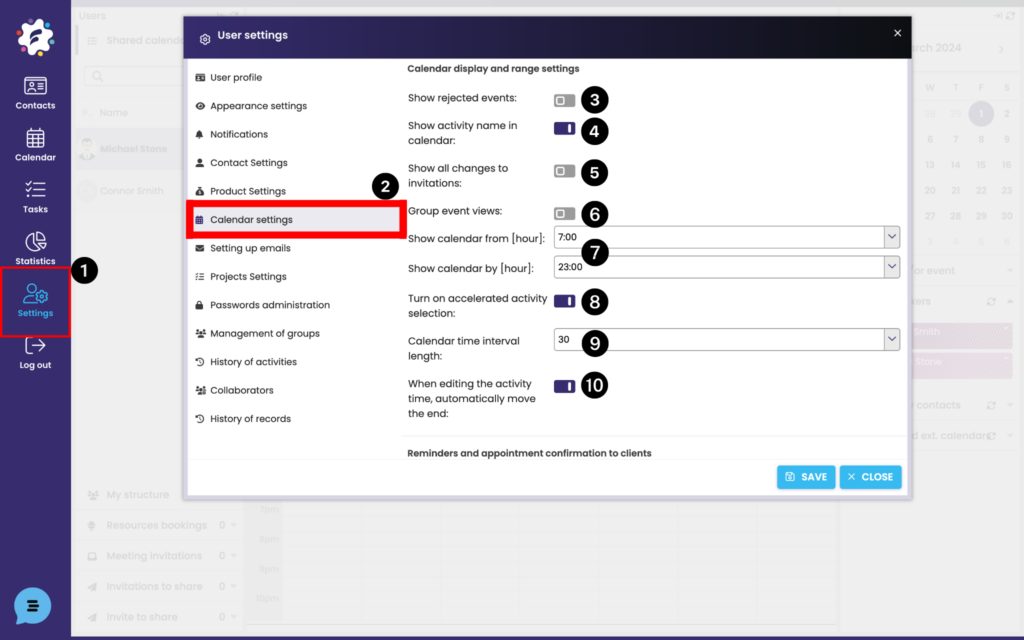
Setting / changing the time of calendar ie. from when to when you enter activities in Settings (1) > Calendar Settings (2).
Decide if you would like to see rejected events in your calendar (3)
Choose whether you want to view the name of the activity (4).
(5)
Press to turn on visibility of your whole group events in your calendar (6)
Set the time range of your calendar view (7).
Turn on the accelerated selection of activities (8) – we recommend keeping, faster input will offer you the most type of activity, respectively. task, and based on this, a window is created for entering an activity.
Length of the calendar time interval (9) – it is possible to select the display after 15, 30 and 60 minutes.
(10)

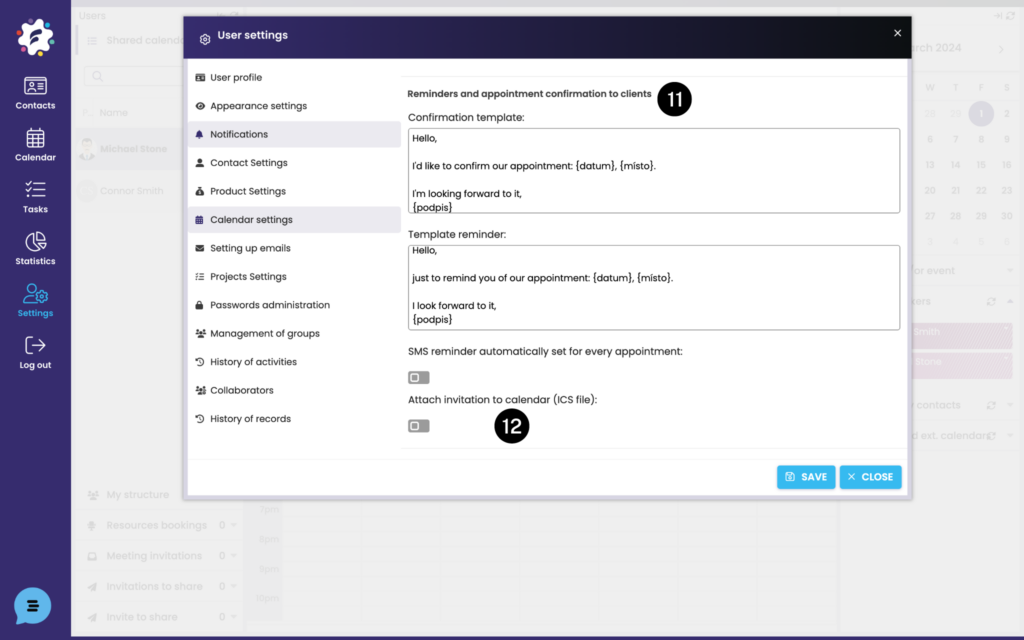
You can edit confirmation text and reminder here (11) You might set SMS appointment automatically for every event (otherwise, it needs to be set manually for every activity).
(12)

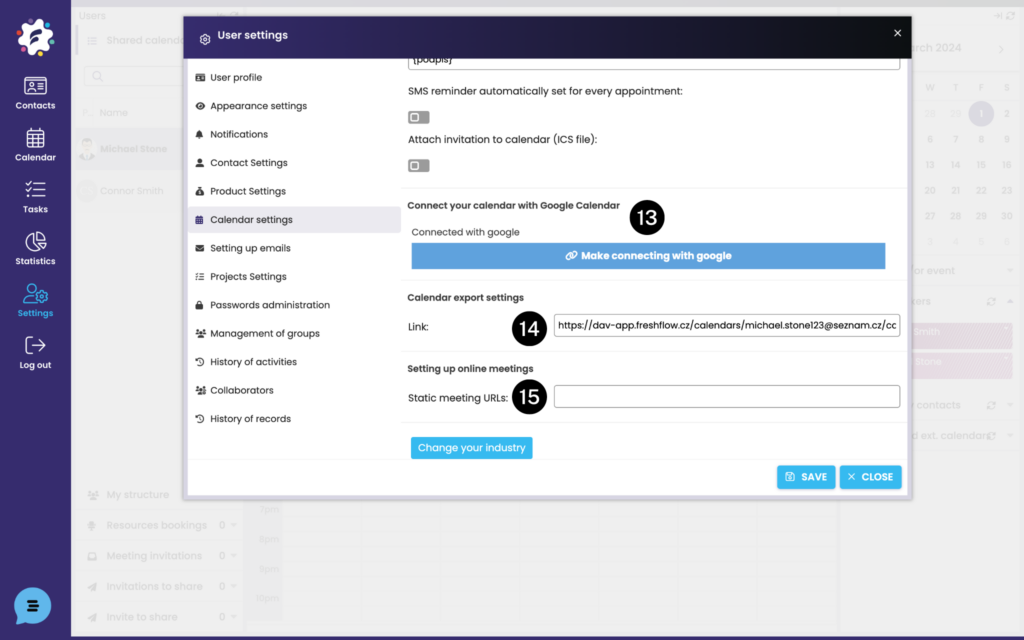
Connecting your FreshFlow calendar with Google calendar (13).
Link (14) – if you need to export your FreshFlow calendar to another of your calendars (e.g. google, outlook, etc.)
(15)