View and search for contacts
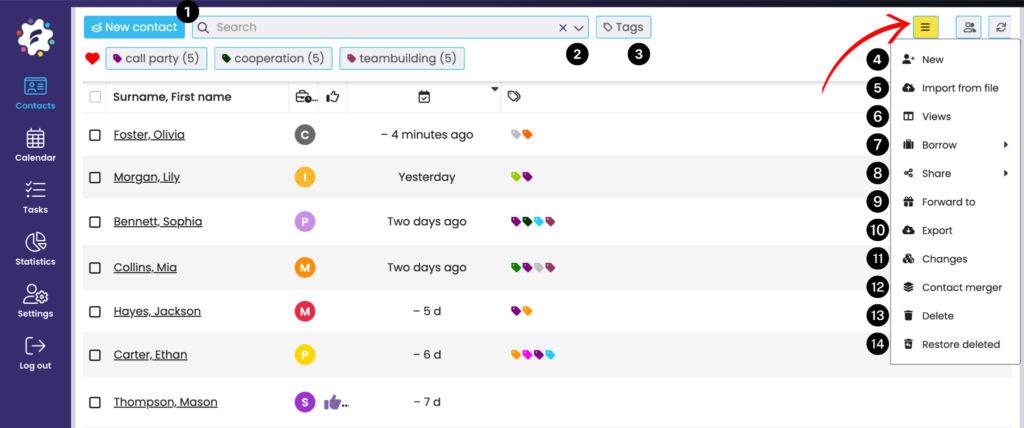
(1) New Contact– If you need to add several contacts at once, click on the Add Contact icon and you will see a simple table where you can add basic information and save.
(2) To view the advanced search, click on the arrow and you can search by:
- Recent activities,
- Results of the last activity,
- Future activities,
- Recommenders,
- Last user
- Basic data (name, surname, tel., e-mail)
- Addresses (1,2).
(3) Labels – Filter by label and edit labels or folders. For more detailed instructions, see Tagging and tagging contacts.
(4) New – allows you to enter a new contact by filling in the contact details.
(5) Import from file – allows you to import multiple contacts from an excel file
(6) Views– allows you to save a specific view of contacts or view an already saved view
(7) Lend– you can lend selected contacts to a colleague
(8) Sdílet – vybrané kontakty lze sdílet s kolegou
(9) Forward to– you can transfer selected contacts to a colleague
(10) Export– allows you to export the list of contacts to an xls table
(11) Bulk changes– if you wish to edit the same parameter for multiple contacts at once
(12)
(13) Delete selected contacts – deletes selected contacts from the database
(14) Undo deleted – undoes the previous selection
Favourite tags
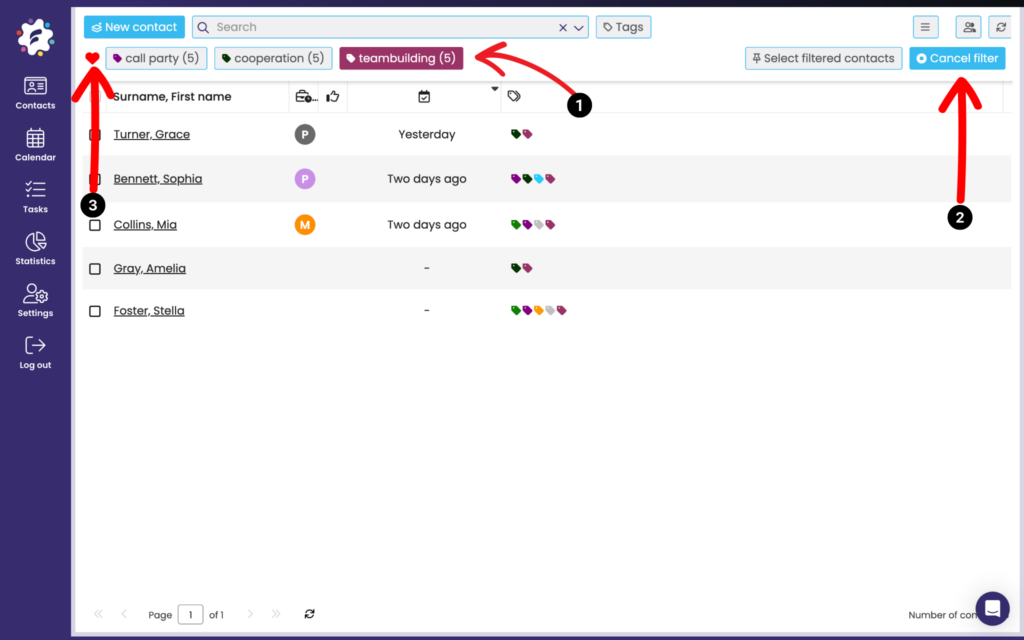
You can very quickly find contacts with a label that you have saved in your “favourites” – just click on the desired labels (1). Selected labels are marked by colouring. To deselect a label, click it again and the label is deselected.
To completely cancel the current selection, use the Cancel Filter button (2).
If you click on the heart icon (3), you will see a window with all the labels and you can edit or add them to your favourites.
Edit column/row display

Click on each column (1) to specify the order of the contacts according to this data (ascending or descending).
You can set which columns you want to display by clicking on the last column Actions (2) -> Columns (3) -> check/uncheck the selected columns.
You can adjust the order of the columns simply by dragging the mouse over the skin where you want it.