Invitation to share your calendar
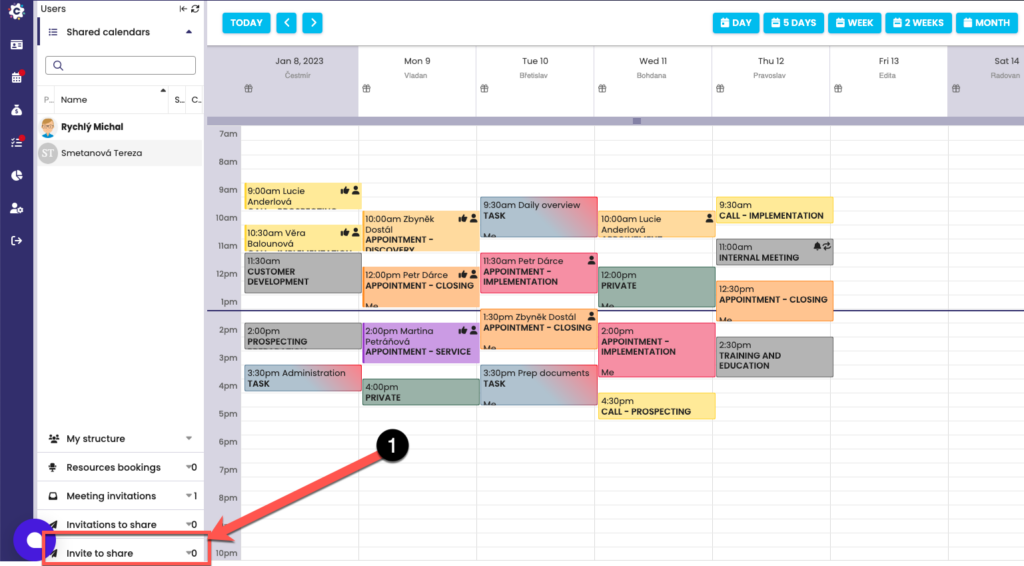
To create a Sharing Invitation, click the Send Sharing Invitation button (1) to open a new dialog box.
Create a calendar sharing invitation
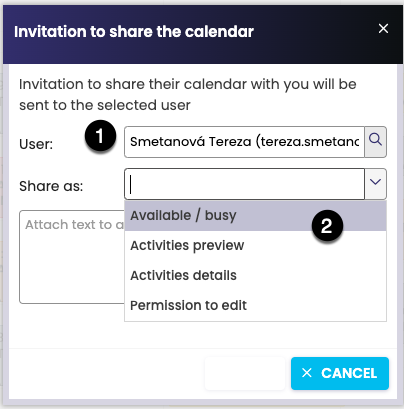
In the dialog box, fill in the necessary information to specify the User to whom the Invitation to Share will be sent. Select the name of the User (1) to whom you will send the Invitation. Choosing a sharing level is very important to set how the person who receives the Sharing Invitation from you will see your calendar.
Four levels of calendar sharing are possible (3):
– Free / Busy
– Activity preview
– Activity details
– Permission to enroll
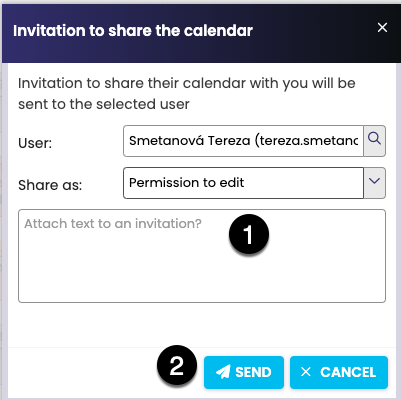
You can also attach a short text (1) to the Invitation, for example, to justify why you are sending the Sharing Invitation to the User. Click Send (2) To send the invitation to the selected User.
Learn how to receive a Calendar Sharing Invitation
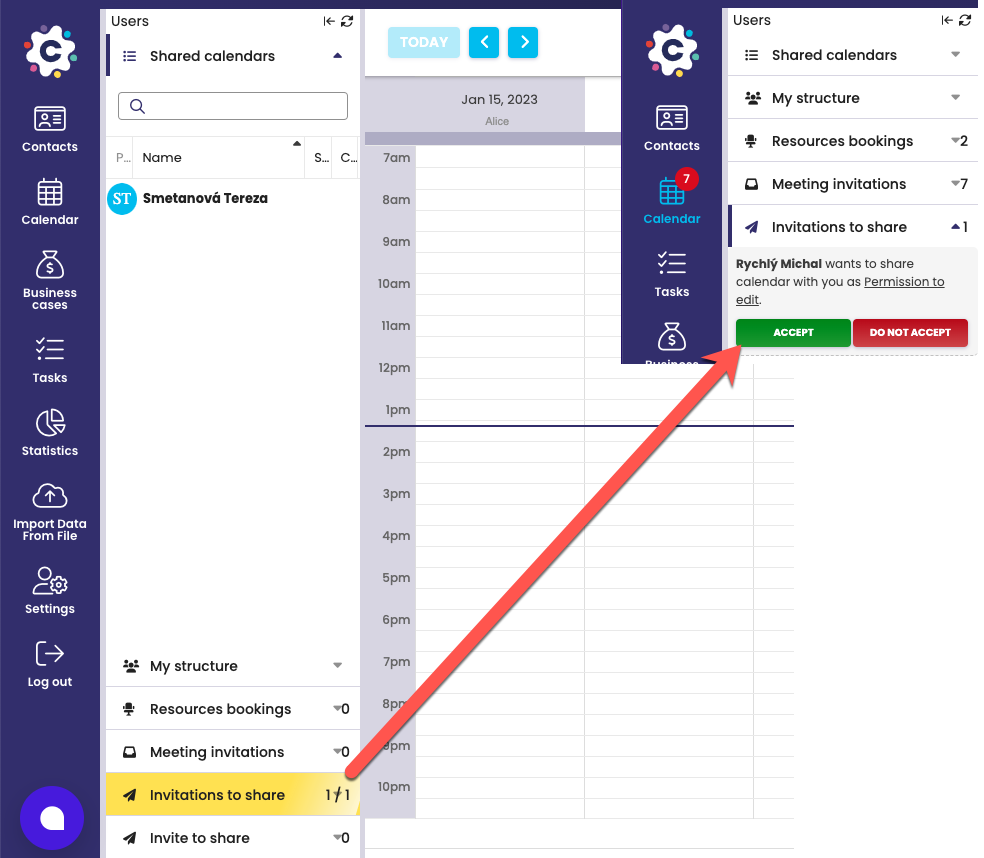
Information that you have received an Invitation to share a calendar with your colleague can be found in the calendar module in the Sharing Invitations tab (1). The Invitation (2) describes in detail who sends you the Sharing Invitation and how they want to share their calendar with you. That is, how you will see his calendar and a suggestion of how you can share your calendar with a colleague. By default, the same level of sharing of your calendar is set as the person wants to share their calendar with you.
Confirm a calendar sharing invitation
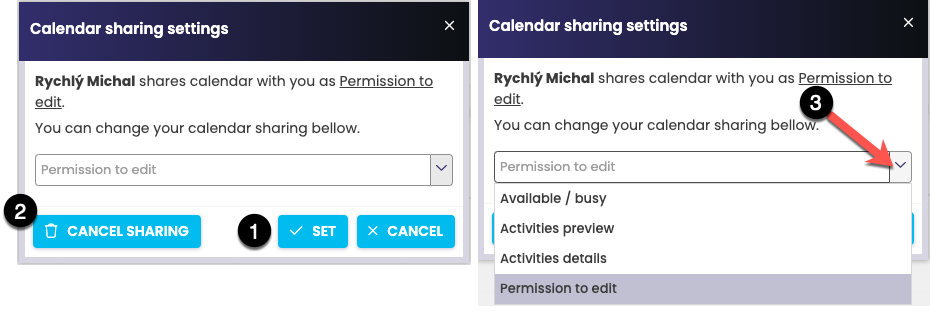
By default, the same level of sharing of your calendar as the person wants to share their calendar with you is set for confirmation, in this case Allowing enrollment. If you agree to this type of mutual calendar sharing settings, click set up (1) to confirm. This sets up and activates mutual sharing.
If you do not agree with the proposed mutual sharing of the calendar, you can completely refuse to share with each other by clicking the Cancel Sharing button (2). The system will ask you to confirm if you really want to unshare your calendar with this user. Click Yes to confirm. This will cancel the sharing with each other.
It is also possible to set a different level of sharing (3) of your calendar, such as Activity Preview type and click Set to confirm. In this case, you will see your colleague’s calendar as Free/Busy and they will see your calendar as Activity Preview.
Decline a calendar sharing invitation
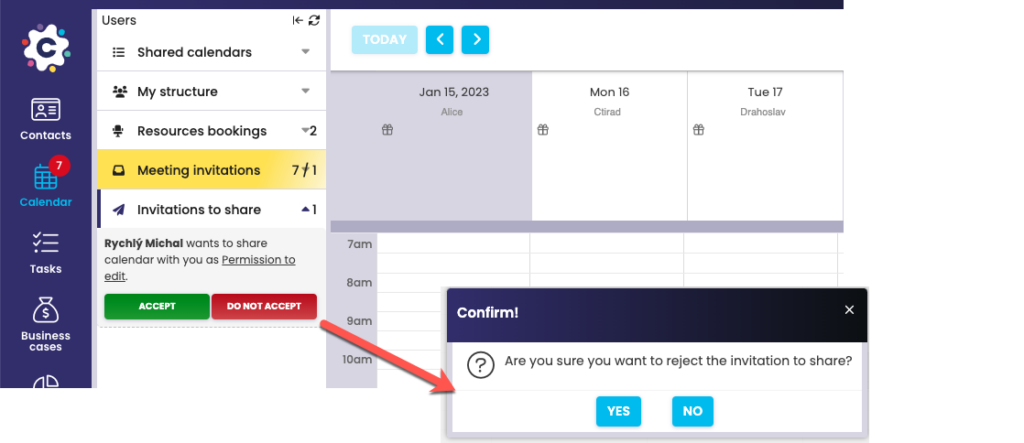
You can decline a sharing invitation directly from the Sharing Invitations tab by clicking DO NOT ACCEPT. The system will ask for confirmation if you will really accept the Sharing Invitation, which you can confirm by clicking Yes. Rejecting an invitation does not activate mutual sharing, so you will not see the calendar of the person who sent you the Invitation and they will not see your calendar either.
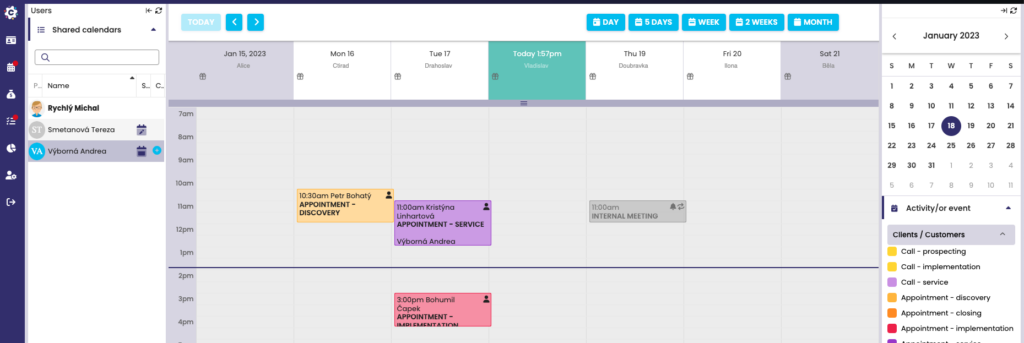
Basic view of your calendar
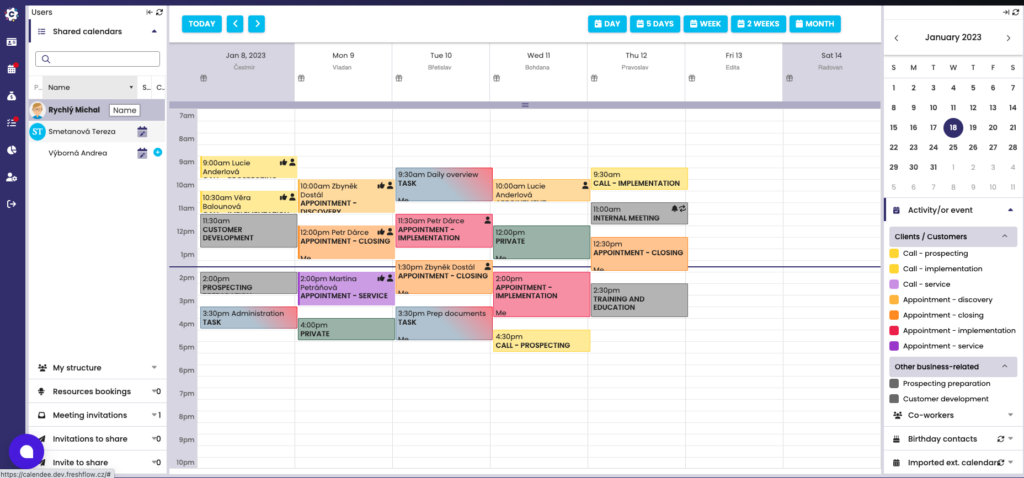
This is the original calendar from your point of view, or in this case Mr. Michal, who will send the Invitation to share the calendar.
Calendar display at the Available/Busy sharing level
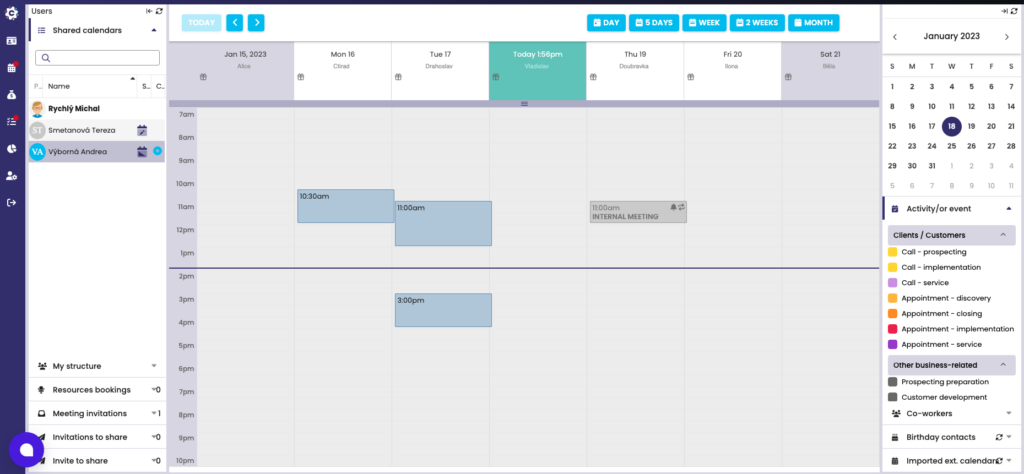
After confirming the mutual sharing of the Free/Busy calendar, the person to whom you have enabled sharing or sent the Sharing Invitation will only see your calendar in the version as in the picture, so dark gray boxes indicate when you have activity in the calendar (Busy). Activities are not color-coded, nor are descriptions of individual activities displayed. Scheduled phone calls and tasks are also not displayed in this type of view.
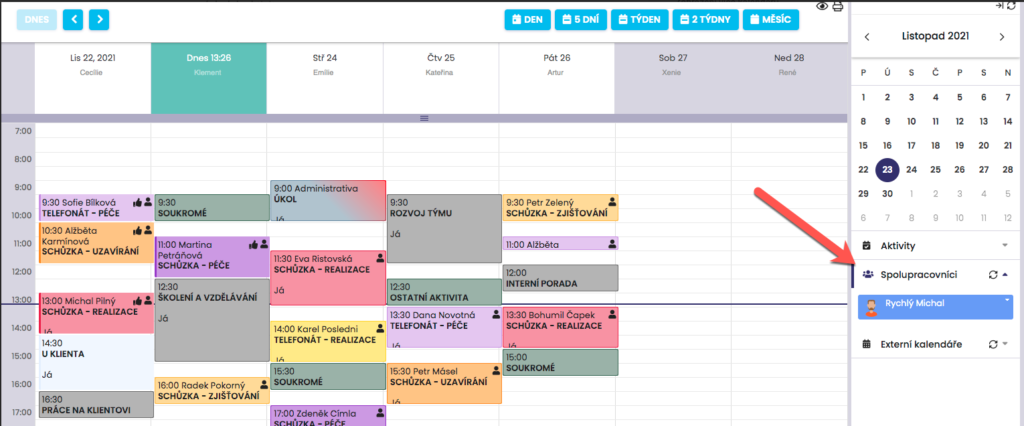
View your calendar at the sharing level Activity preview
When you set the calendar sharing type Activity Preview, the visibility of your calendar is displayed to the person as in the picture, where the activities in the diary are color-coded by type of activity and a description of each activity is visible. However, you can’t click on activities to see more details about the activity.
View your calendar at the Activity Details level

Sharing an Activity Details calendar allows your calendar to be visible to the person who has received this permission from you. If the individual activities are color-coded, a description of the activities is visible and at the same time it is possible to click on the activities and look at the detail of the activity. However, the details of the activities cannot be edited in any way, it is only a preview so that it is not possible to change and move the activities.
View your calendar at the Enable Enrollment level
The visibility of the calendar is the same as at the Activity Details level, except that it is possible to write a new activity to the calendar to a colleague.
See people I’ve shared my calendar with

The Shared Calendars tab displays the names of the people with whom you have set up mutual sharing of calendars. The icon next to your name indicates how the person sees your calendar.
Icons showing your calendar sharing:
- sharing type Free / Busy (1)
- sharing type Write Permission (2)
- sharing type Activity preview (3)
- sharing type Activity details (4)
Clicking on a person’s name in the Shared Calendars list (4) will display the person’s calendar in the shared type you set.
Editing/unshared calendars

You can edit or cancel calendar sharing with each other at any time. In the Shared Calendars tab (1), select the person you want to edit or unshare. Then click on the icon next to the name (2) to open a dialog box where you can edit the share (3). You can change another type of calendar sharing with that person, such as how they see your calendar (4), or cancel sharing completely by clicking Cancel Sharing (5). When you unshare, the share is canceled mutually, so you won’t see the person’s calendar and they won’t see your calendar.
Blend collaborators’ calendars
(view multiple calendars)
To view multiple calendars, or to blend collaborators’ calendars, first click on the Collaborators tab in the right menu.
Add a user to collaborators
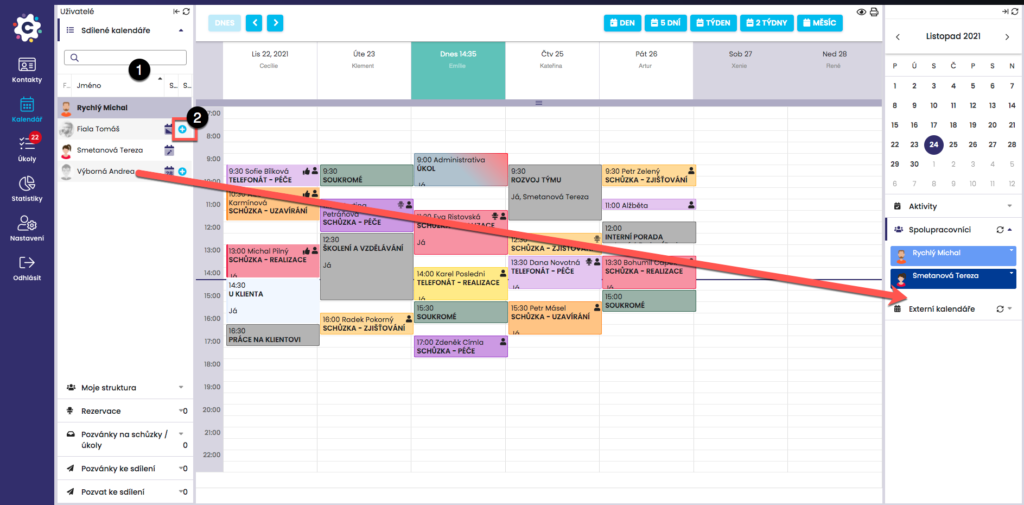
Using drag-and-drop, drag and drop the ones you want to view at the same time from the Shared Calendars tab (1) to the right menu of the Collaborators tab. Their calendars will be color-coded. You can also use the + icon (2), which also adds users to collaborators.
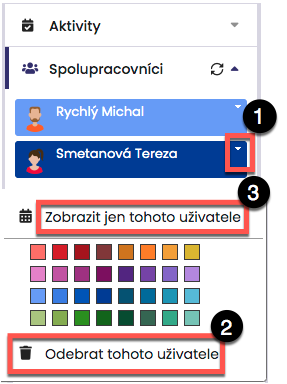
Users can be removed from the list by clicking the drop-down button (1) and then removing (2). You can also just view the calendar of the selected user (3). You can use the color palette to change the color that a collaborator reflects in the diary overlay to make comparisons as clear as possible.