Reserve resources
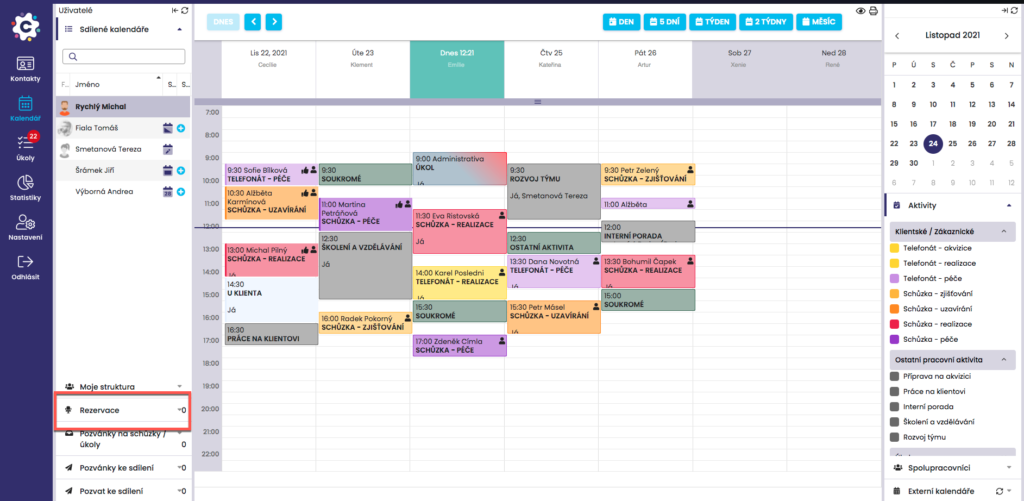
Reservation of rooms/resources can be found in the Calendar module in the left column under the Reservations tab.
Create a room/resource for reservations
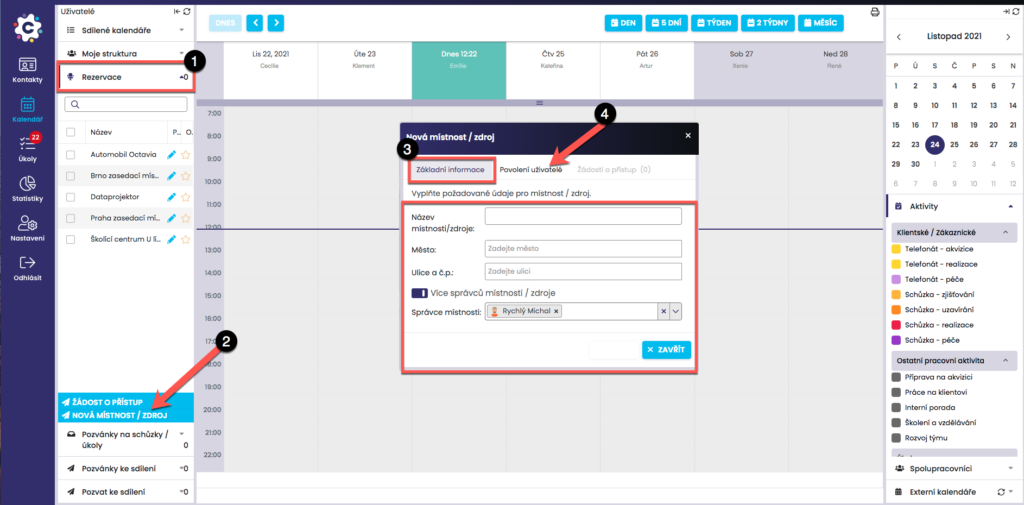
Creating a feed is very easy. Click to open the Reservations tab (1). After expanding the tab, click New Room (2). A new dialog box will open where you can define a new room/resource in the Basic Information tab (3) by entering the required data (City, Street and Number and Name of the room/resource). The name of the room/resource is very important, because under this name the resource will be displayed in the list of sources. Therefore, we recommend that you carefully choose the name that will specify the source the most, for example, TOKOVO 7. floor – green one, or Ruby House, jan Novák office.
You can also use resource reservations to reserve data projectors or roll-ups. In this case, write in the name of the source, for example, Dataprojector – Michal Rychlý.
If you have basic information about the Resource set, click on the Allowed Users tab (4), where it is necessary to define which users will be able to make reservations for this room/resource.
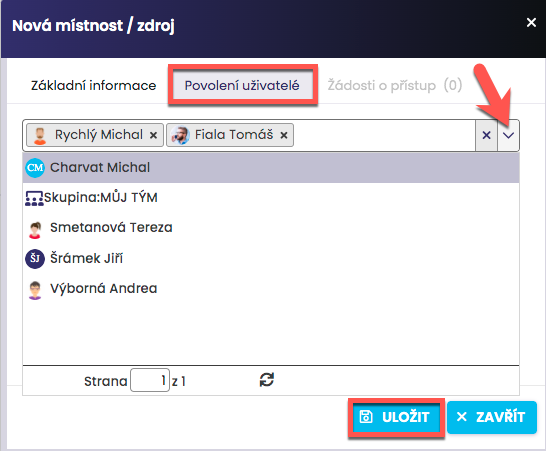
On the Allowed Users tab, define which users have the right to make reservations for the given room/resource. You can enter individual people by typing Surname and First Names in the box or use a preset or created group (alias).
To confirm the settings, click the Save icon.
Request access to a resource
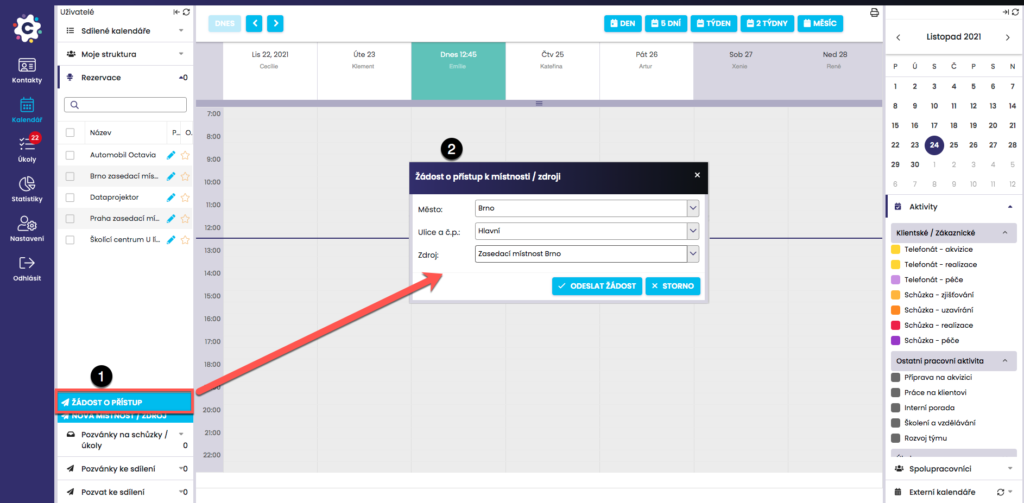
If the manager creates a room/reservation resource and you do not have access to it, you can request access to the room/reservation source by clicking Request access (1). In the new dialog box (2), select the City and Street where the room/resource of the reservation is located, and in the Resource field, select the offered rooms/resources. To confirm your request, click Submit Request.
Confirm request for access to room/resource
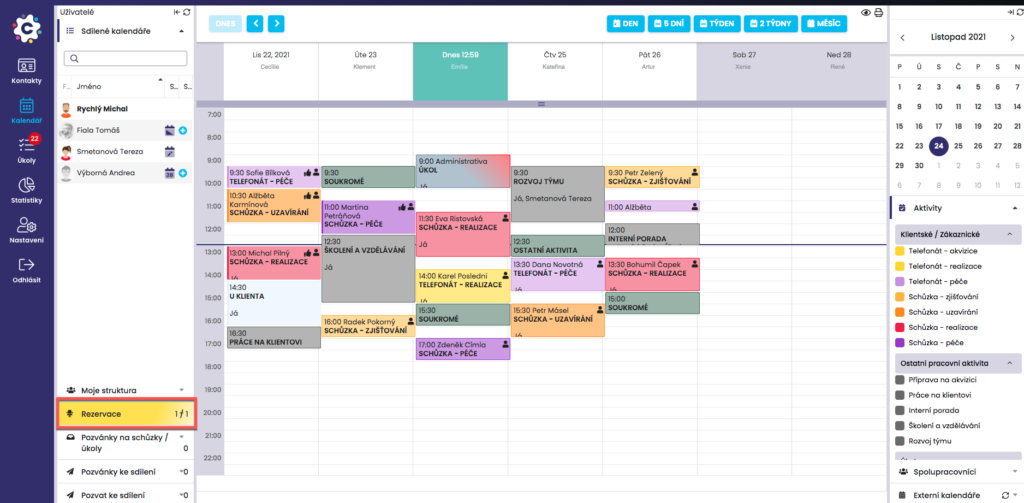
If the Room/Resource Reservations tab contains a new resource access request, it is highlighted in color.
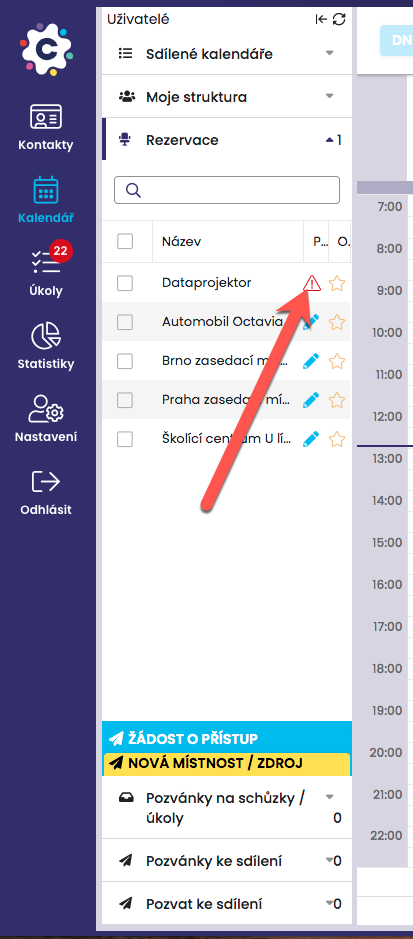
When you open the Room/Resource Reservations tab that contains a new request, a red triangle appears next to the resource affected by the new request to indicate that someone is requesting access to the resource. By clicking on it, you will see a new window in which you can allow or deny a request for access.
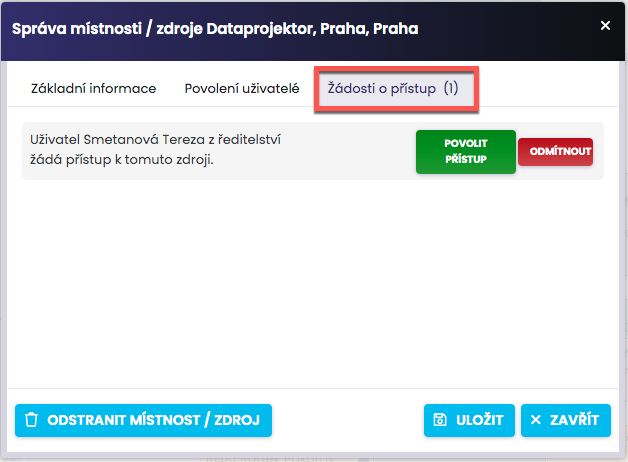
In the Access Requests tab, you will see the current requests. You have the option to allow access to this resource by clicking Allow Access or Deny. To confirm the settings, click Save.
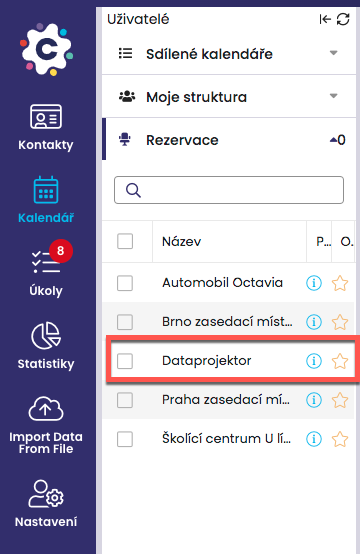
After you confirm the request, the reservation resource appears next to the person who requested it in the Resource Reservations folder. After that, work can begin with this resource.
Make a reservation
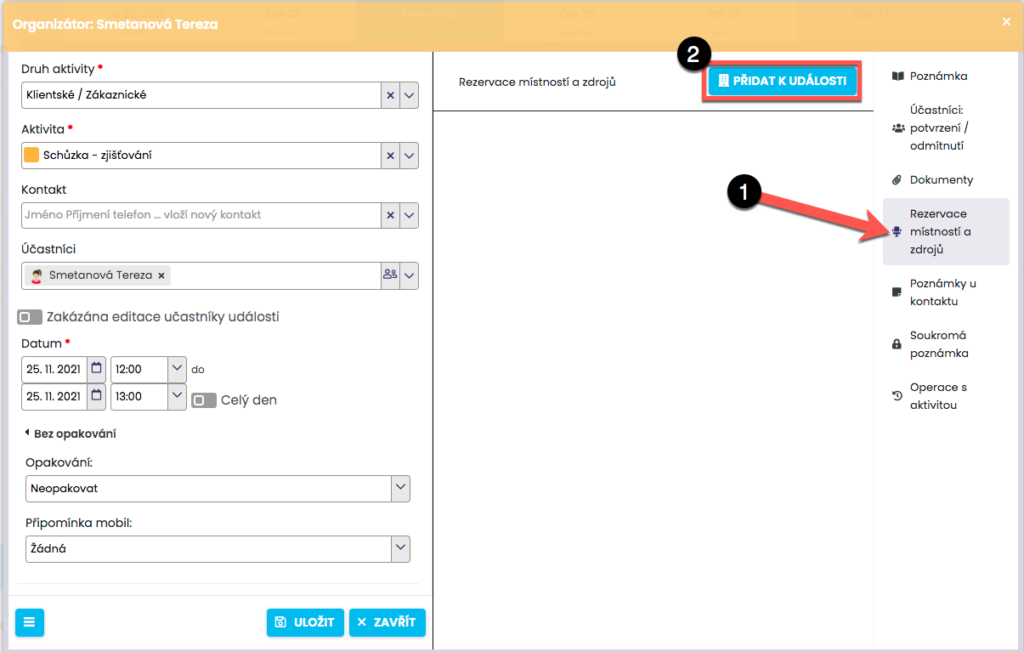
It’s very easy to make a reservation. When entering an activity in the calendar, click Room and Resource Reservations on the right (1), then Click Add to Event (2).
In the new dialog box you will see a box for finding a suitable room/resource for your event.
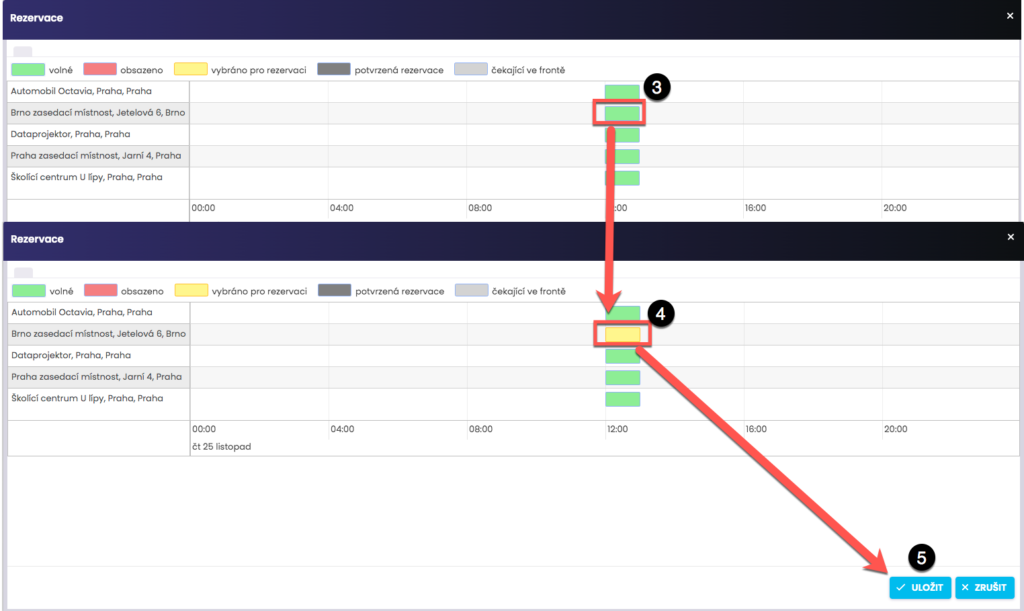
In the reservation dialog box, you will see rooms with a free date at the time of the event (marked in green) (3). Click on the green rectangle in your desired room/resource > it will turn yellow (4) > proceed to “Save” (5).
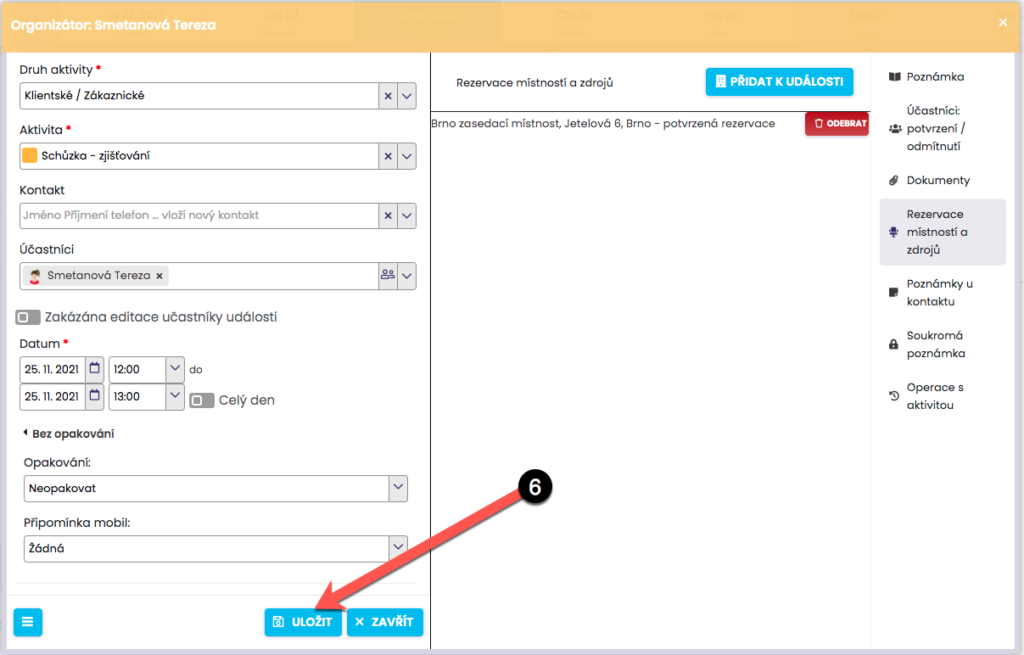
Once confirmed, the room/resource added to the event will be displayed. Click Save (6) to confirm your reservation. Multiple rooms/resources can be added to a single event.
The room / resource is already occupied
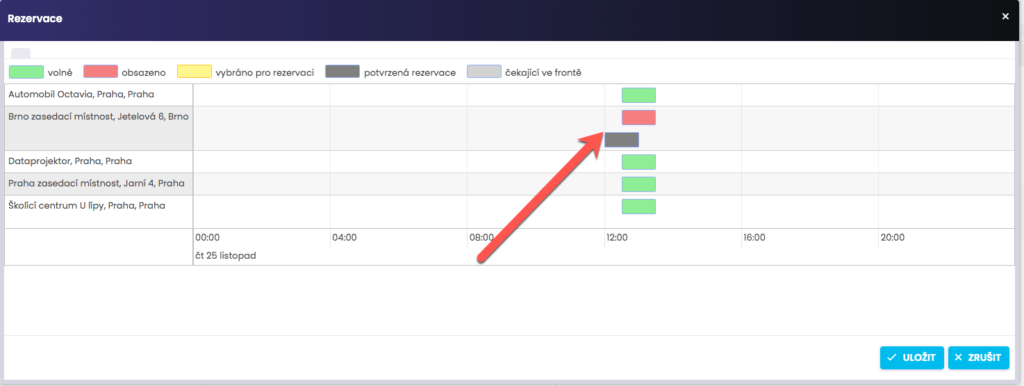
If the selected room/resource is already occupied for the given date, you will see a red window at that time. If you still add a reservation, you’ll see information that you’ll be queued. If a room/resource becomes available, a reservation is automatically created.
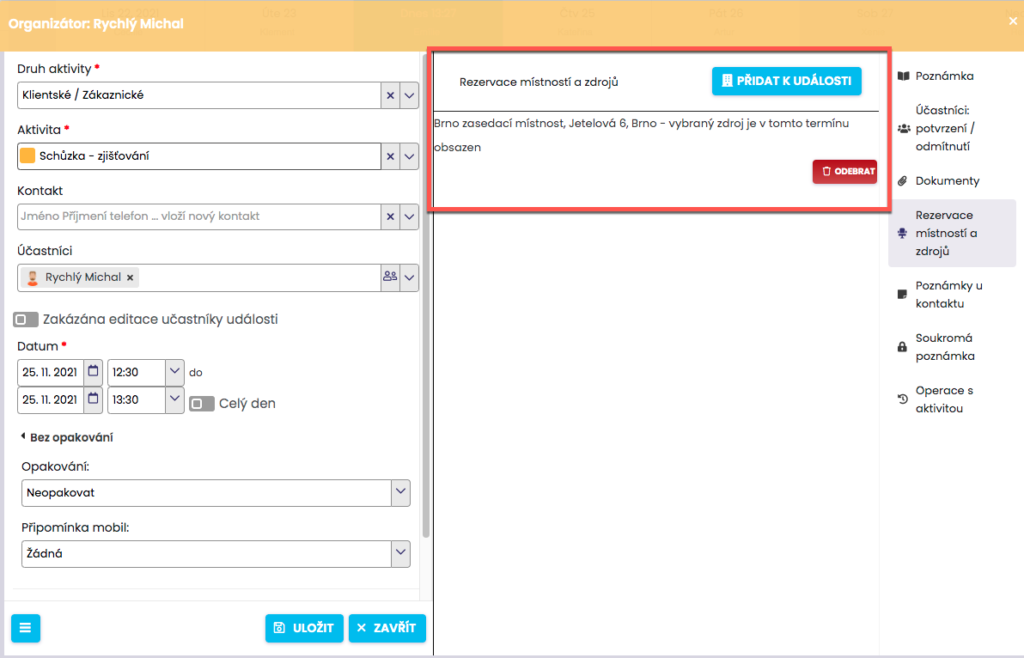
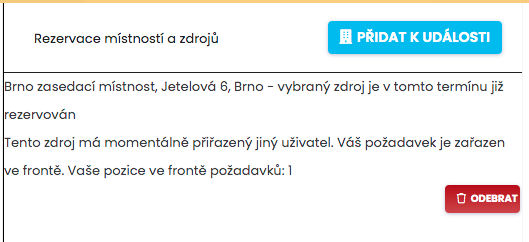
You can remove a reservation or a reservation in the queue at any time for an event.
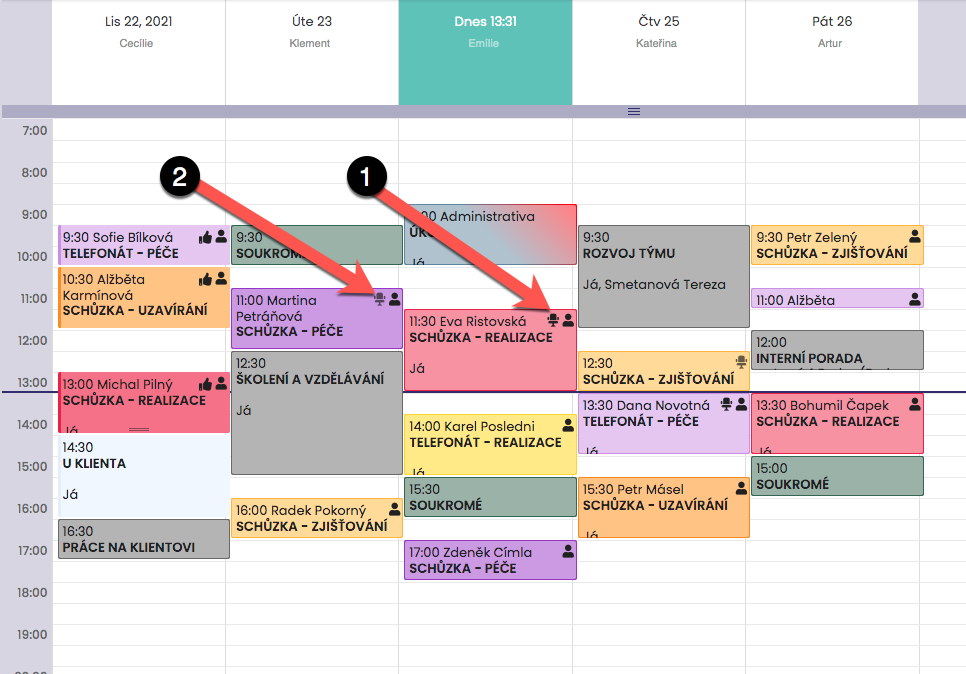
Use the icons next to each activity to get a perfect overview of which activities you’ve created room/resource reservations for. A black chair (1) means that the reservation is confirmed and is valid. If the chair is grizzled for an activity (2), the reservation for this activity is queued. If the room/resource becomes vacant, the status is automatically updated and a black icon is displayed.
Booking editing
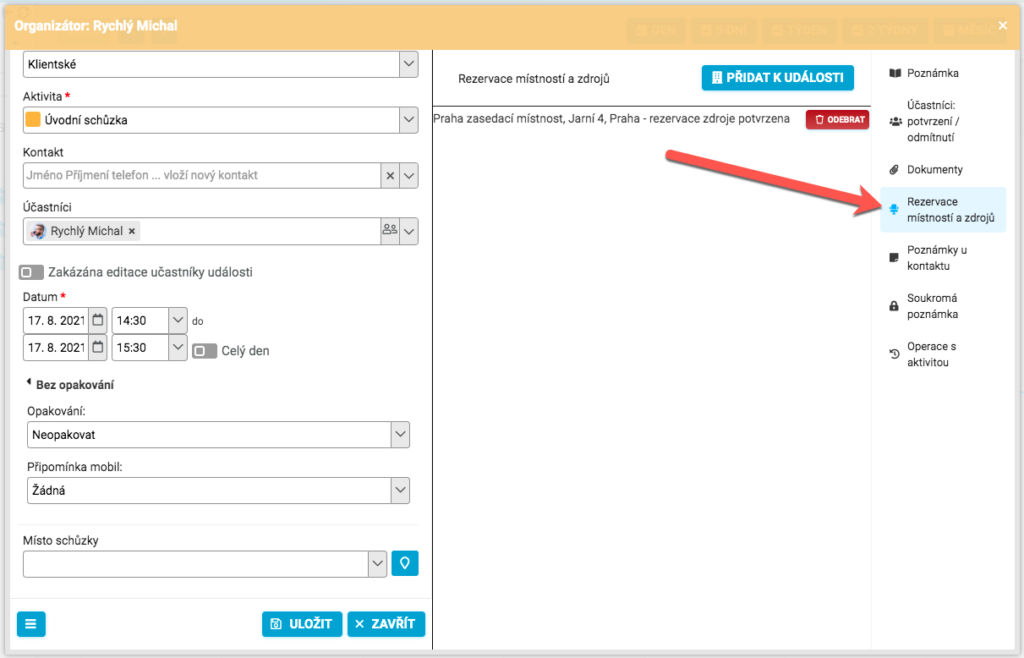
You can edit a reservation directly from the activity details window by clicking Room & Resource Reservations in the right pane.
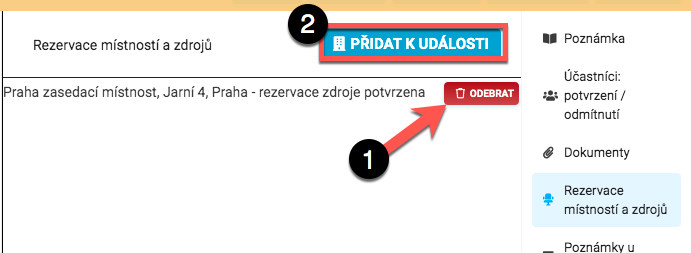
The reservations edit window will open, where you can check the status of the reservation or remove it by clicking on Remove (1). You can also add another reservation to the event by clicking Add room/resource to the event (2).
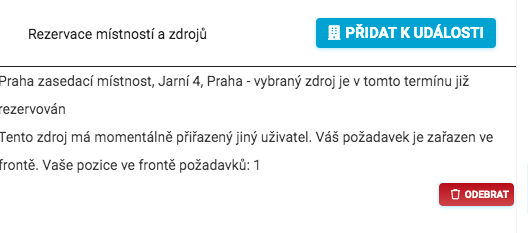
If you have entered a reservation in the queue, a message will be displayed during editing with information about how many in the order you are. Here you can check whether the resource has been released for you or you are still in the queue and at which place.
Room /Resource Calendar
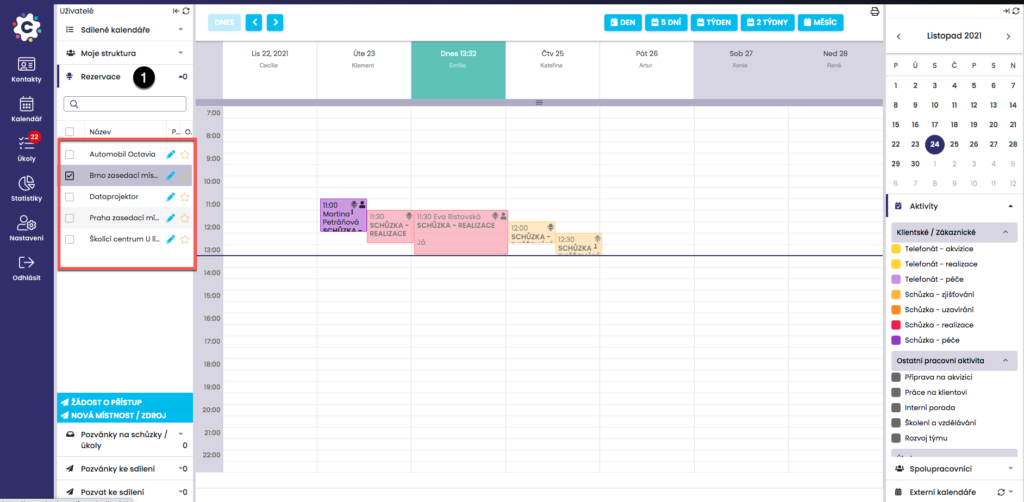
A list of available rooms/resources for reservations can be found in the Reservations tab (1). Here you can click on the name of the resource to open the resource calendar and see when there is a free term. You can’t add activities in a resource calendar. You can only edit your reservation for another date by dragging it to a new date. This change in the date of booking an activity to a new date will also be reflected in your calendar.
Room/Resource Management
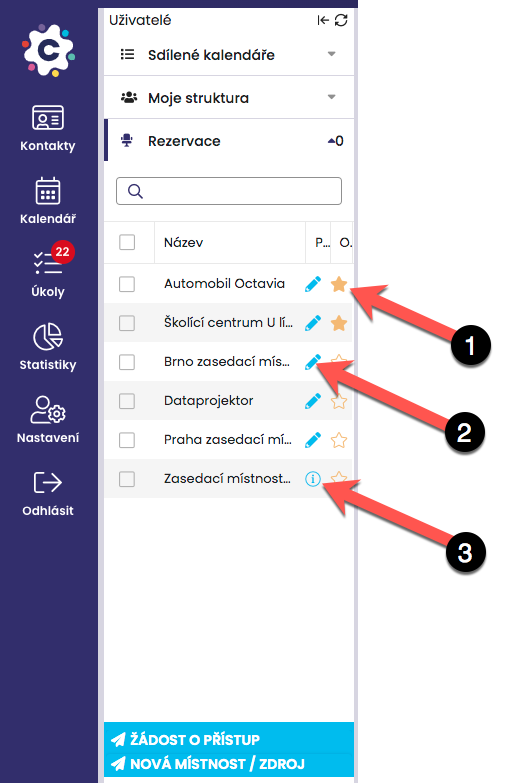
By default, rooms/resources are sorted alphabetically. By clicking on the Stars icon, you can add the resource to your favorites and it will rank among the first. If the feed is added to the favorite, the asterisk is colored yellow (1).
The blue pencil icon (2) is used to manage the room/resource. Click to display a new source management window. The “i” icon (3) indicates that the logged-in user is not the source administrator.
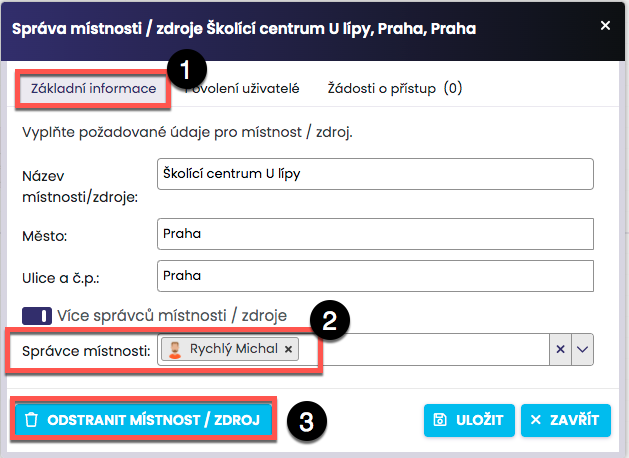
If you are a room/resource manager, you can edit the resource data in the Basic Information tab. There can be multiple resource managers, or you can delegate them to an assistant or colleague (2). If the resource is no longer up-to-date, the resource manager can delete the entire resource, including all reservations, by clicking Delete Room/Resource (3).
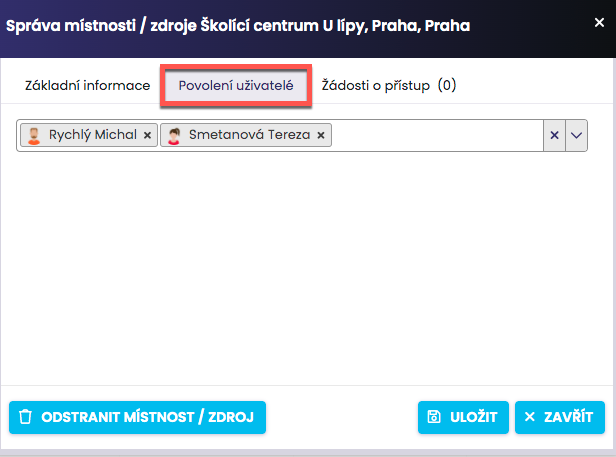
On the Allowed Users tab, you can edit who has access to make a reservation for a given resource.