Create an alias
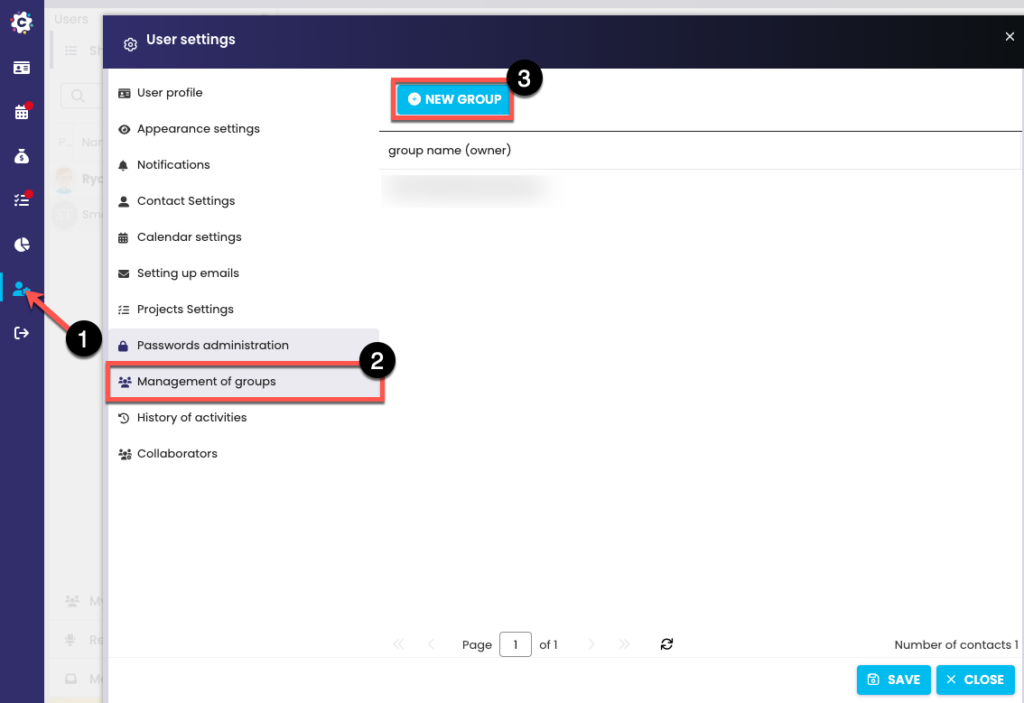
To create an alias, go to Settings (1) and select the Manage Groups (Aliases) tab (2). A list will open with already created aliases, which you can edit after clicking. To create a new alias, click on “New Group” (3).
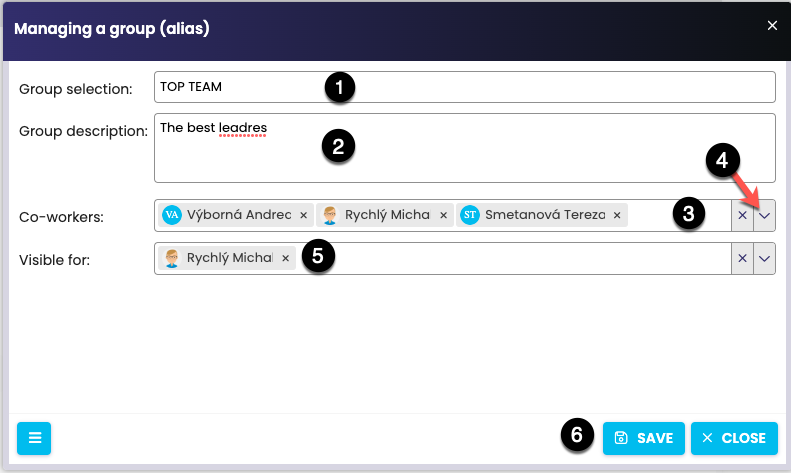
You can now define your new alias. Enter a Group Label (1) to name the group, and you can also enter a Group Description (2). You can enter collaborators directly into the Collaborators box (3) or use the arrow (4) to expand the collaborators’ menu. You can also set who the group is visible to (5). To confirm the entry, click Save (6).
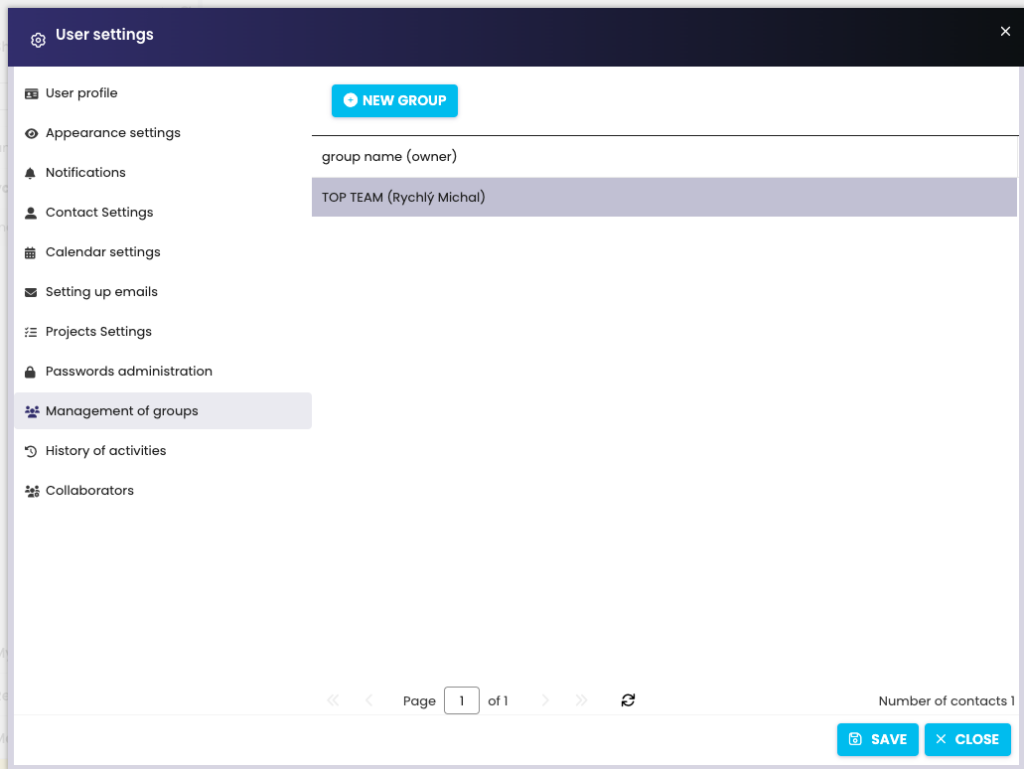
The new alias is stored among the predefined aliases and is ready for your use when entering Activities.
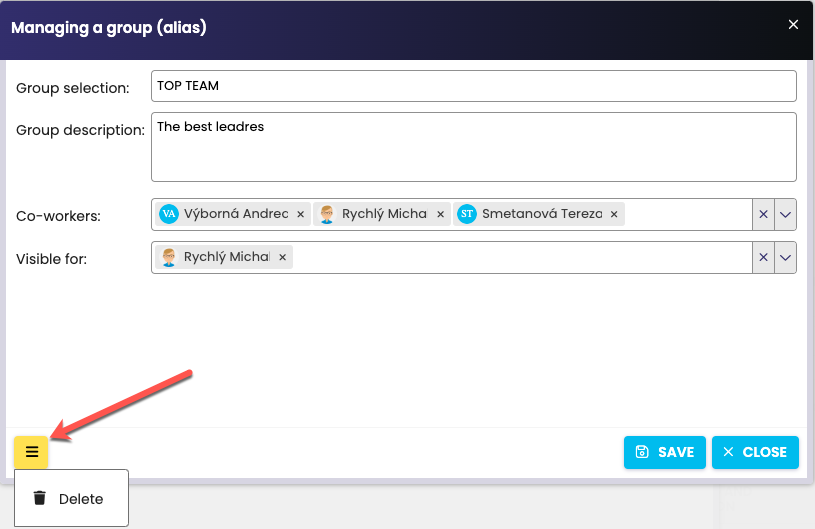
After clicking on it, you can edit or delete the aliases you have defined at any time (1).
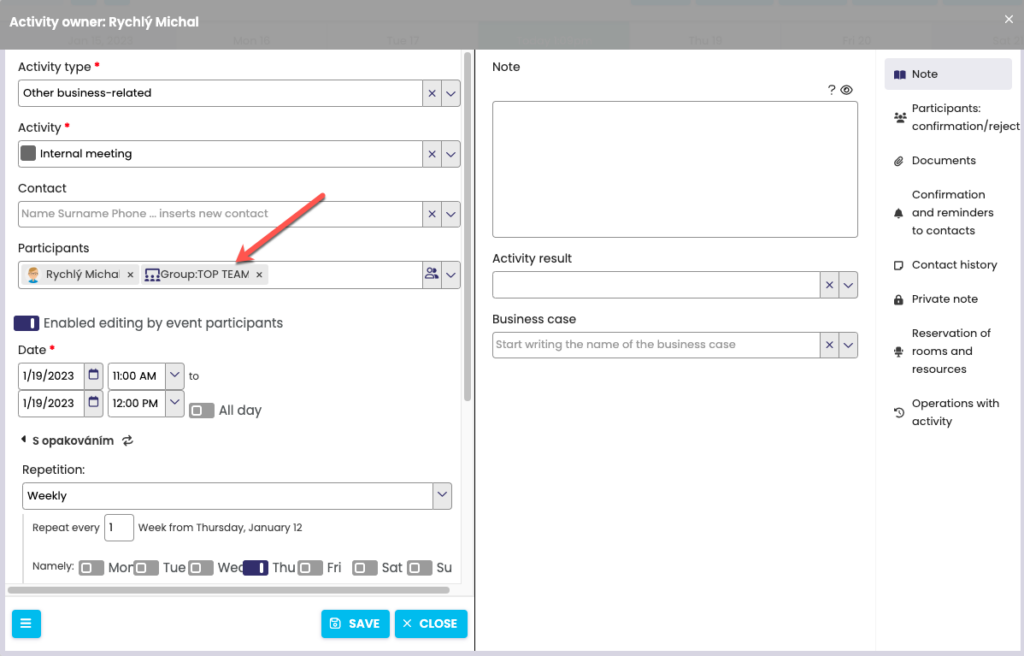
Example: The new TOP-TEAM alias is used when creating a New Event.