Multiple contact marking with a label
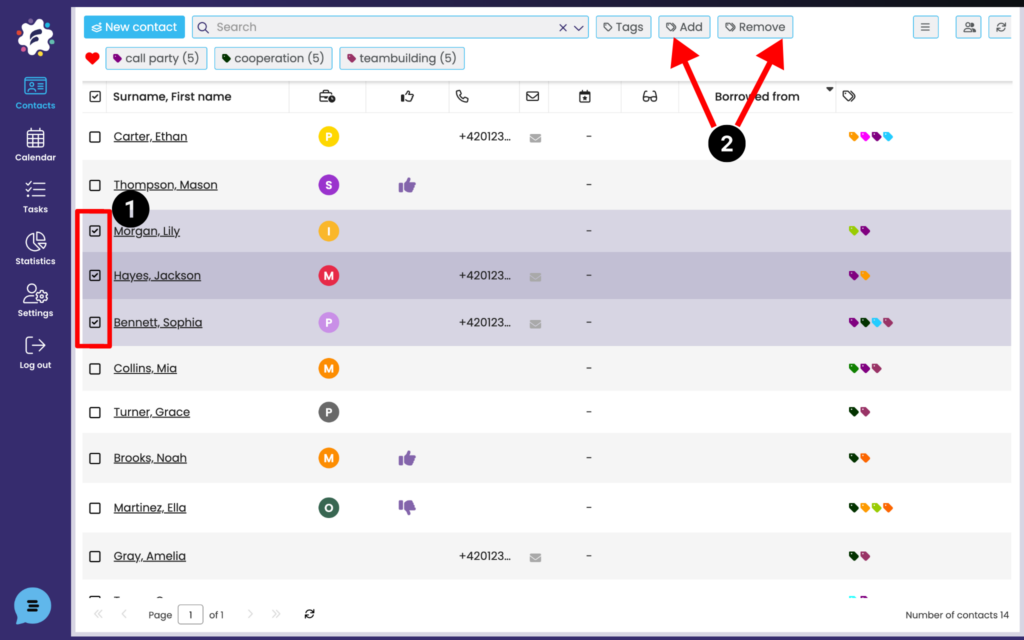
If you select the required contacts (1), you will see the Add and Remove Labels option (2) in the top bar for all selected contacts.
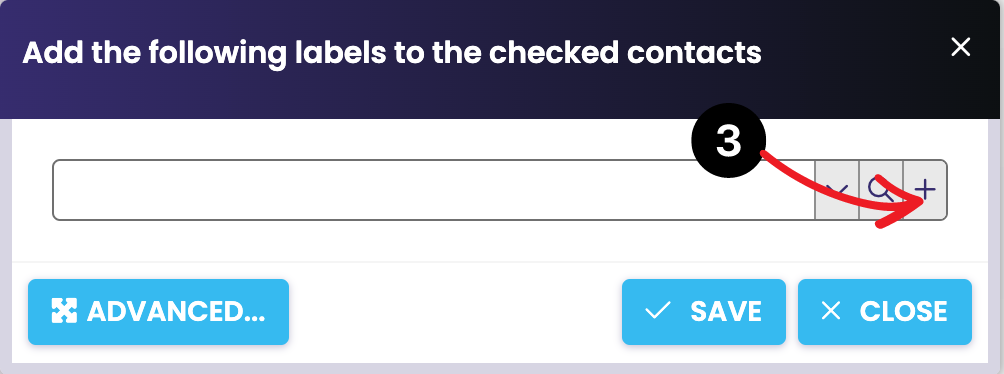
When adding labels to selected contacts, you can create a new label directly by clicking on the plus button (3) -> then you create a completely new label, paste it into the selected folder, select the color of the label and save. The label will be automatically assigned to the selected contacts and saved in the Labels folder.
Individual contact marking with a label
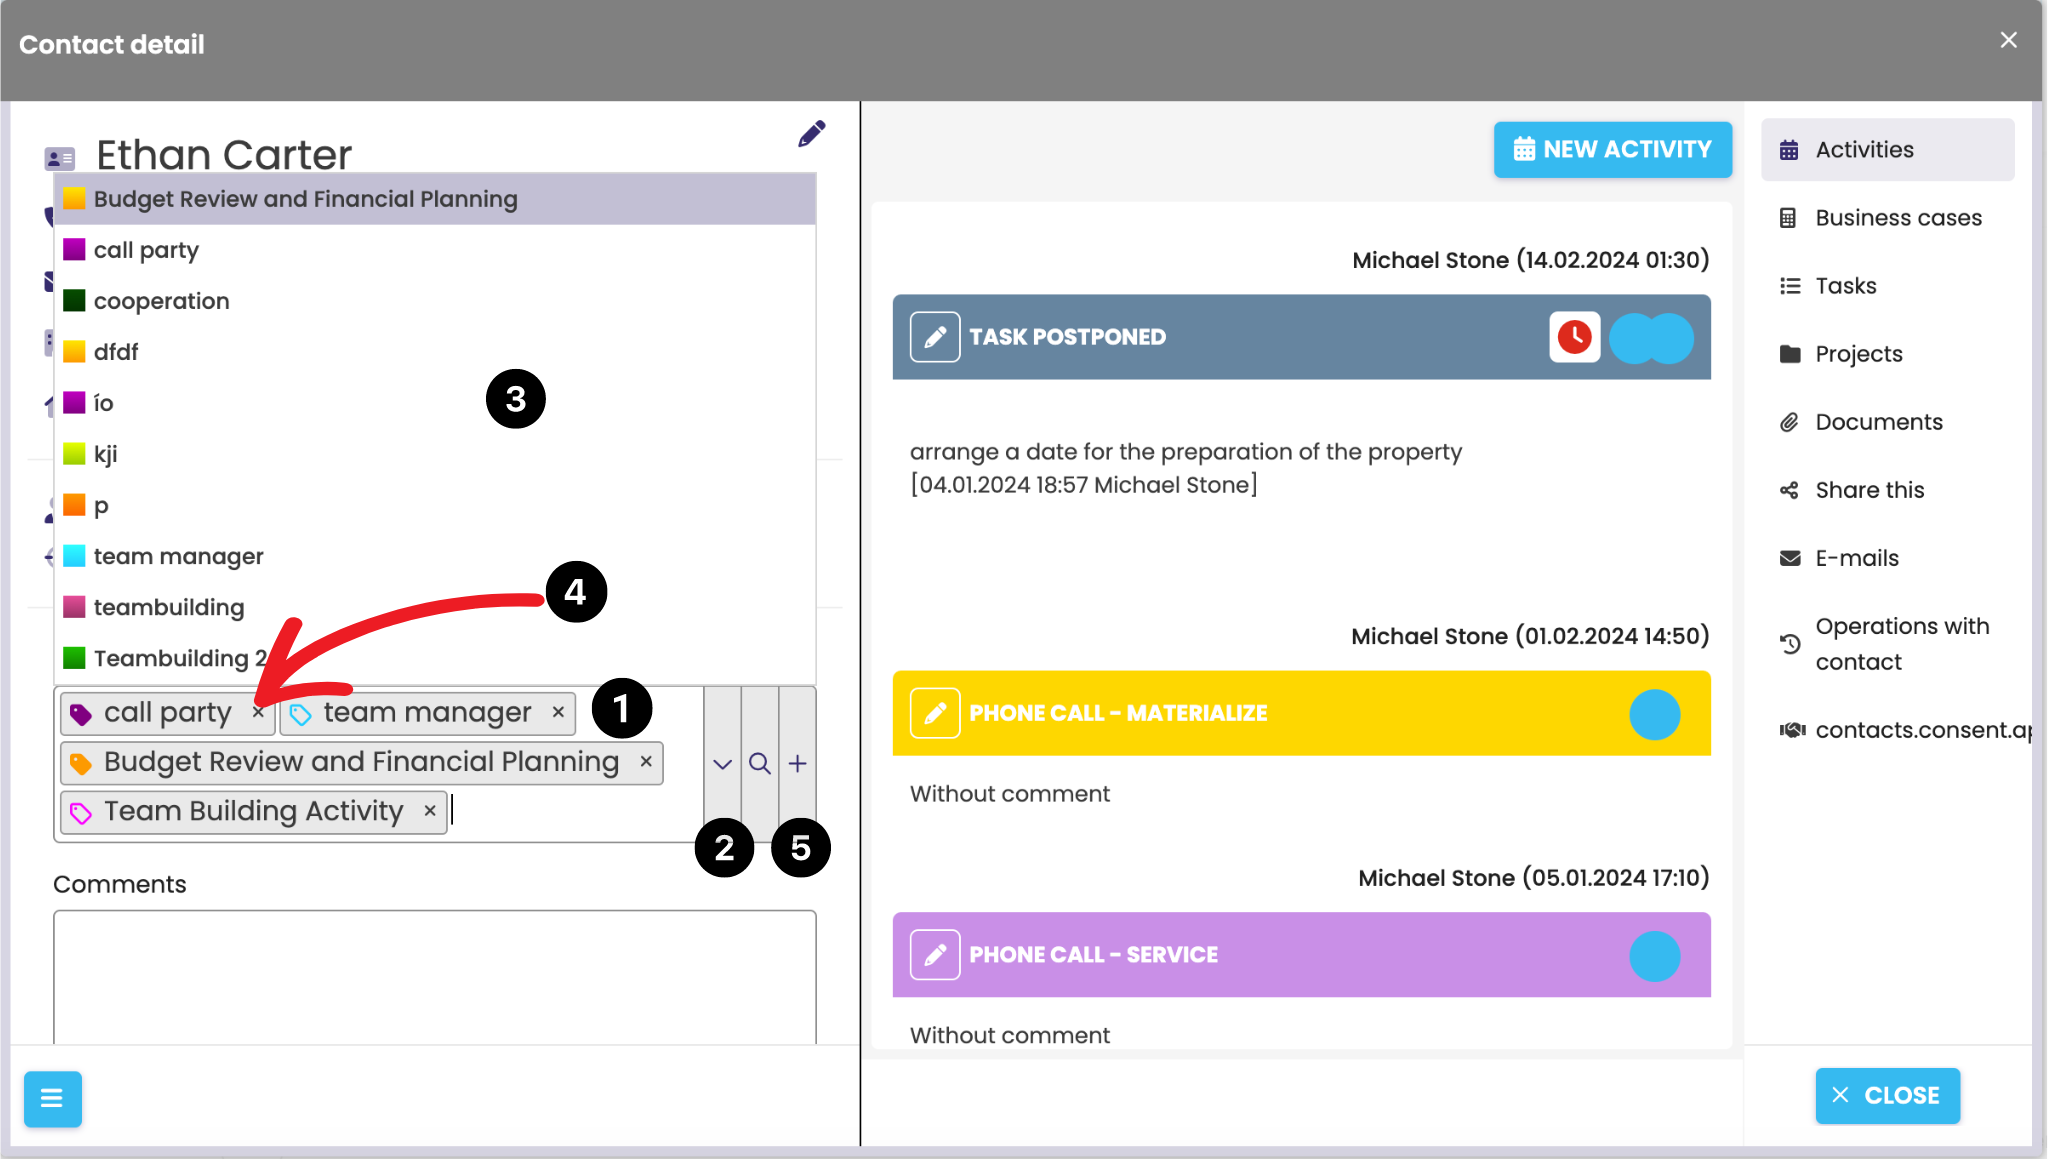
You can label an individual contact in the details of each contact. First click on the selected contact, in the left part you will see the Labels box (1). Click on the drop-down box (2) next to the label to display the label menu (3). Click on the selected label to select it to label the contact, and one contact can have several labels at the same time. You can remove a label by clicking on the cross next to the label (4).
To create a completely new label, click on the “+” icon (5). The label created in this way is then saved directly to the contact.
We recommend, if possible, to label the contact directly when entering the contact into the database.
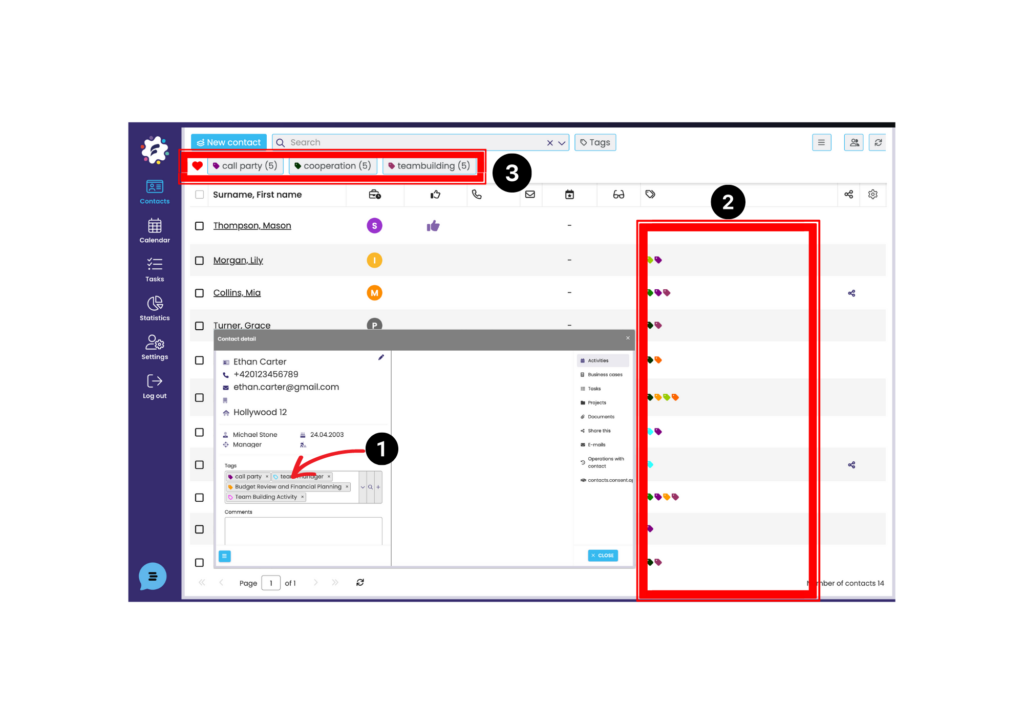
When you click on the label icon, the icon will be colored. This indicates that you have added the tag to your “favorites”. You can remove it by clicking on the icon again (the label will be discoloured). Popular labels are then used mainly in the Contacts module.
Contact marked with a label