How to add new contacts?
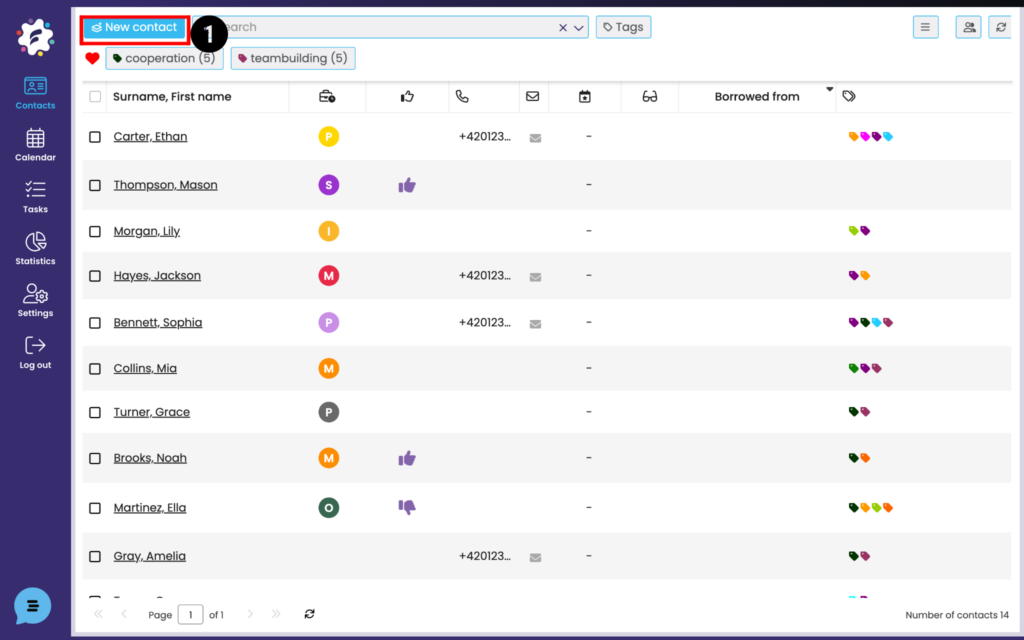
To quickly enter new contacts, click on the New Contact icon (1). You will see a table for filling in the basic data ->
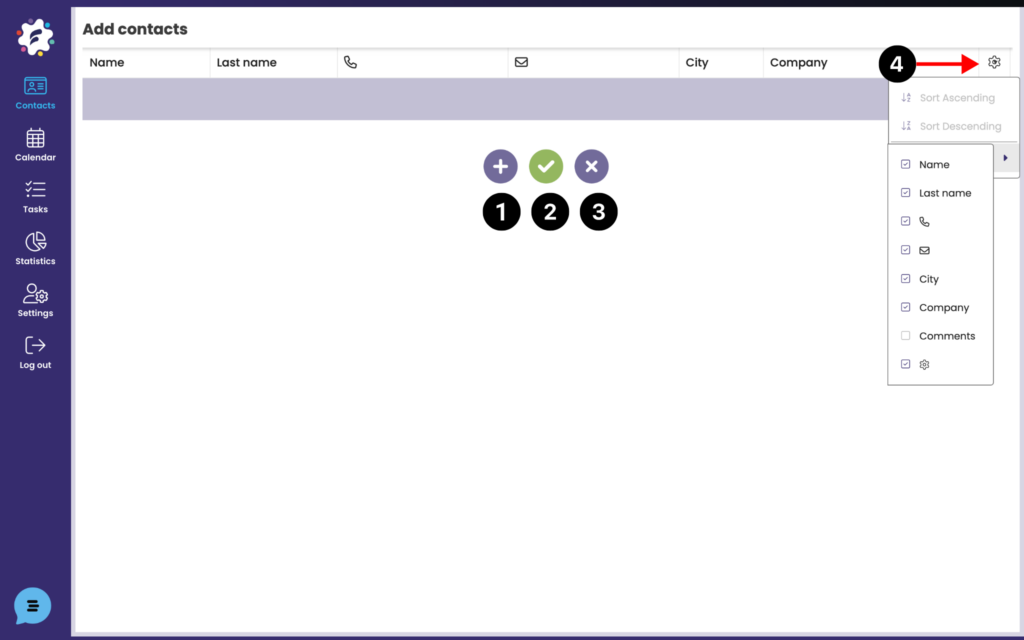
Use the Plus button (1) to add rows to the table.
To save the completed contacts, select the save icon (2). Once saved, the table closes.
If you want to close the table with inserted contacts, click on the cross (3) -> the table will close, the contacts will not be saved in the database, but they will remain available to you in this table. Therefore, if you open “Add contacts” again, it is possible to edit contacts that have not yet been saved.
Again, you can edit the columns you want to display here by clicking on the last Column Action (4) -> Columns -> select the desired one.
If you log out of FreshFlow and log back in or use refresh (ctrl+shift+R), the unsaved contacts will no longer remain in the table.
Add a contact individually
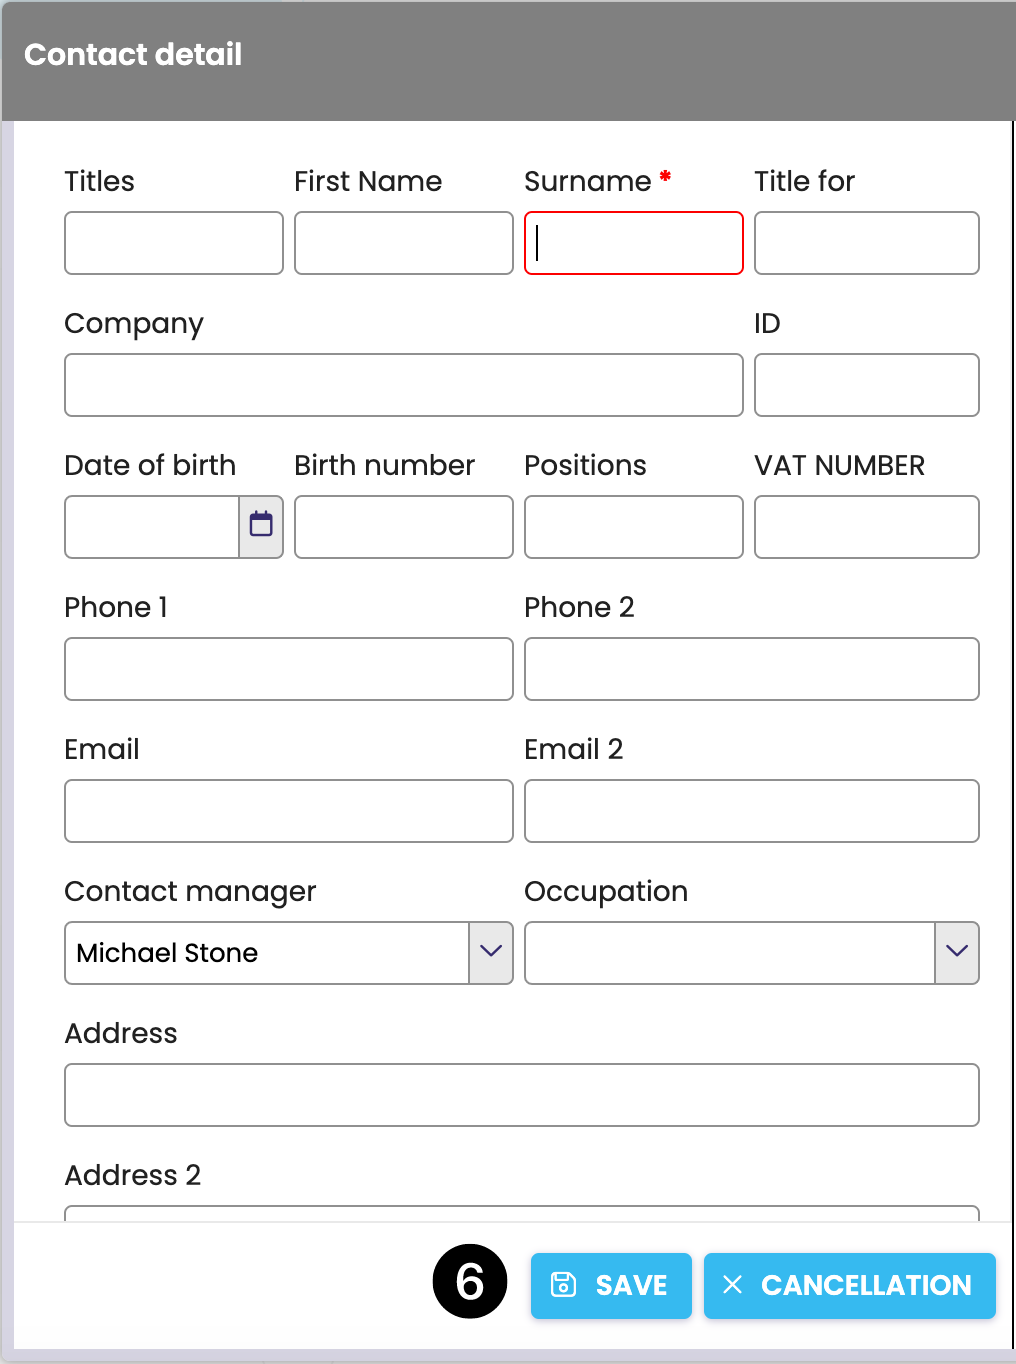
If you wish to add one new contact separately and fill in more information, select the icon for Add contact in detail (5)

A contact detail will open, which you will fill in and save (6).
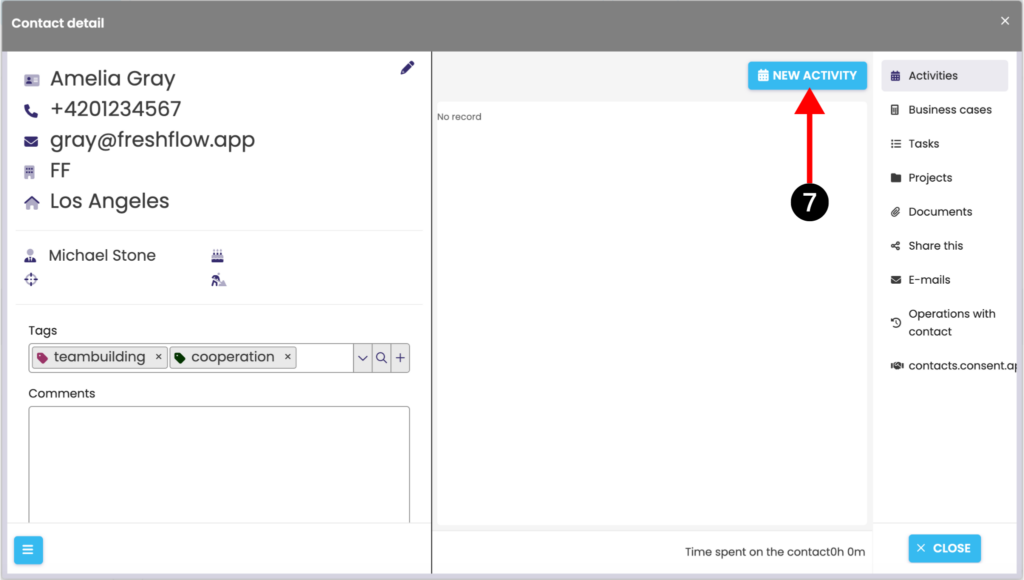
After saving, you can immediately enter activities (7), which will be automatically written into your Calendar.
How to import contacts from a file?
Step 1 – Import function
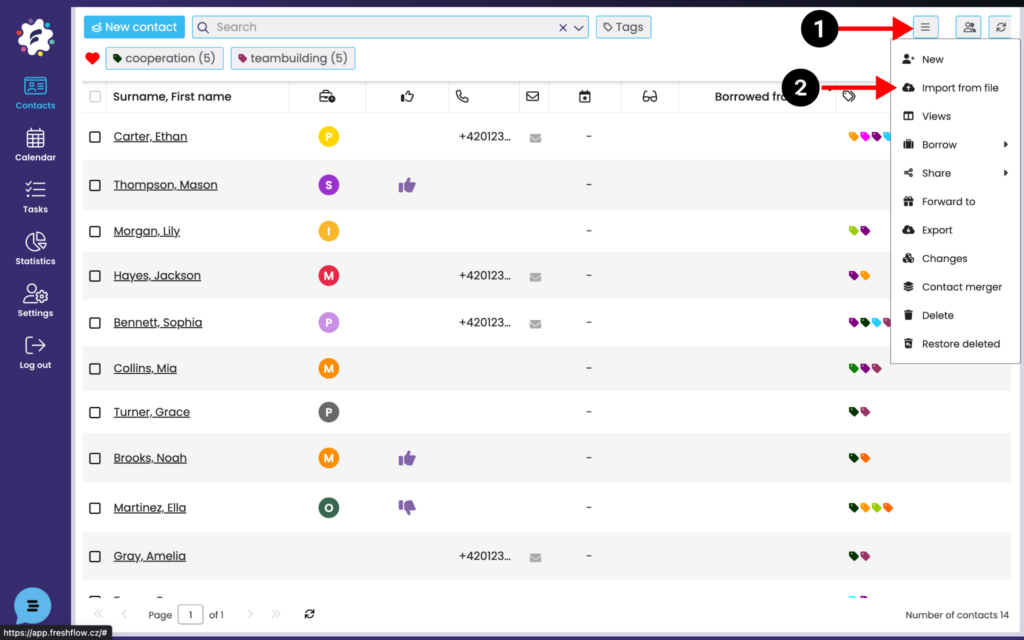
After logging in to the system, open the Contacts module and click on the more actions button (1) and select Import from file (2). Then a new window will open for you to select a file from your PC. Select an xlsx or csv file with contacts.
Step No. 2 – Import Contacts dialog box
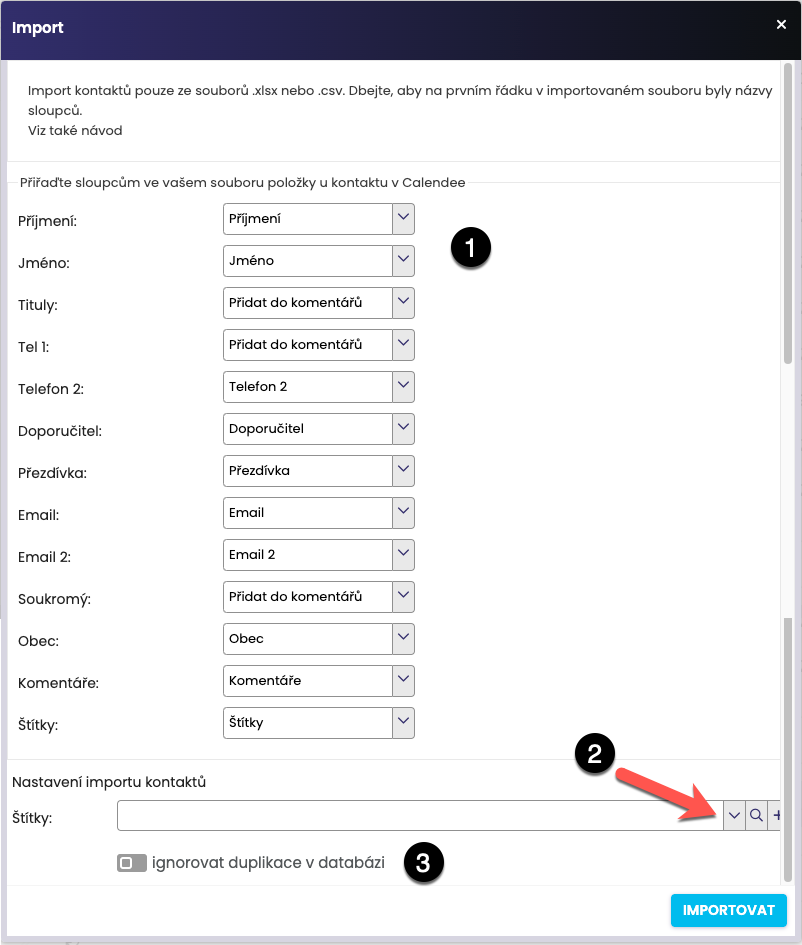
In this step, you assign the columns from your table to those in FreshFlow (1). You can also assign an existing label to your contacts (2) or create a brand new one by clicking on the plus icon. Under this label, you can easily filter out the imported contacts.
If you have any duplications in the database, these contacts will not be imported into FreshFlow. But if you want to import with duplications, you can set this option (3).
Confirm with the Import button. The contacts are entered into FreshFlow and then can be searched in the database.
Step No. 3 – check imported contacts
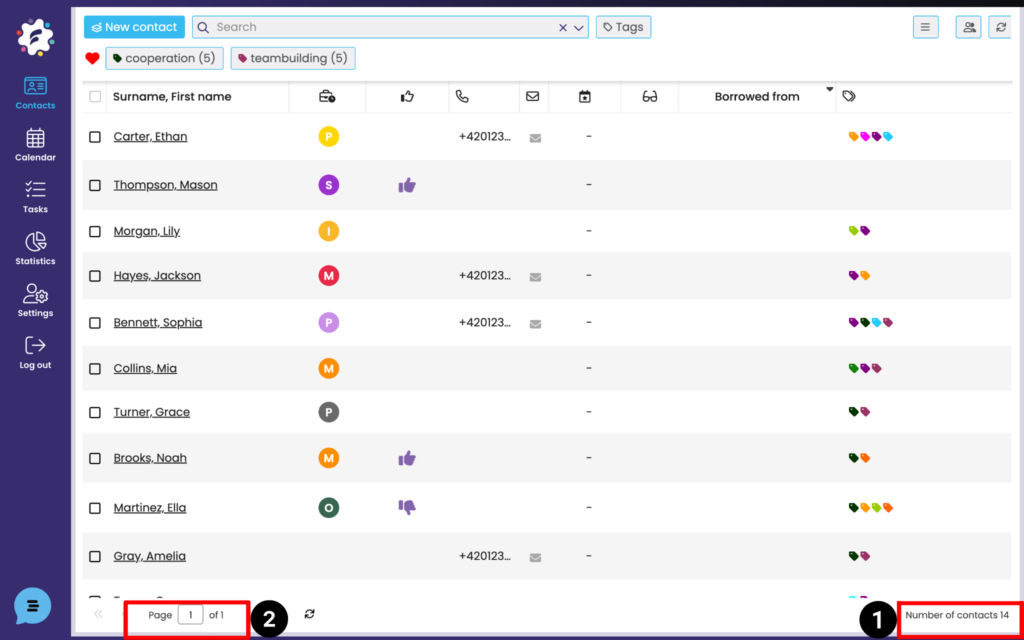
Now you can check the imported contacts directly in the system. Click on the Contacts module, where you will see your imported contacts. The system also shows you the total number of your contacts (1) and the total number of pages for displaying contacts (2). With multiple imported contacts, it may take some time to retrieve and display the contacts in the database. Contacts will appear in the database sequentially, and not all at once.
How to create a new label?
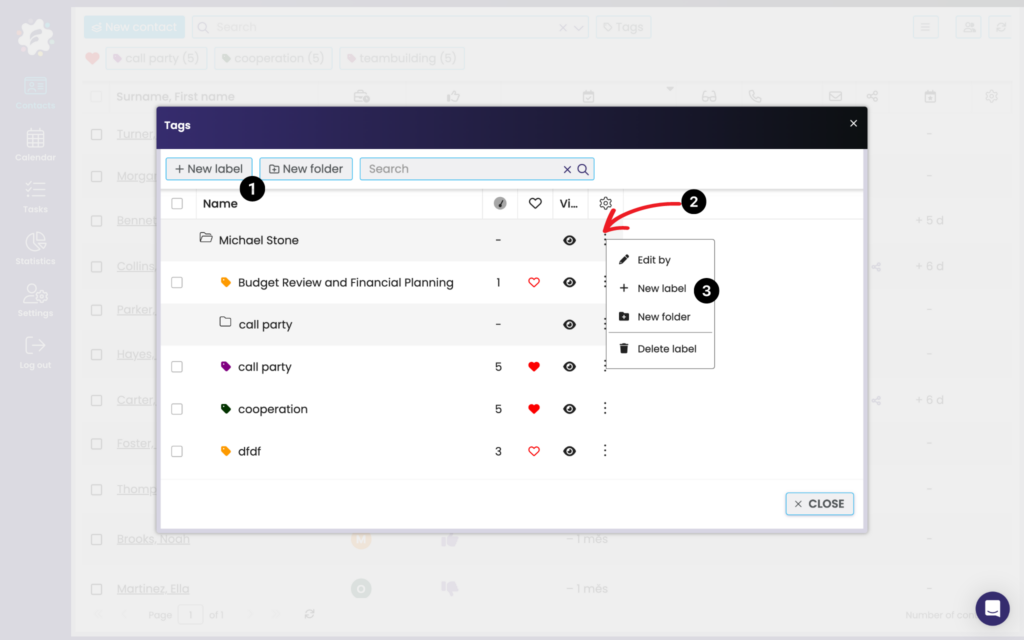
To create a new label, after clicking on button Tags, a new window appears. Either click + New Label (1) or right-click the three dots (2) > + New Label (3).
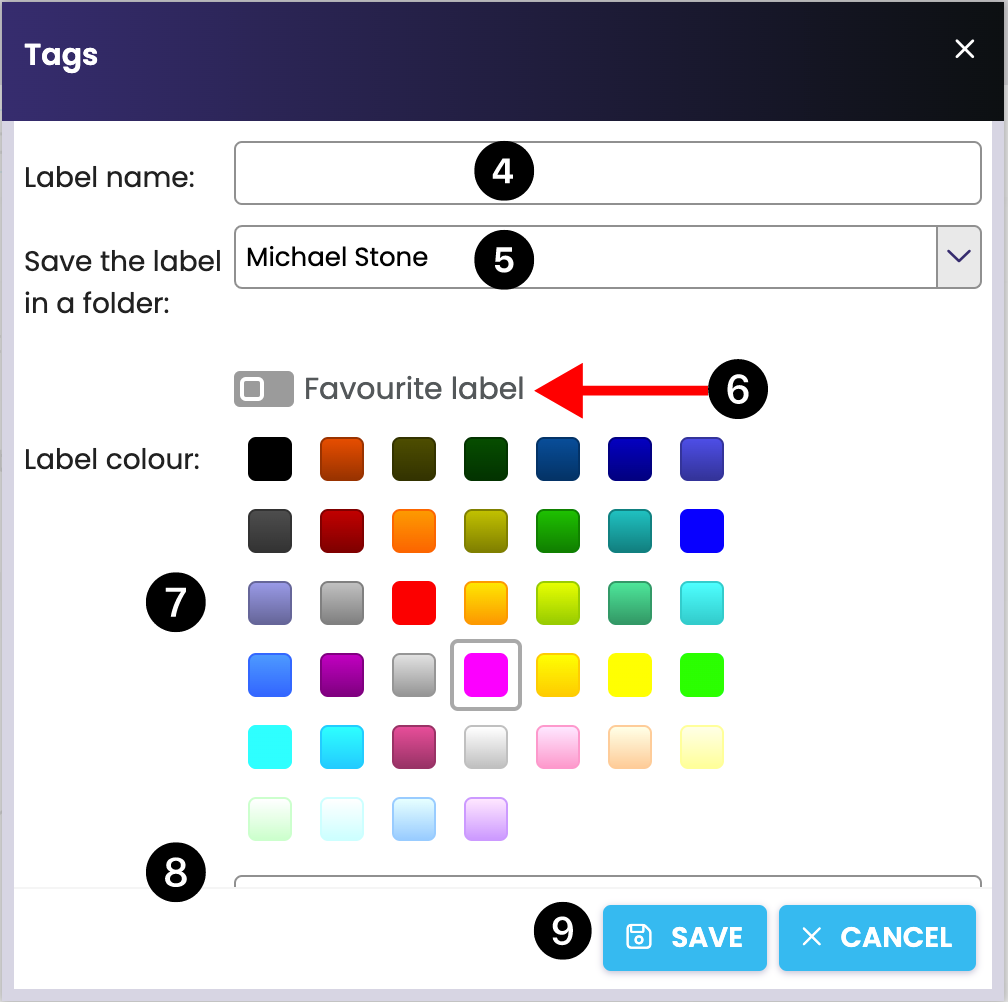
An other new window will open, where you can enter:
- the label name (4)
- the location in the folder structure (5)
- you can check “Favorite label” (6) – so you will see the label directly on the main bar in your contacts.
- next, you can select the colour (7) you want.
- you can also enter a Label Note (8).
Click Save (9) to save the new label and display it in the selected folder.
How to mark contact with a label?
Multiple contact marking with a label
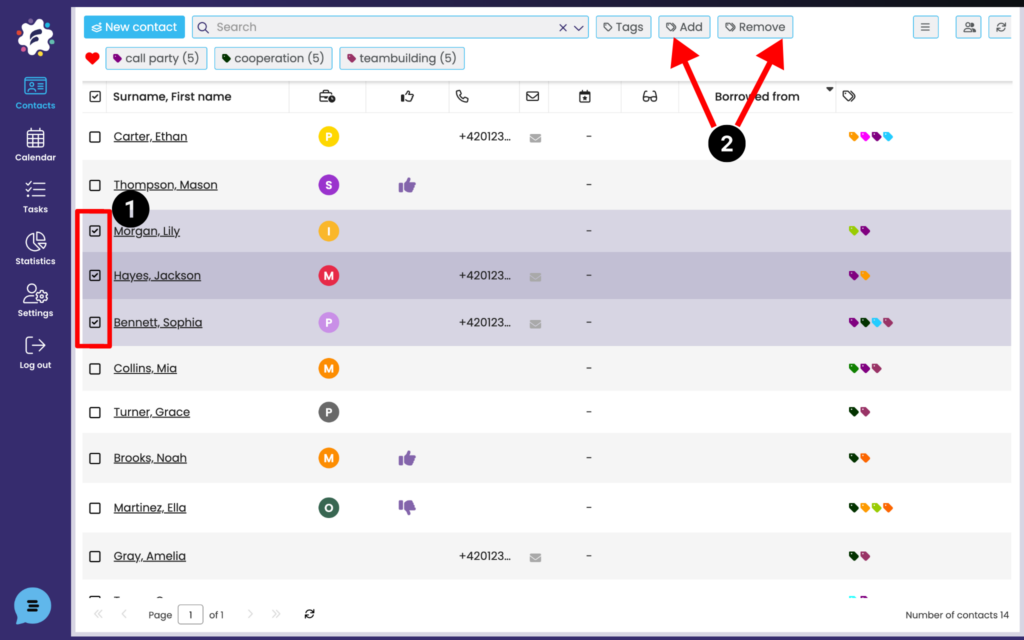
If you select the required contacts (1), you will see the Add and Remove Labels option (2) in the top bar for all selected contacts.
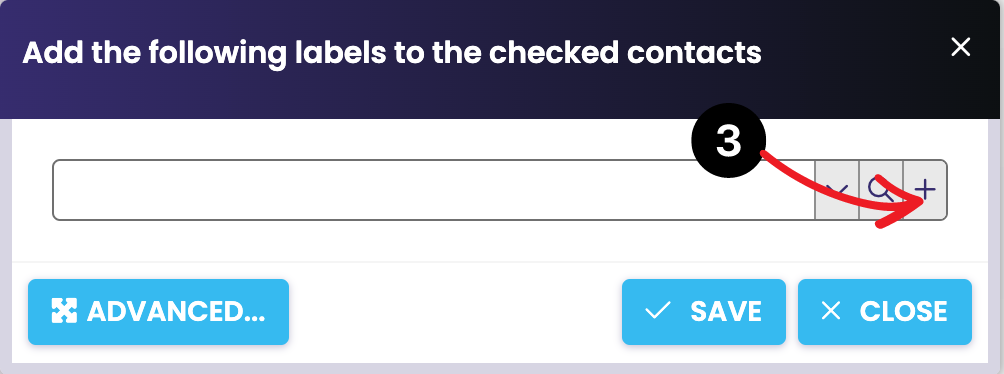
When adding labels to selected contacts, you can create a new label directly by clicking on the plus button (3) -> then you create a completely new label, paste it into the selected folder, select the color of the label and save. The label will be automatically assigned to the selected contacts and saved in the Labels folder.
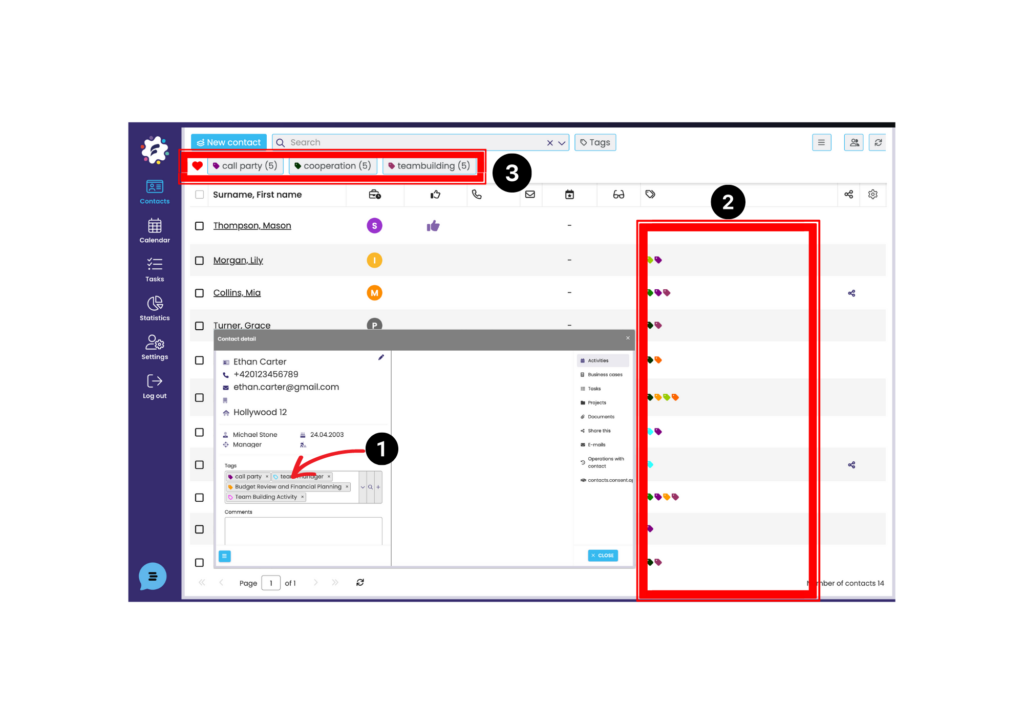
Individual contact marking with a label
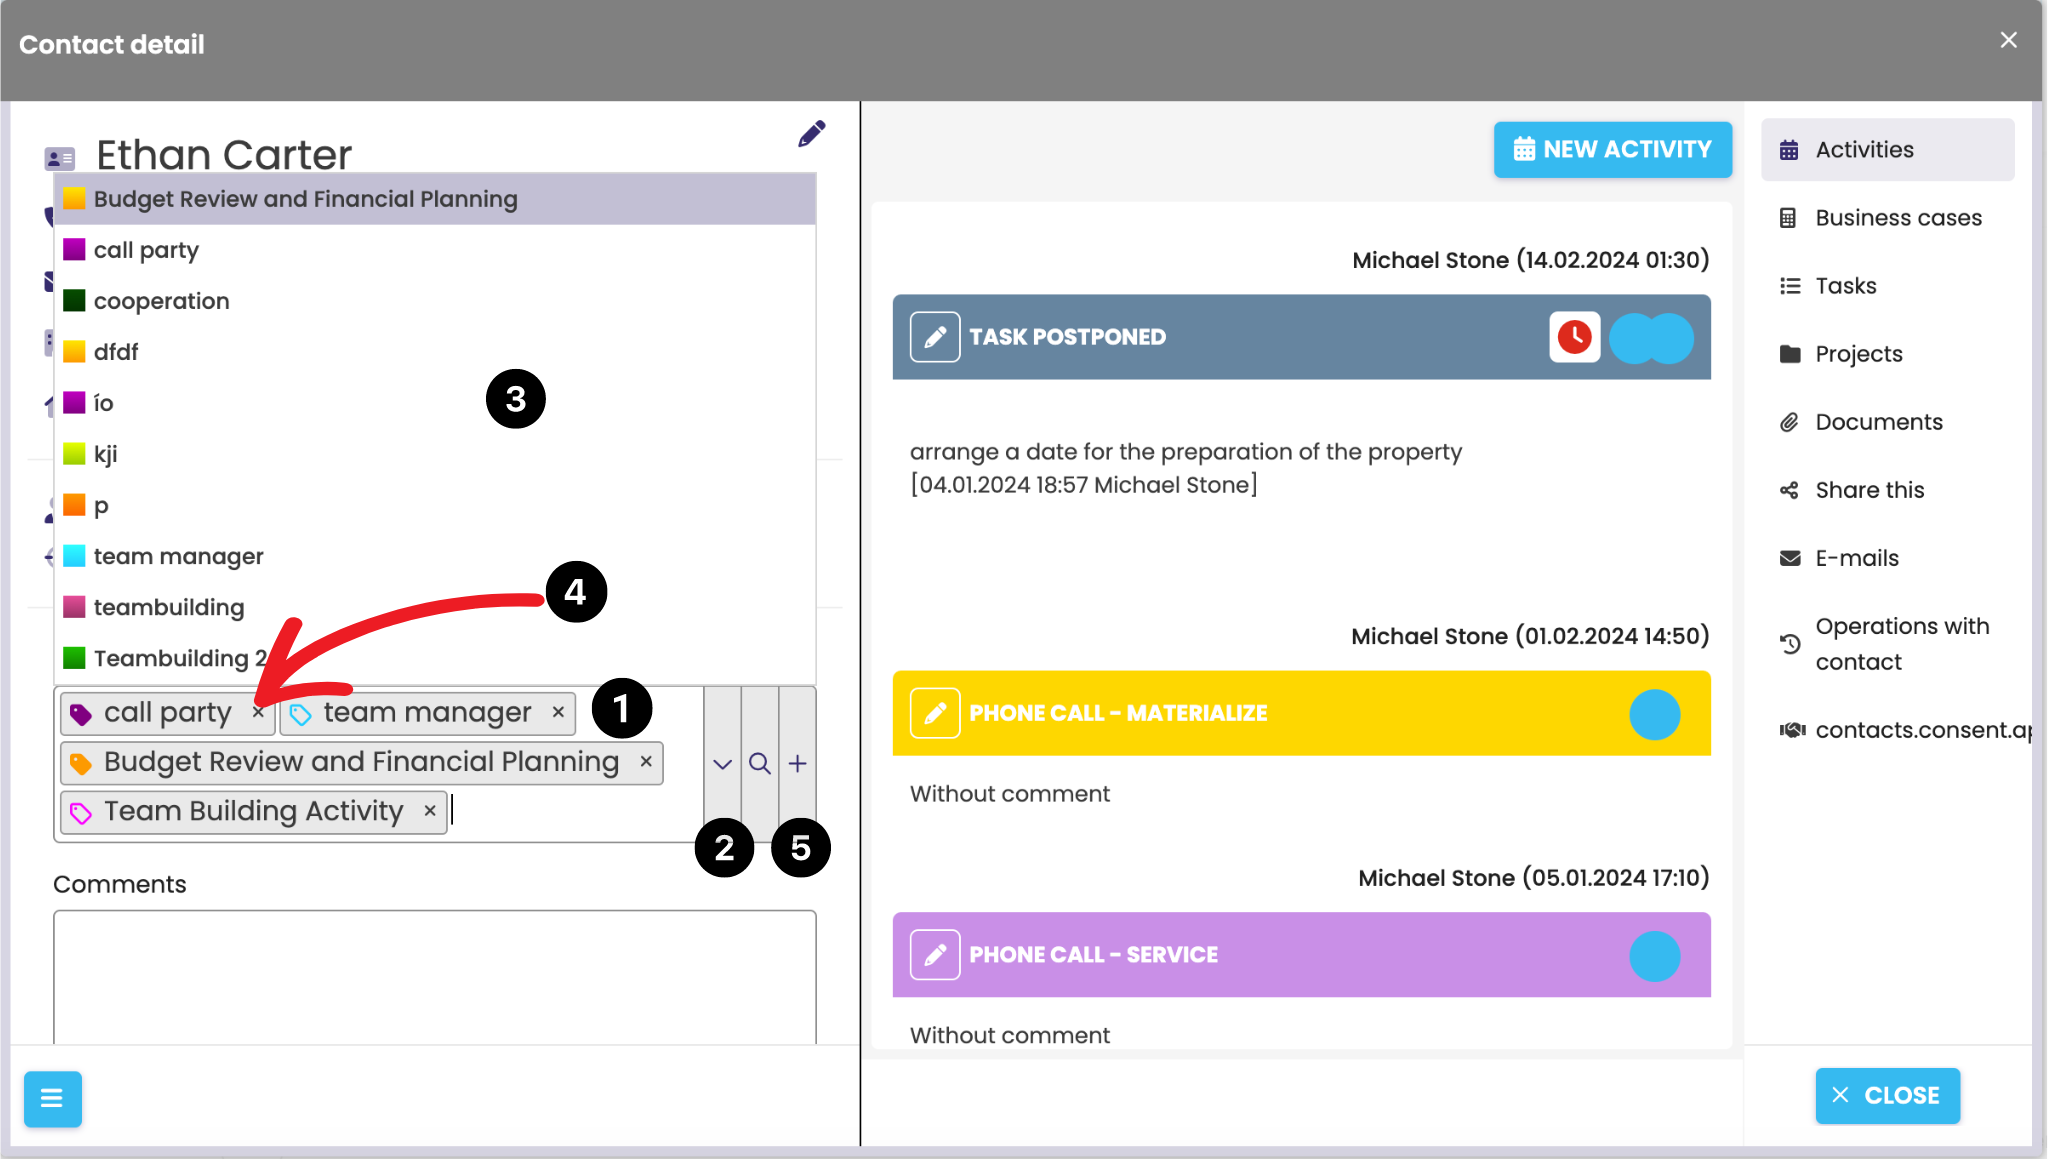
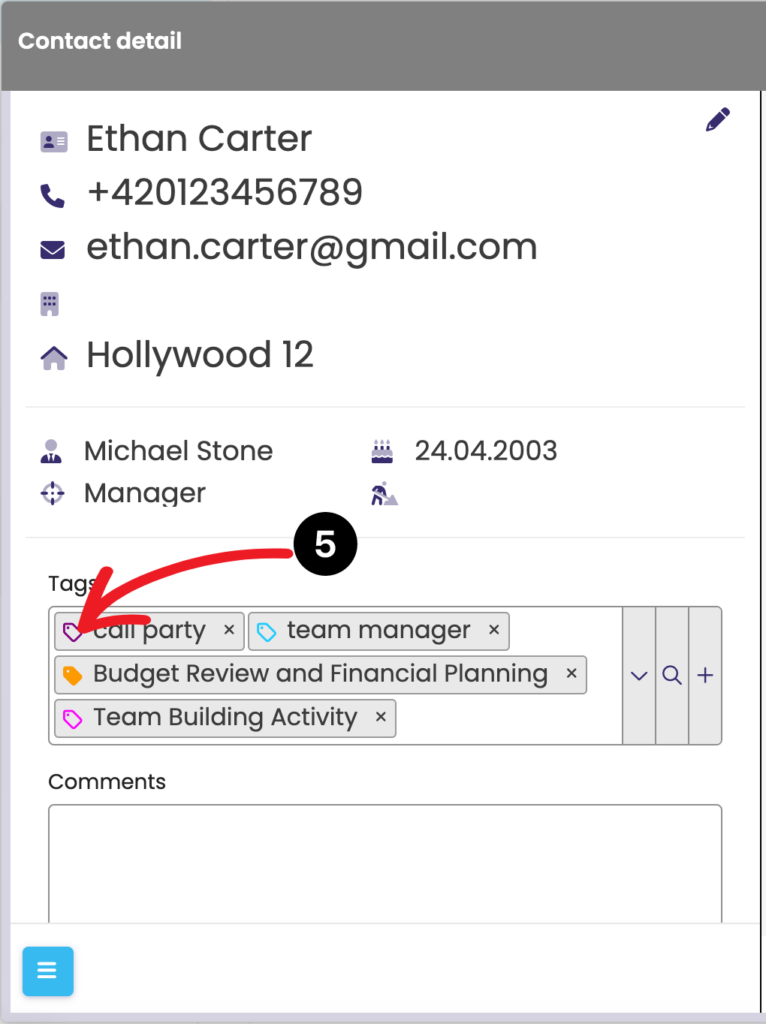
You can label an individual contact in the details of each contact. First click on the selected contact, in the left part you will see the Labels box (1). Click on the drop-down box (2) next to the label to display the label menu (3). Click on the selected label to select it to label the contact, and one contact can have several labels at the same time. You can remove a label by clicking on the cross next to the label (4).
To create a completely new label, click on the “+” icon (5). The label created in this way is then saved directly to the contact.
We recommend, if possible, to label the contact directly when entering the contact into the database.
When you click on the label icon, the icon will be colored. This indicates that you have added the tag to your “favorites”. You can remove it by clicking on the icon again (the label will be discoloured). Popular labels are then used mainly in the Contacts module.
Contact marked with a label
How to preview a collaborator’s contacts?
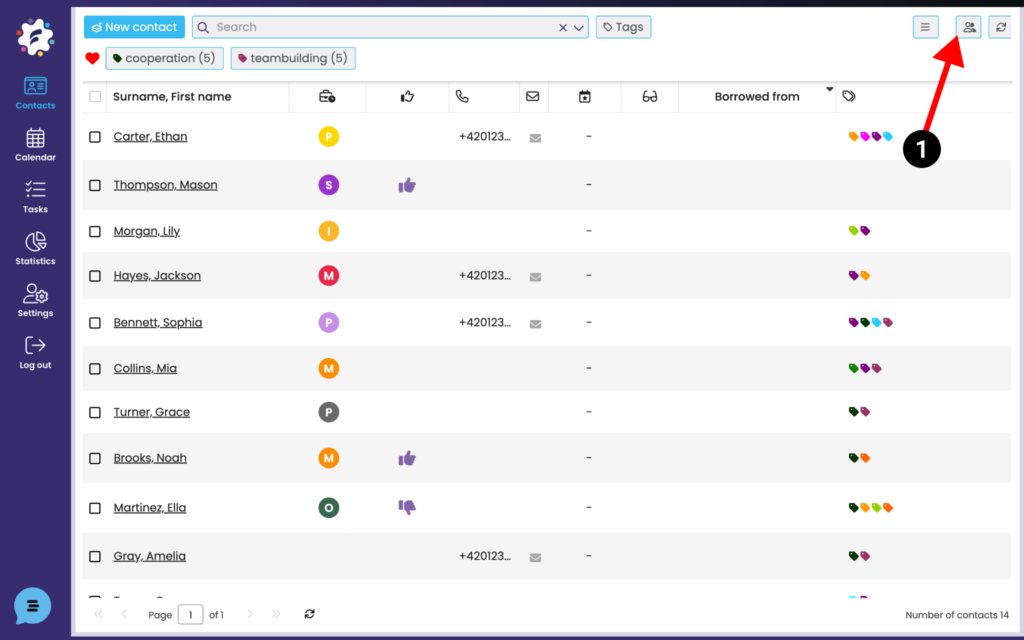
On the right side of the top bar, click on the collaborators icon (1) -> you will see a table with the names of your co-workers ->
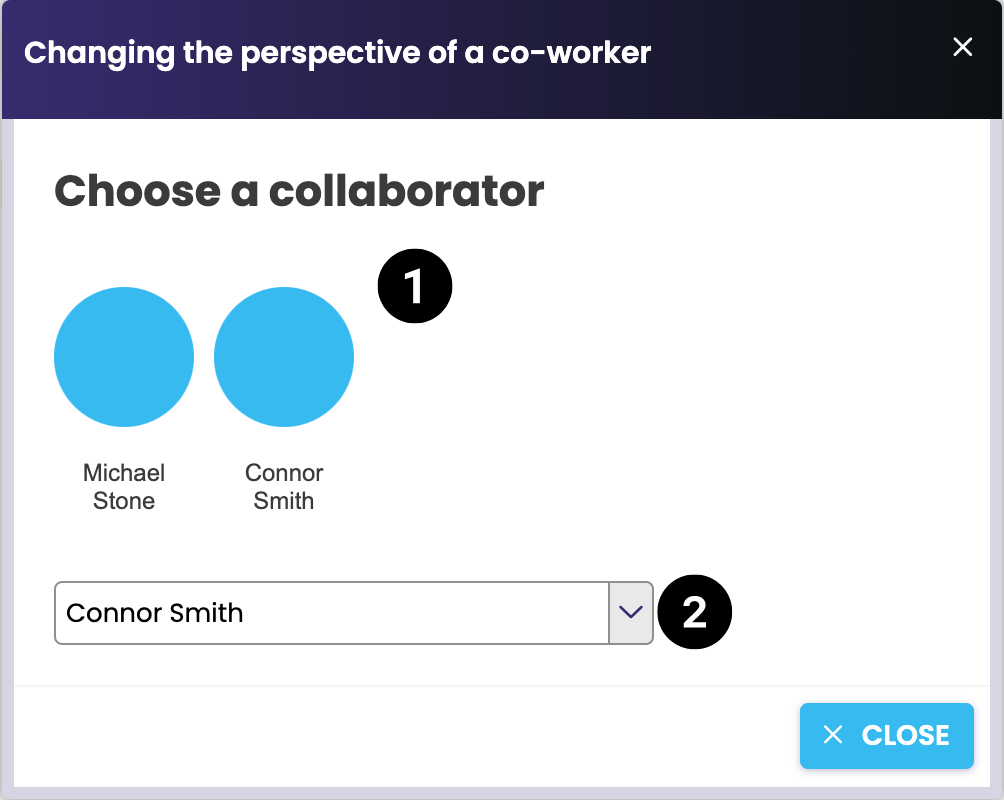
Select the collaborator whose contacts you want to view. The last ones displayed are shown by the icons at the top (1). To see more, click on the arrow (2) and you will see a complete list.
To end the view of the collaborator’s contacts, click again on the collaborator’s icon at the top right and select your name (it always remains the first among the last ones displayed.
How to add a document to a contact/activity?
Insert a document in Contacts
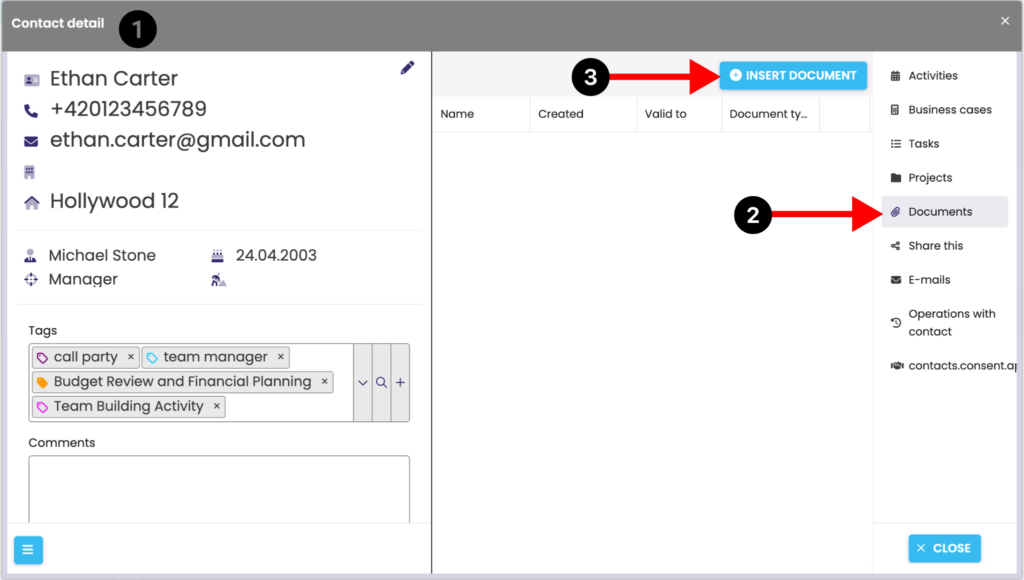
In the Contacts module, open the contact detail (1) and on the Documents tab (2) you can insert the document (file) by clicking on “Insert Document” (3).
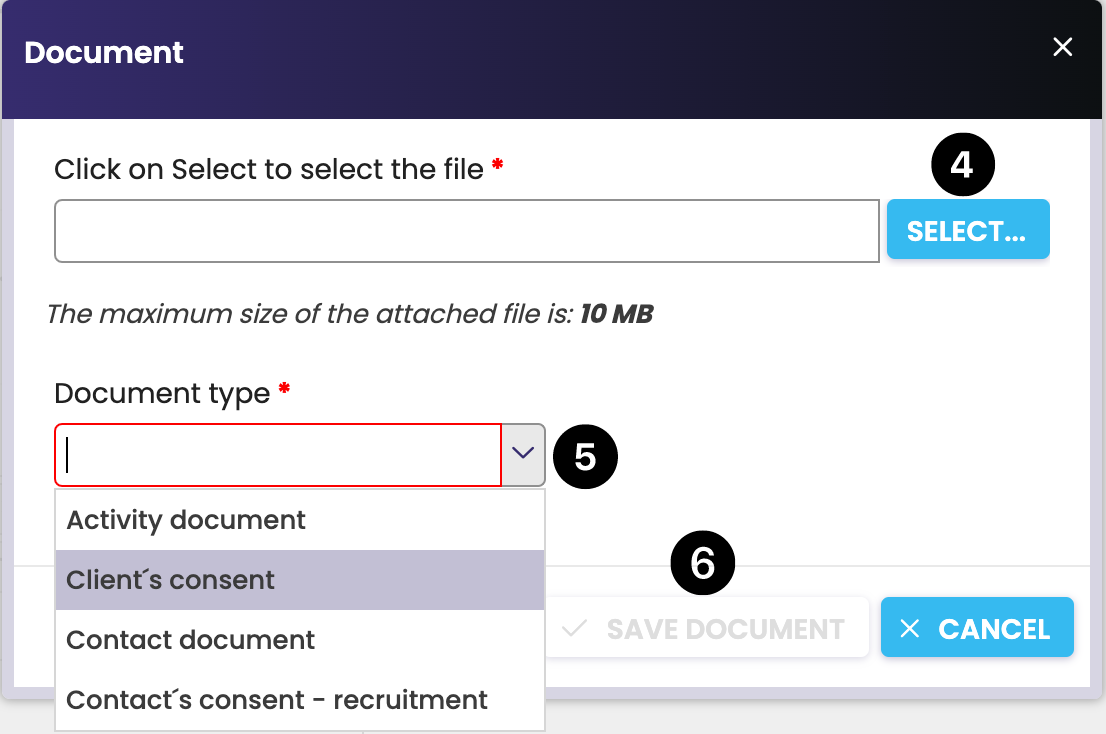
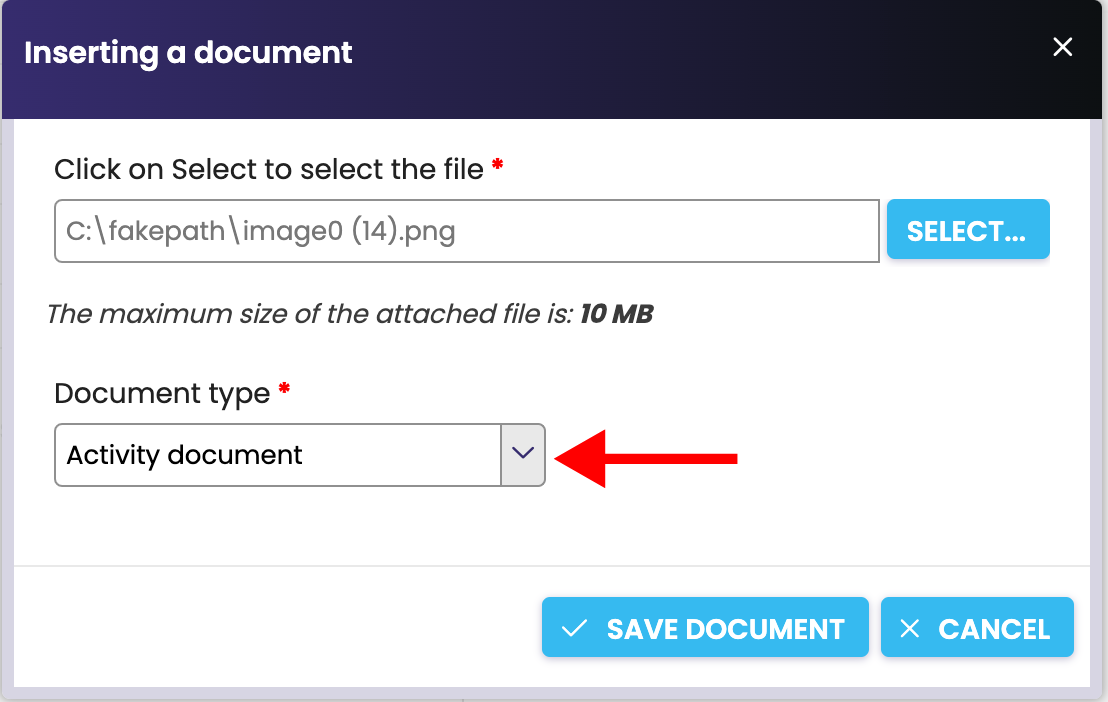
Clicking Insert Document displays the “Document” dialog box, select the file (4) you want to insert, and displays a file name such as Handouts.pdf. Select a document type from the menu (5). To paste, click Save (6). You are informed about the saving by a message, click OK.
Inserting document in Calendar
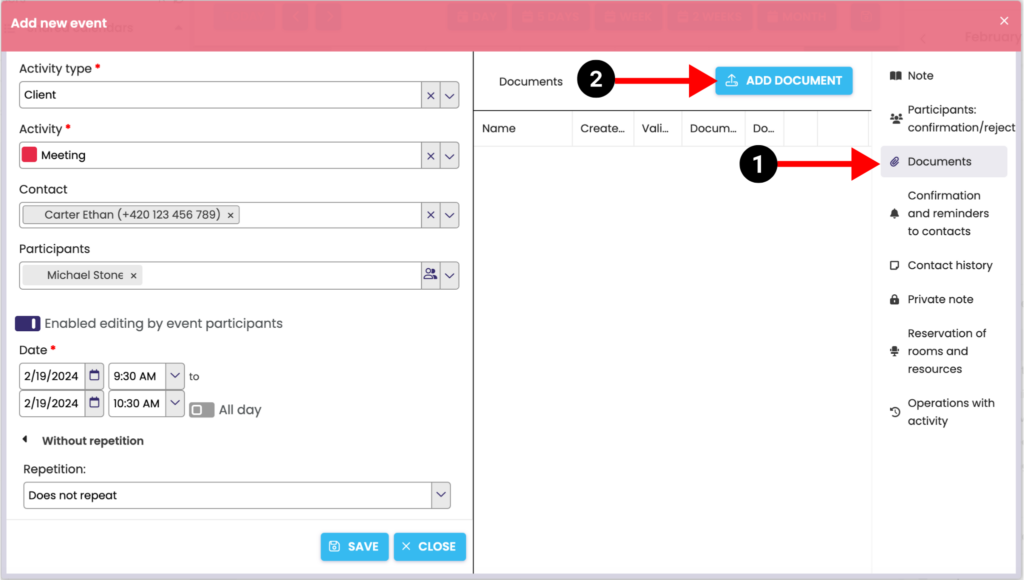
You can insert a document to a client or activity directly in the activity detail by clicking on the Documents tab (1) > Insert Document (2).
After clicking, you will see a dialog box for saving the document. Alternatively, you can change whether you want to save the document for an activity or contact.
How to export contacts from FreshFlow?
Step 1 – Export function
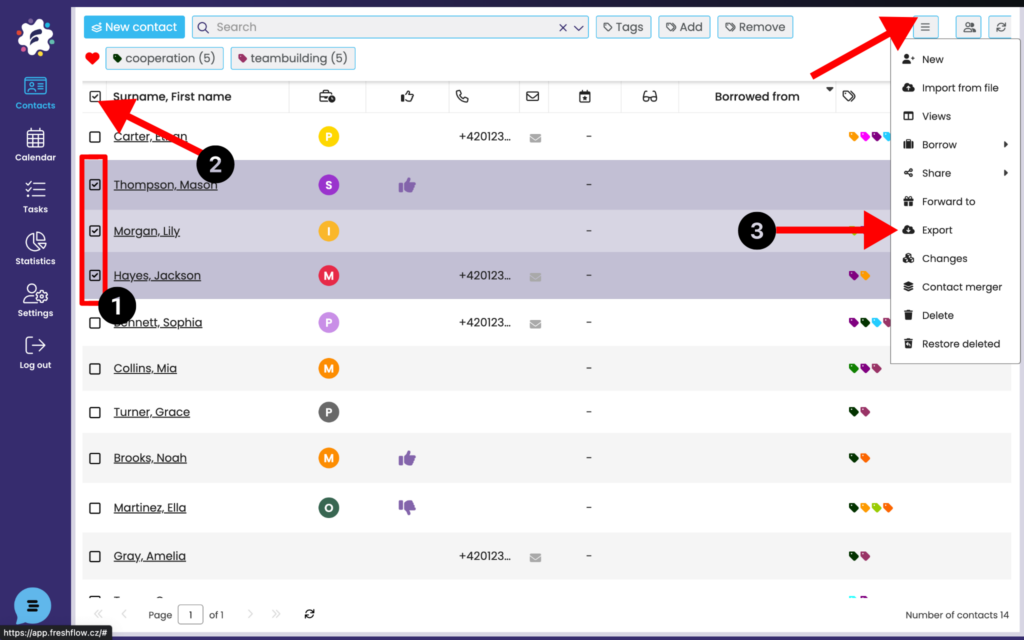
You have two options to choose from. Either click on the contacts you want to manually select the ones you want to back up (1) from your database or use the button to mark all contacts (2) to select all contacts. Once you have all the contacts to export selected, click to Export (3).
The Export Contacts function exports the contacts that are yours, i.e. does not export the contacts shared with you.
Step 2 – select the source to export
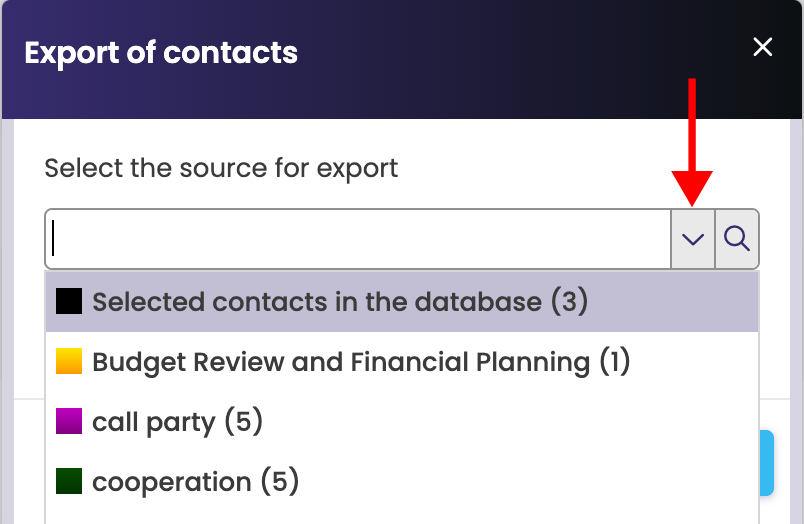
Select the contacts you want to export > click the options arrow and select either the selected (checked) contacts in the database or the contacts under a specific label.
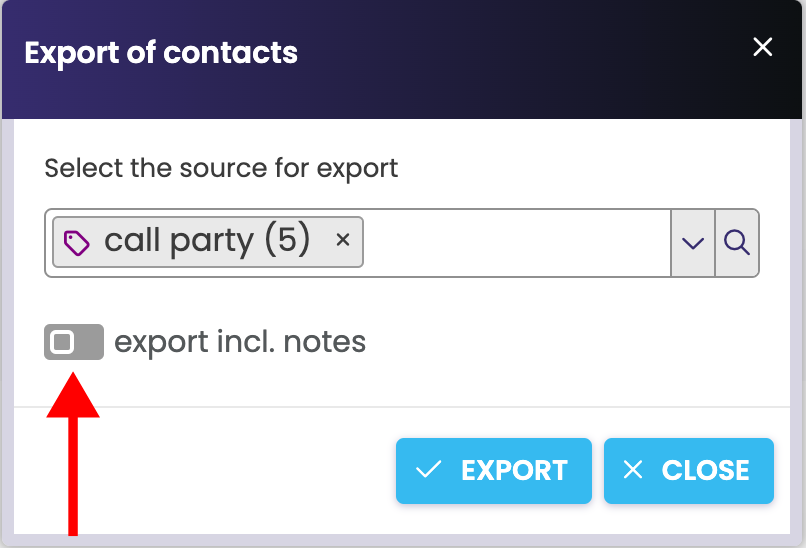
Choose whether you want to export contacts incl. notes and confirm with the “Export” button. The xlsx file “contacts” will be downloaded to your computer.