Main Calendar screen
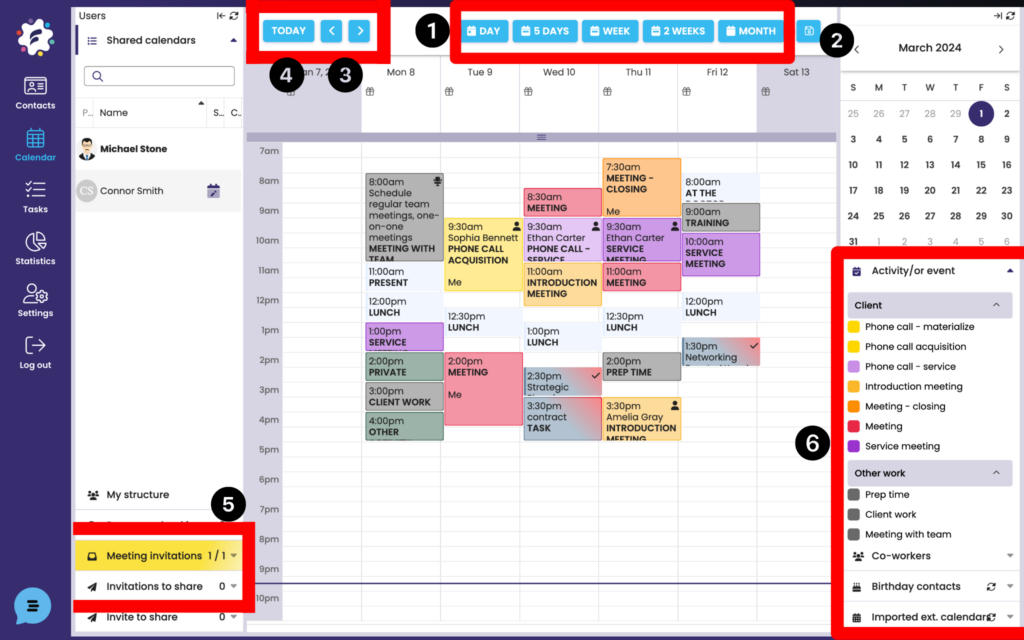
The basic setting of the Calendar is the weekly view, see the picture. This can be changed to daily, two-week or monthly display using the buttons on the top bar (1).
You can also move the Calendar view back and forth using the arrows (2) to move the Calendar view according to the display settings (day, week, 2 weeks, month). If you’ve been looking for something in Calendar, use the Today quick button (3) to return to the current day view.
Incoming meeting invitations/tasks or confirmation of their (non-)acceptance are displayed at the bottom left (4) in the Meeting/Task Invitations and Sharing Invitations tabs.
All types / types of activities (according to the set field) are color-coded, the help and at the same time the option to filter the display of individual types of activities is in the right control column (5).
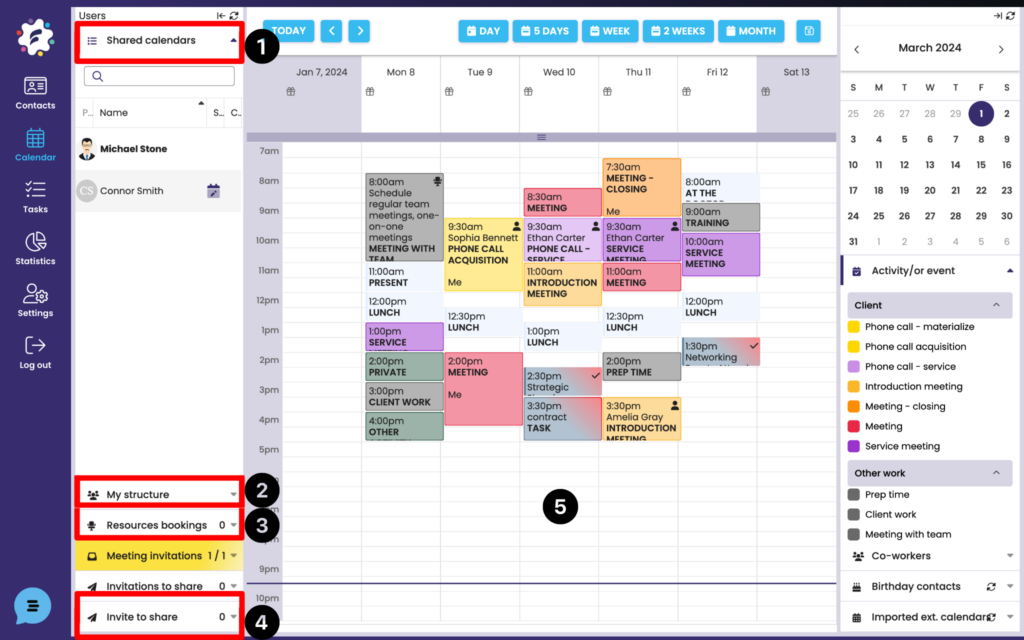
In the left menu in the Shared Calendars tab (1) there is a list of users with whom active calendar sharing is set. The My Structure tab (2) displays the structure of the logged-in user in the form of a structural tree. You can click on individual collaborators. If you set up sharing calendars with this user, you will see a preview of their calendar and you can schedule eg. a meeting with the person.
In the Reservations tab (3), you can create a room/resource and use reservations (for example, meeting rooms within a team). A detailed description can be found in the booking instructions. To create a calendar share, use the Invite to Share tab (4).
The main window (5) of calendars is used for viewing and entering activities. By clicking in the calendar, you will see the Add Event window, where you will enter the necessary information to enter the activity. You can also move activities to a new date in the calendar by grabbing and dragging the mouse. Click on the activity window to open the already entered activities for the possibility of previewing the detail or editing. The displayed activity in the calendar displays the most important information in the form of text and icons (explained in detail in the instructions for entering the activity). By looking at the activity, you have a quick overview of the type of activity, what contact is concerned/who is invited, the exact time, whether a contact is assigned, if it is a recurring activity, if the room/resource reservation is confirmed for the activity, and the emoticons represent the result of the activity.
View multiple calendars (calendar blending)
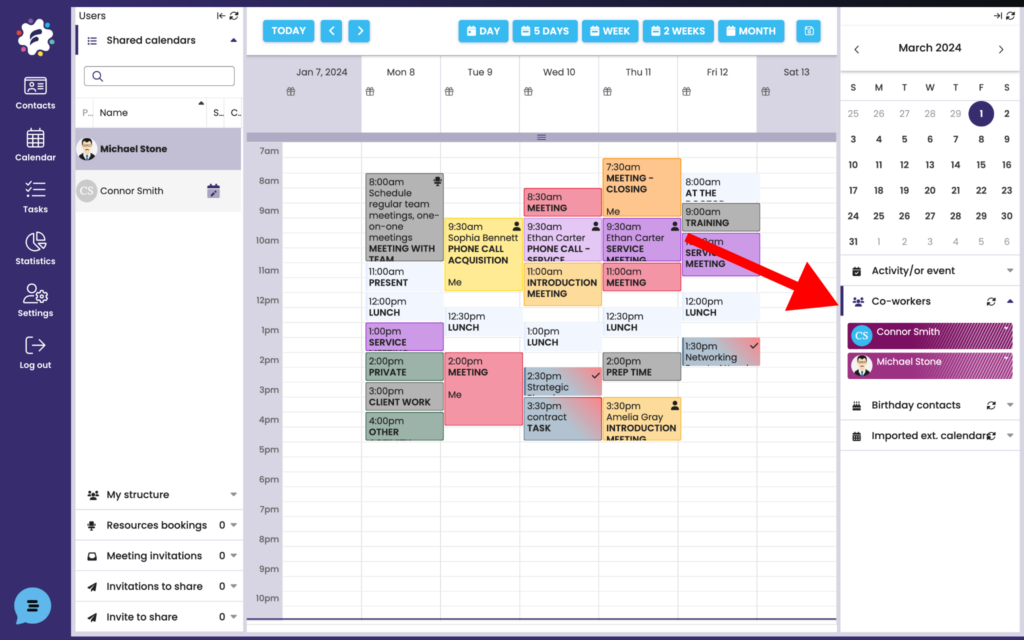
To view multiple calendars, or to blend collaborators’ calendars, first click on the Collaborators tab in the right menu.
Add a user to collaborators
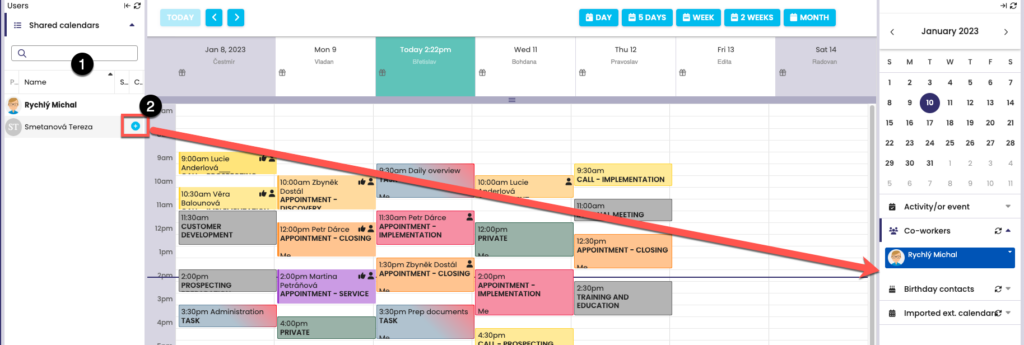
Using drag-and-drop, drag and drop the ones you want to view at the same time from the Shared Calendars tab (1) to the right menu of the Collaborators tab. Their calendars will be color-coded. You can also use the + icon (2), which also adds users to collaborators.
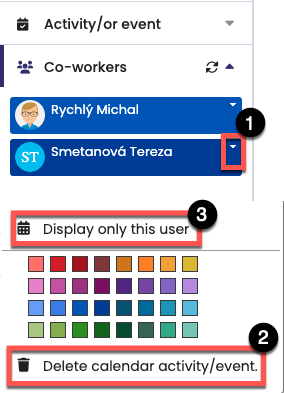
Users can be removed from the list by clicking the drop-down button (1) and then removing (2). You can also just view the calendar of the selected user (3). You can use the color palette to change the color that a collaborator reflects in the diary overlay to make comparisons as clear as possible.