Create a contact in the Classic Contacts module
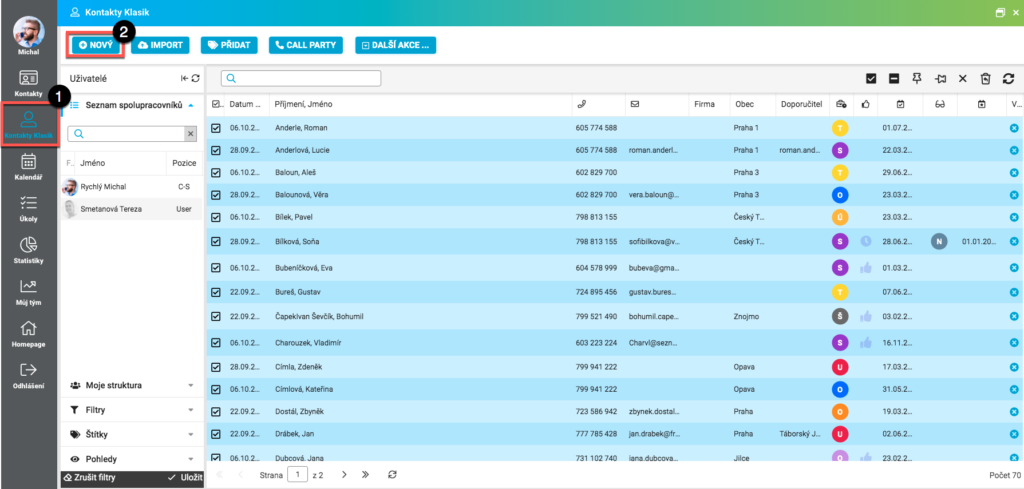
Individual contacts can be added in the Contacts module (1) via the New button (2). If you want to add multiple contacts to your contact database at once, you can use the contact import (for more information, see Import contacts from a file into FreshFlow .
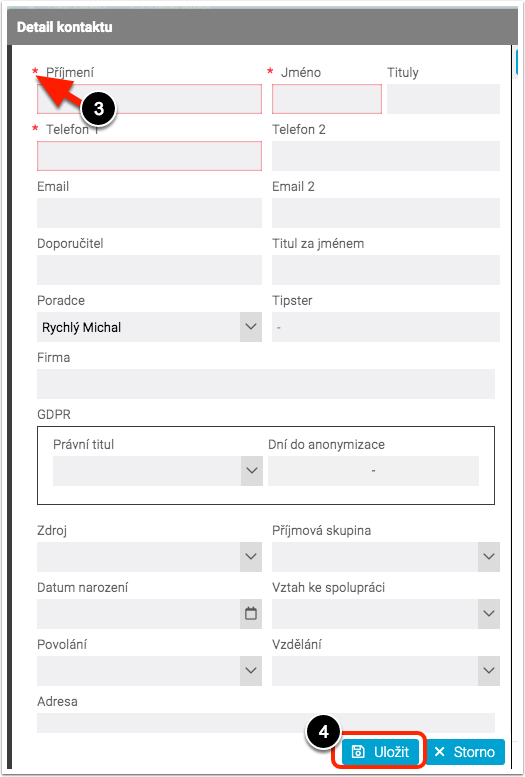
After clicking on New, a window with details will appear where you will enter the details of your new contact. Mandatory data that must be filled in to successfully save a contact are marked with a red asterisk (3). After entering the data, click on the Save button (4) and the new contact will be uploaded to your contact database in the FreshFlow system.
Create a contact in the Classic Contacts module without a phone number
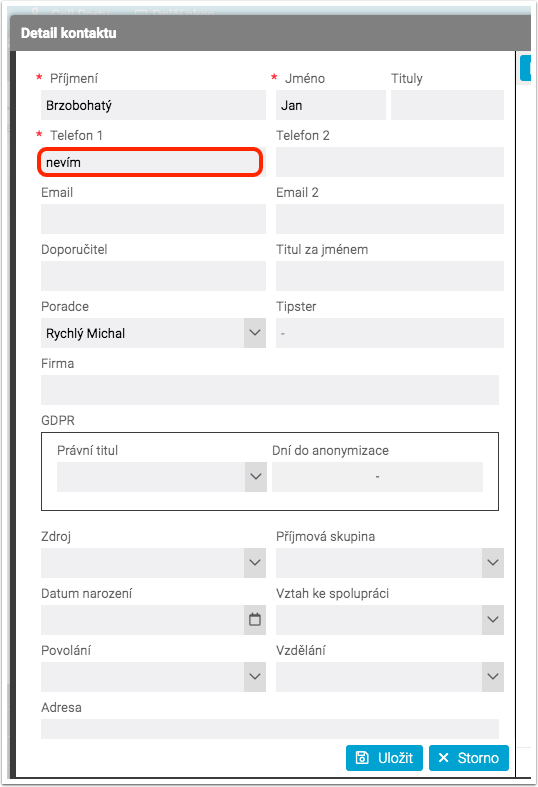
In the Contacts module, you can create a contact even without a phone number. Just type “I don’t know” in the Phone 1 field. To find contacts without a phone number, use the filter next to the Phone column.
Create a contact in the Calendar module – in the Contact field
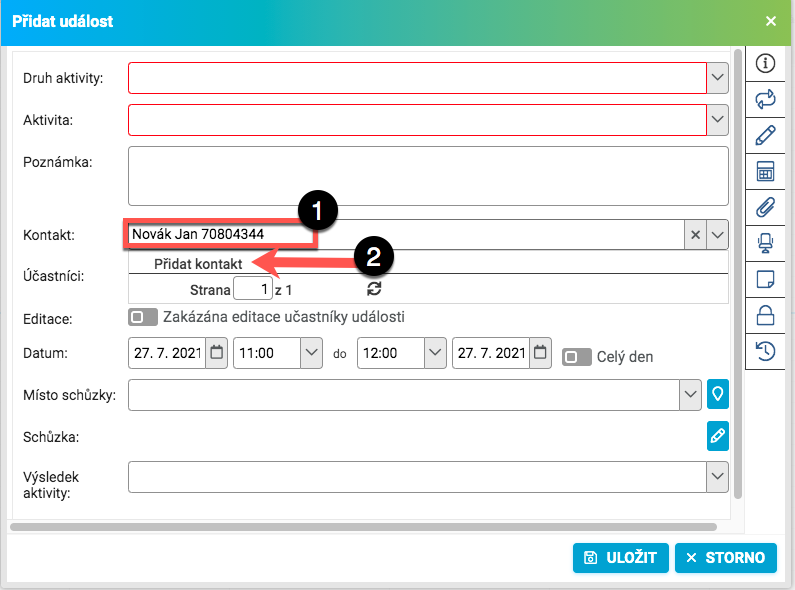
You can also specify a new contact when adding a new activity (event) in the Calendar module. In the Contact box (1), type First Name Last Name Phone , and then click Add Contact (2). This will create a new contact for your database of contacts in the FreshFlow system.
Menu and contact detail
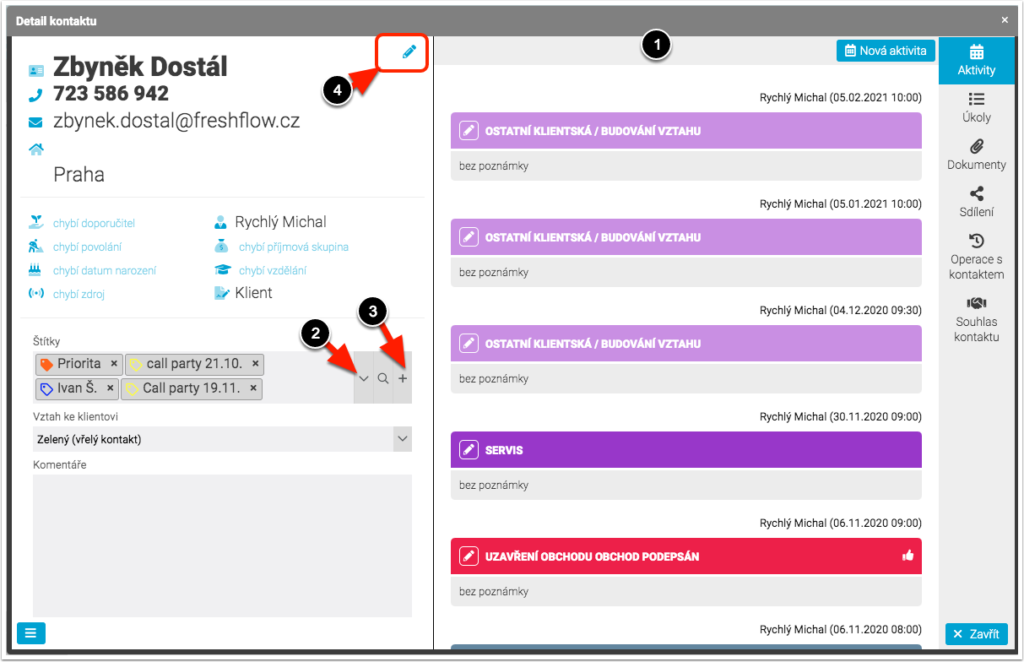
For each contact, there is a contact menu (1), which includes the Activities, Tasks, Documents, Sharing, Contact Operations, and Contact Consent tabs.
From this perspective, you can directly edit Comments, Client Relationship, and Labels.
To add a label to the client, select the arrow (2) and select the label.
Creating a brand new label is possible by using the plus icon (3).
The remaining data in the contact detail can be edited by selecting the pencil icon (4) in the upper corner.
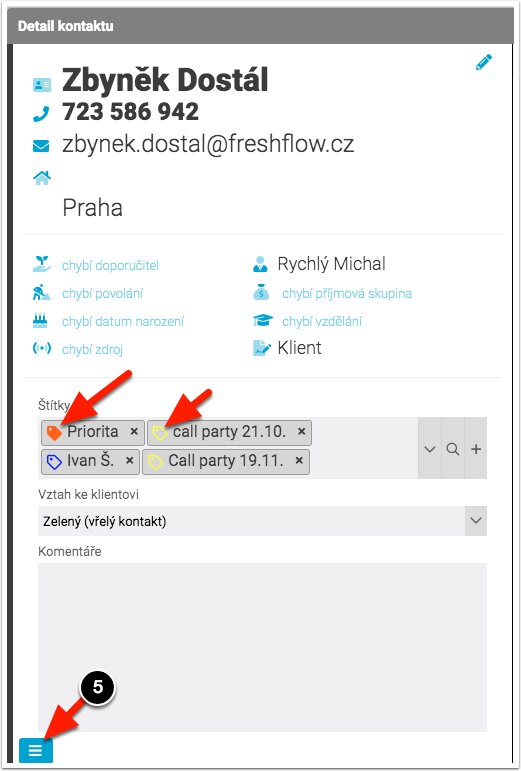
If you click on the icon at the bottom left (5), you will see the menu Delete contact or Manually merge contacts.