Contact search
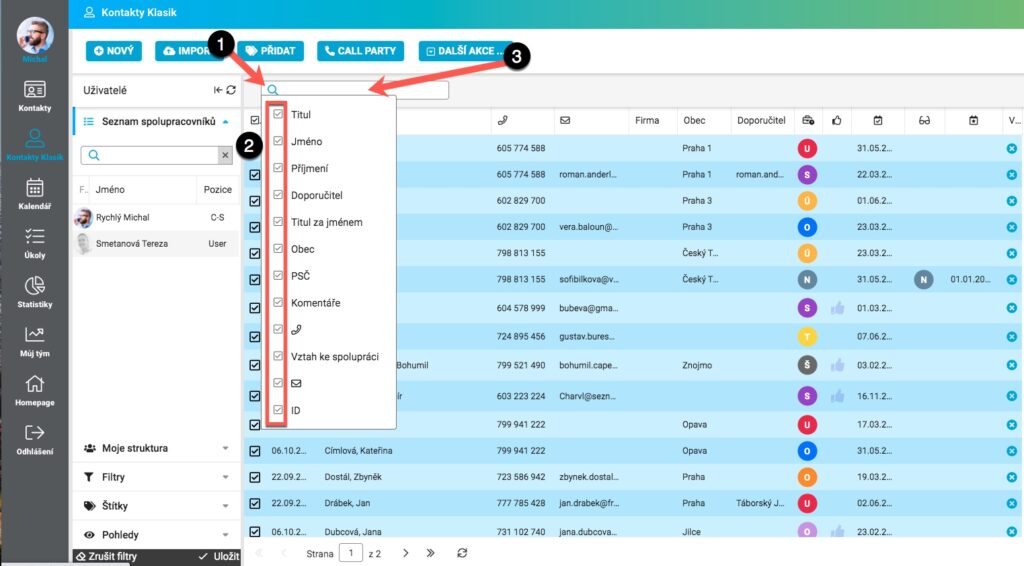
In the Contacts module, first click the magnifying glass icon (1). Then tick where to look (2). Finally, enter the phone or first name, or surname, or other in the search field (3) and FreshFlow will show you the search result.
Set up columns for filtering
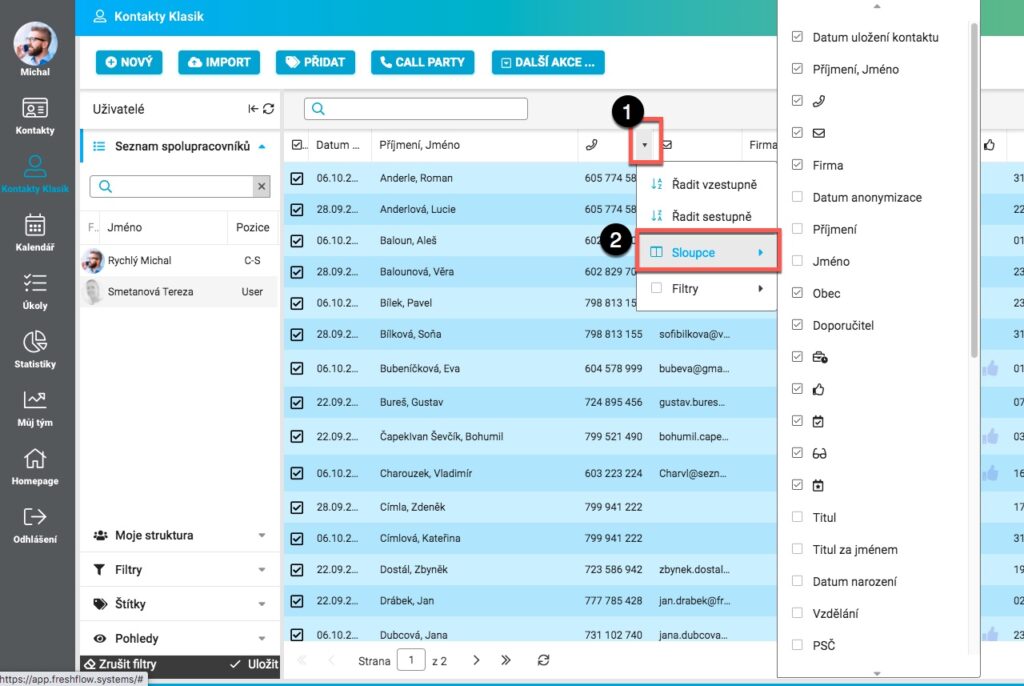
In Contacts, navigate to the database view. For clearer work with contacts or with the table, it is possible to hide some columns. Click the drop-down button next to any column (1) first, then the Columns icon (2). When they are displayed, select the ones you want to work with further and wish to view.
Filter example #1
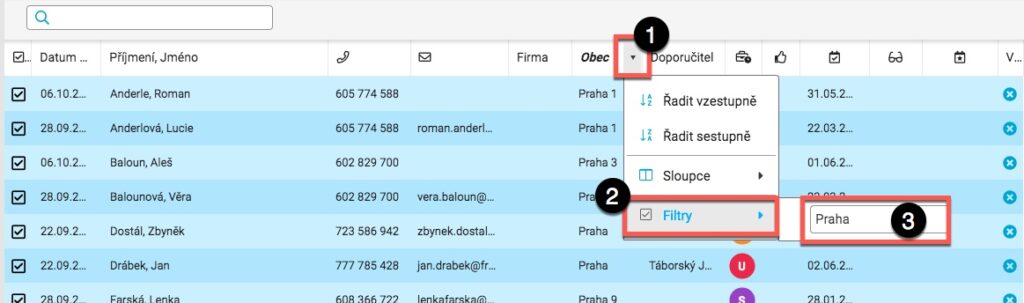
For example, if you want to filter out all clients or potential collaborators from Brno, click the drop-down button (1) next to the City column, click Filters (2), and then type Brno in the box (3) and confirm > Enter.
Clear filters
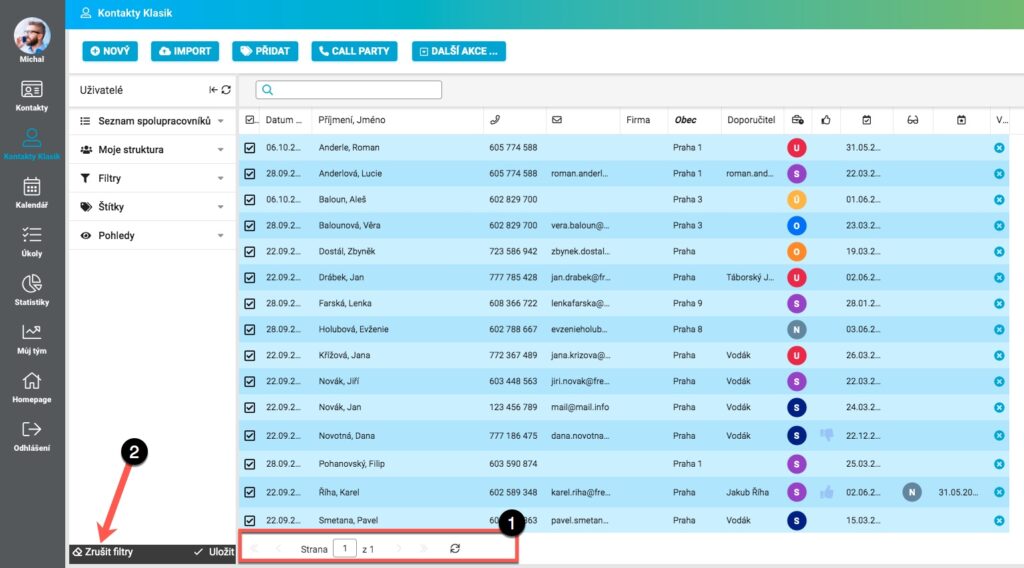
The FreshFlow system has now filtered out all your contacts in Brno. Remember that the screen only shows 20 contacts, if there are more contacts, you can scroll through them on other pages using the buttons (1). You can cancel a filter by clicking the Cancel Filters button (2).
Filter Example #2
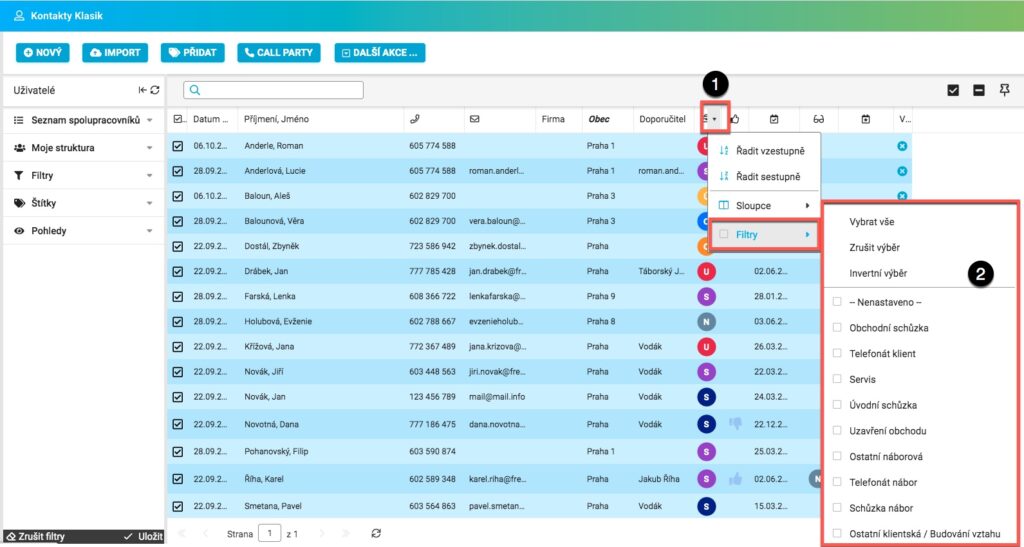
You can also filter contacts by Recent Activity and Its Result. Users very often use filters in case they want to call all the contacts they did not call last time. First, you need to apply the filter to Last Activity (1) and select the Call Client activity type (2). FreshFlow then displays all contacts for whom the last activity was a phone call.
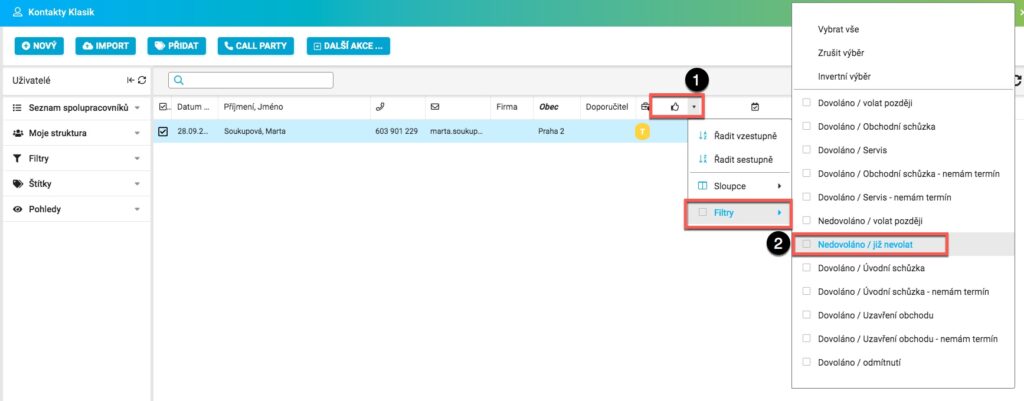
The Last Activity Result filter (1) is then applied to the filtered contacts and checked the Filter Box for Not Called / Call Later (2). The result is a list of contacts that the advisor did not call last time.
Saving filters
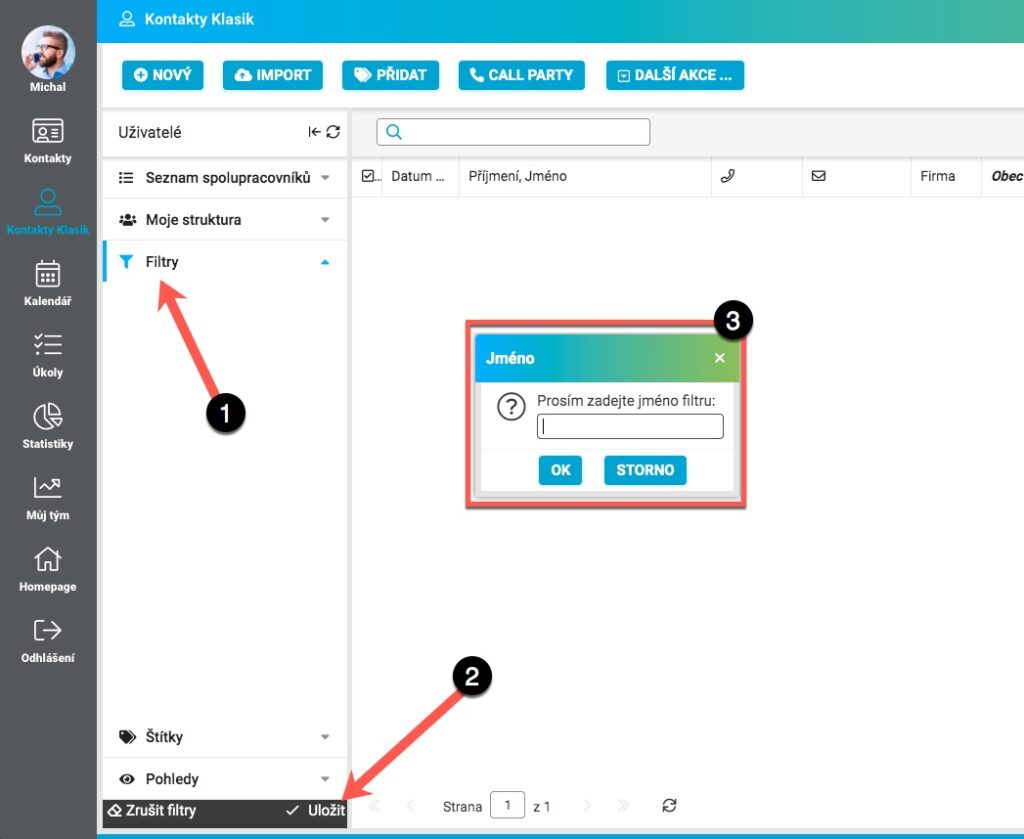
If you think you’ll use a filter regularly, you can save the filter (both single and multiple). Just open the Filters tab (1), click Save (2) and then enter the name of the filter in the dialog box (3) – in our case Called Calls – and confirm by clicking OK.
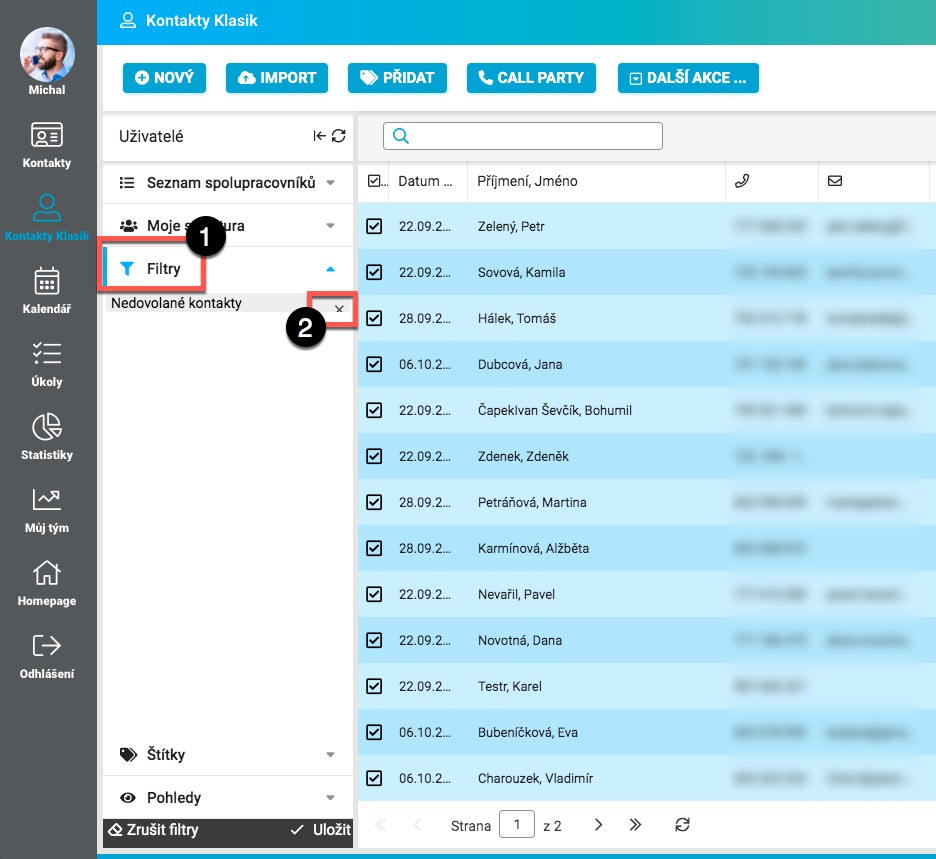
The filter will then appear under the selected name in the Filters tab (1). There it remains for use until the user decides to delete it once and for all by clicking on the “X” next to the filter name (2).