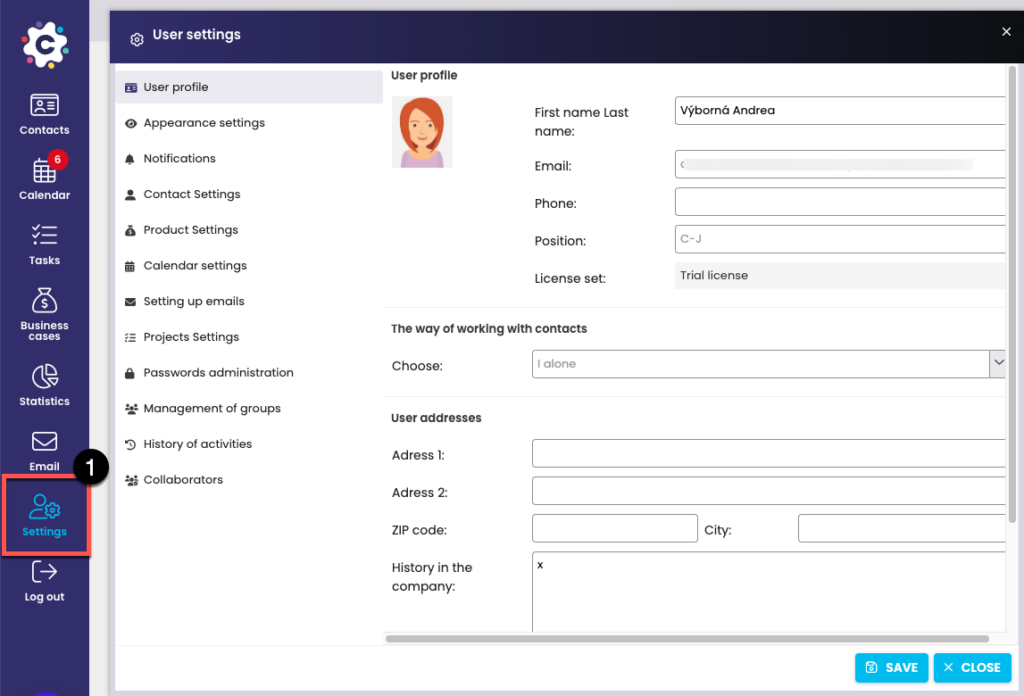
Click on the Settings module (1) in the left pane to open the User Settings window (2).
User profile
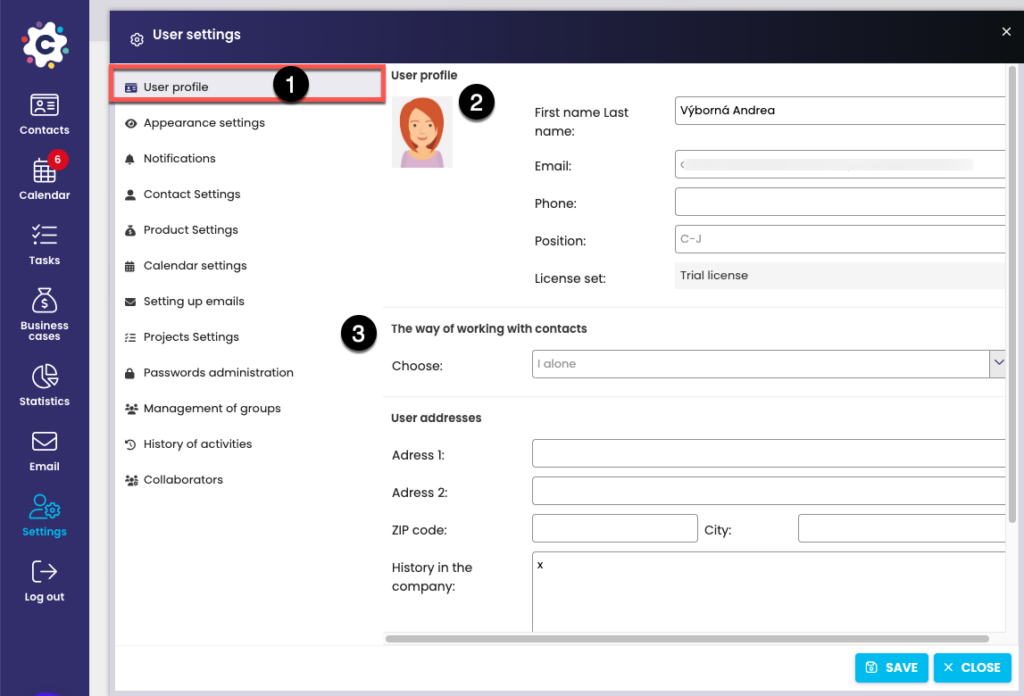
The first option is User Profile (1). Here you can edit user data (phone, main office, addresses, etc.). If you click on the icon with your initials (2), you can then insert a photo or picture directly from your PC.
It is also possible to set how you will work with contacts (3) (function only for authorized users):
By selecting the “Just me” option, you will only see your contacts that you put into Calendee or that someone shares with you.
The second option is “everyone in the company” – you can see (and work with) contacts in the entire structure below you.
Appearance settings
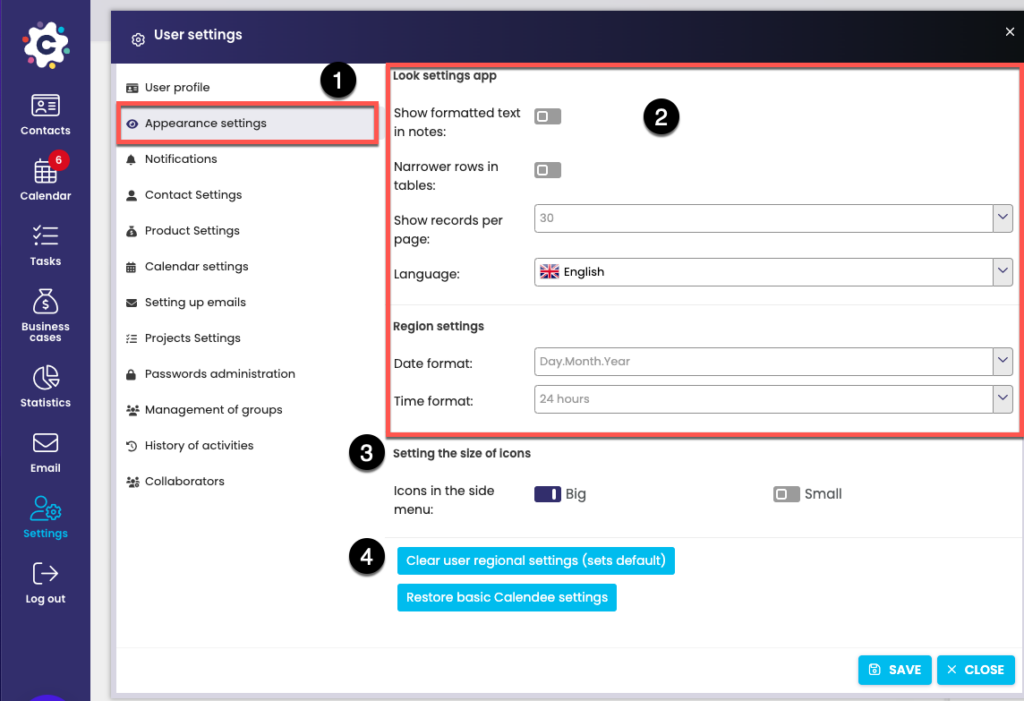
In Appearance Settings and Modules (1), you can customize the display of the system – Display a certain number of records to be displayed on one page, Date and Time Display Format (2).
Icon settings (3) – select whether you want the icons on the left bar (Contacts, Calendar, etc.) to be large with a label or just small icons without labels.
Restore original values (4) – Restore window and panel positions (if you have set otherwise) or directly Restore basic Calendee settings (returns to default values)
Notification
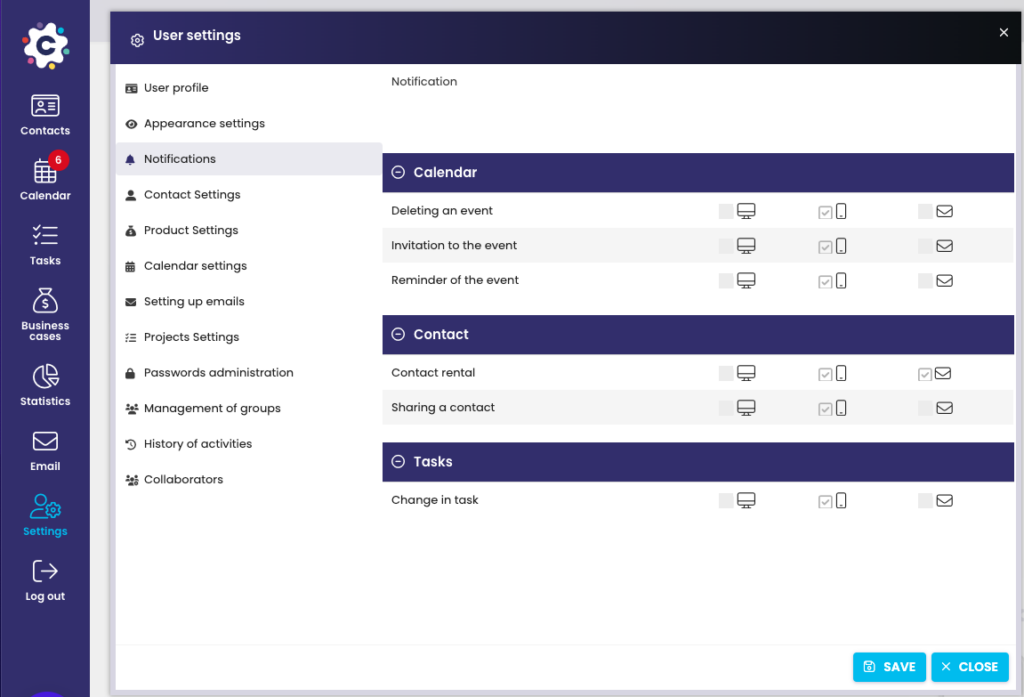
Upcoming….
Contact settings
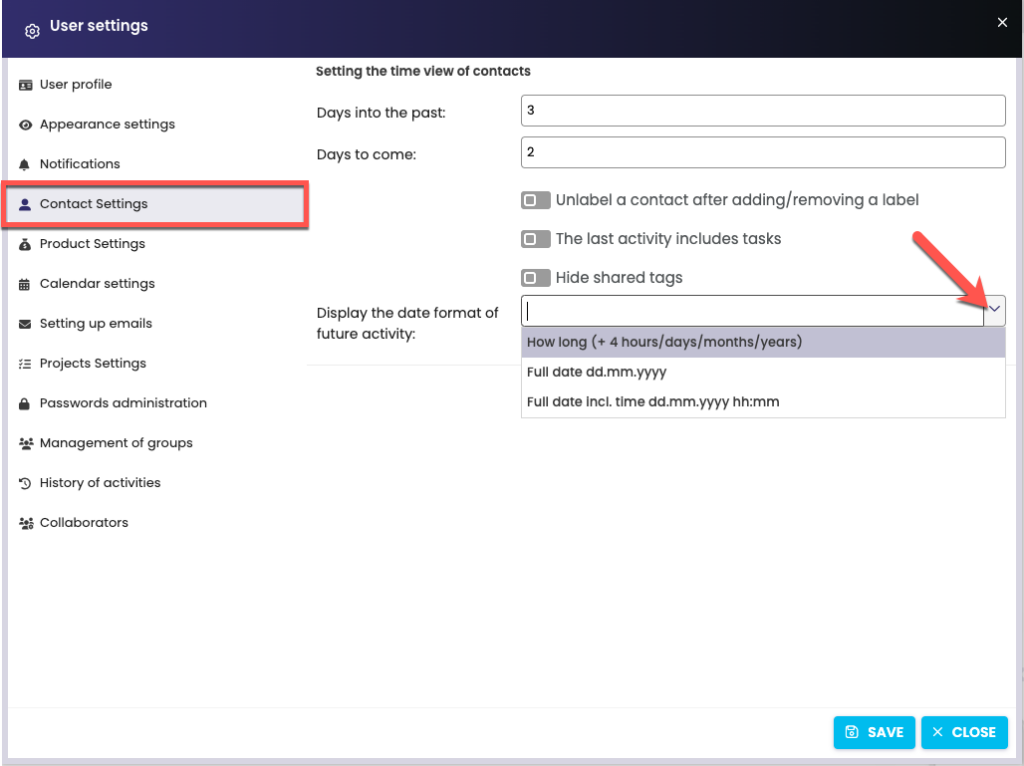
In this step, you can set the form of some of the data displayed in Contacts.
Product Settings
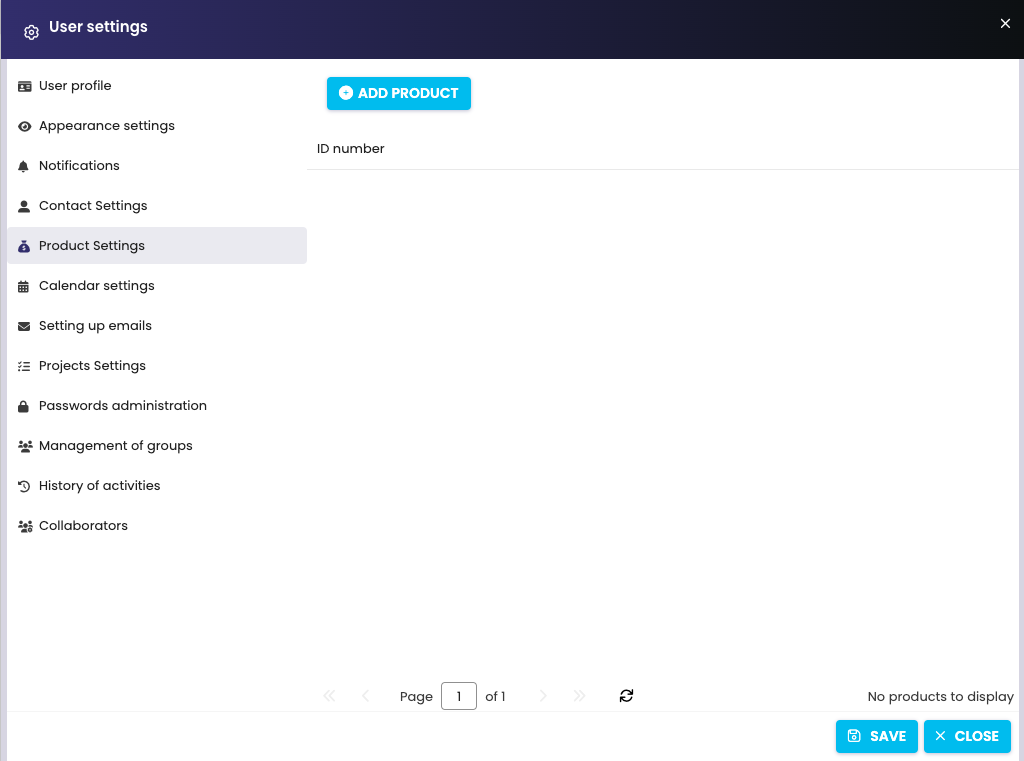
Just for admins – they can create new products to Business cases modul here.
Calendar settings
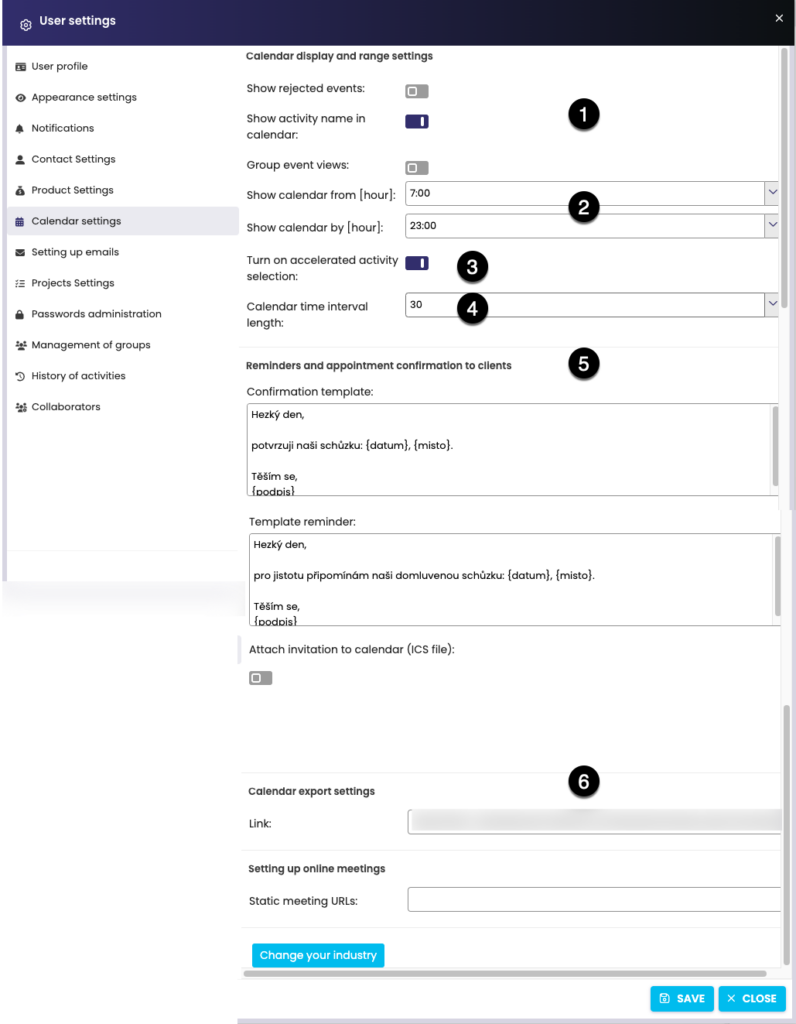
In Calendar settings, you can turn the display of calendar activity names off and on (1) or customize the calendar display range from – to a specific hour (2).
Enable accelerated activity selection (3) – new way of entering activities into the calendar -> you don’t have to fill in Activity type and Activity separately. Tasks can also be entered in this way.
Délka časvého intervalu kalendáře (4) – zvolte si, zda chcete kalendář vidět po 15, 30 či 60 minutách.
Reminders and confirmations to clients (5) – templates – here you can edit the text of the templates, which are then sent to clients if you enter a confirmation or reminder for the activity.
You can use the calendar export link (6) if you need to back up the calendar data in the PO or link it to another calendar.
“Change your field” – this function is available only to authorized users and is about changing activities in the calendar (the so-called dials). If you decide to change the field, all existing activities in the calendar (and in the calendar of all users in your structure) will be converted to “Other”.
Projects / Task settings

- Visibility of completed tasks – if you wish to display completed tasks only for some time after their completion, set here.
- If you enter multiple tasks in a row – you can turn on “repeat last value” – i.e. the same contact (client) and possibly the project where the tasks are created will be automatically inserted.
- Default task priority – you can set what should be filled by default.
- Show completed tasks/projects – if you want to permanently display completed tasks/projects in the tasks module, tick this option.
- Show task in calendar – sets the default value for a new task (can then be adjusted individually for each task)
Show completed tasks in the calendar – again can be set as default value and possibly individually edited in the detail of each task - Priority – set the colour and style of the priority marking in the task – it will be reflected in the tasks displayed in the calendar.
Password management
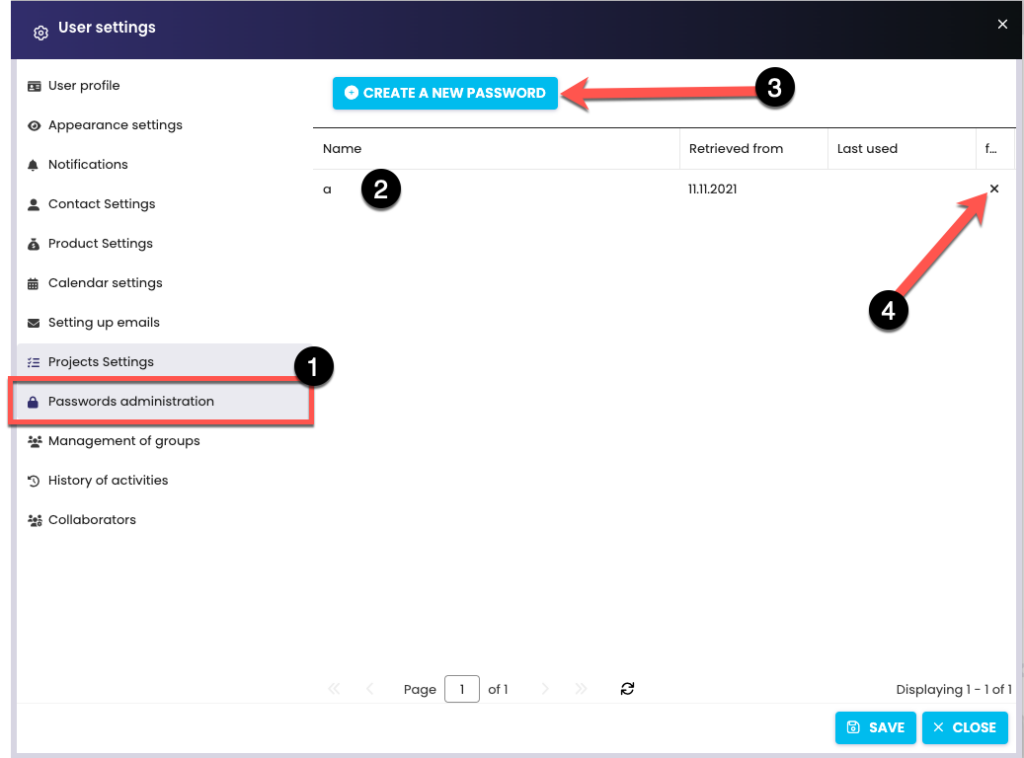
In Password Management (1), you can see a list of passwords created so far (for mobile devices and sync) (2), create new passwords (3) or delete existing ones (4).
For more information on creating a password for synchronization, click HERE.
Managing groups (aliases)
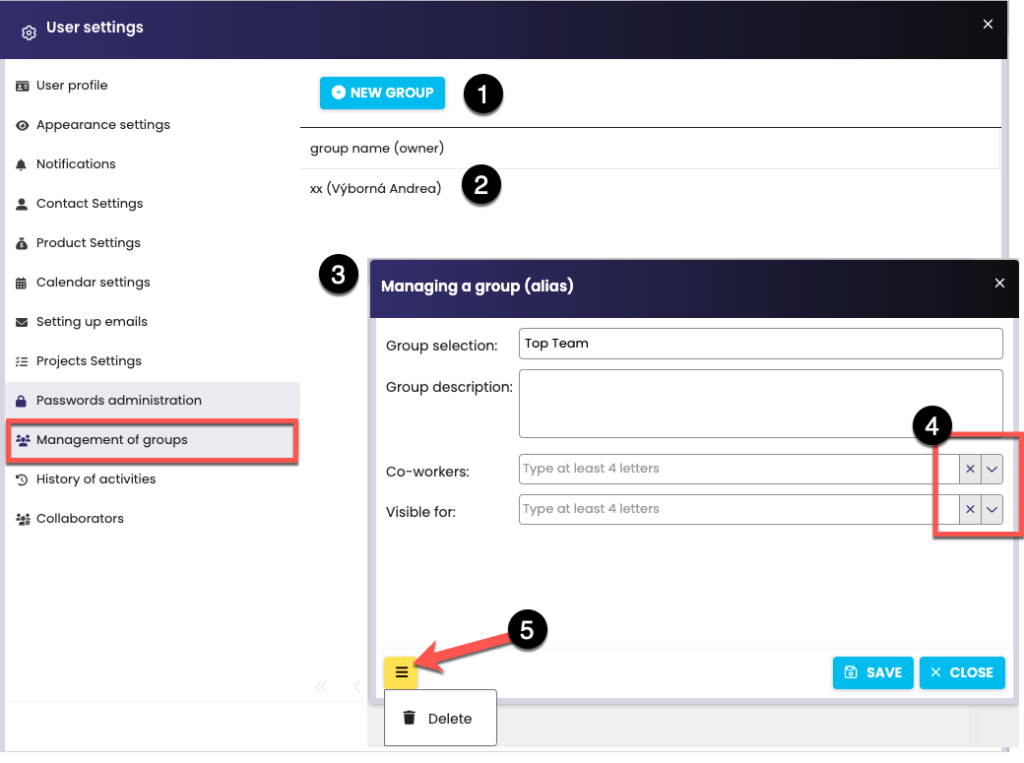
Manage groups– here you can create new groups (1) or edit existing ones (2). To edit, click the group (2) to open the Manage Group dialog box (3). Here you edit what you want, add collaborators and visibility (4) and click Save. If you wish to delete a group, click on the three lines icon at the bottom left (5) and select Delete.
History of activities

In the Activity History tab, you can find out what the logged-in user edited in the system and when the edit was made (date and time). When you expand the plus sign (1) for each activity, the record of the original and new value (2) is displayed.