Step 1 – Import function

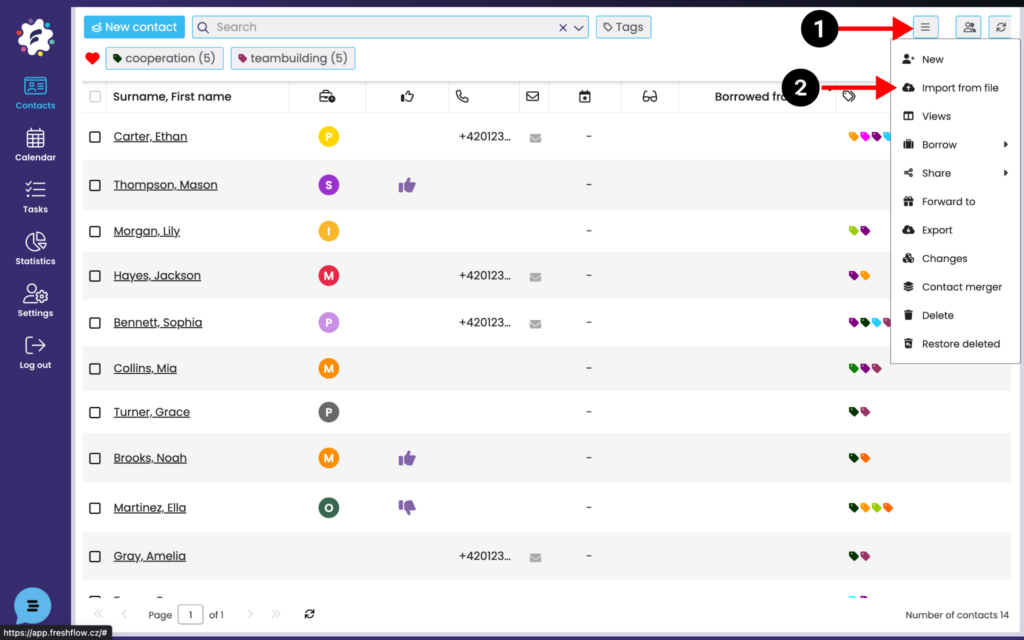
After logging in to the system, open the Contacts module and click on the more actions button (1) and select Import from file (2). Then a new window will open for you to select a file from your PC. Select an xlsx or csv file with contacts.
Step No. 2 – Import Contacts dialog box

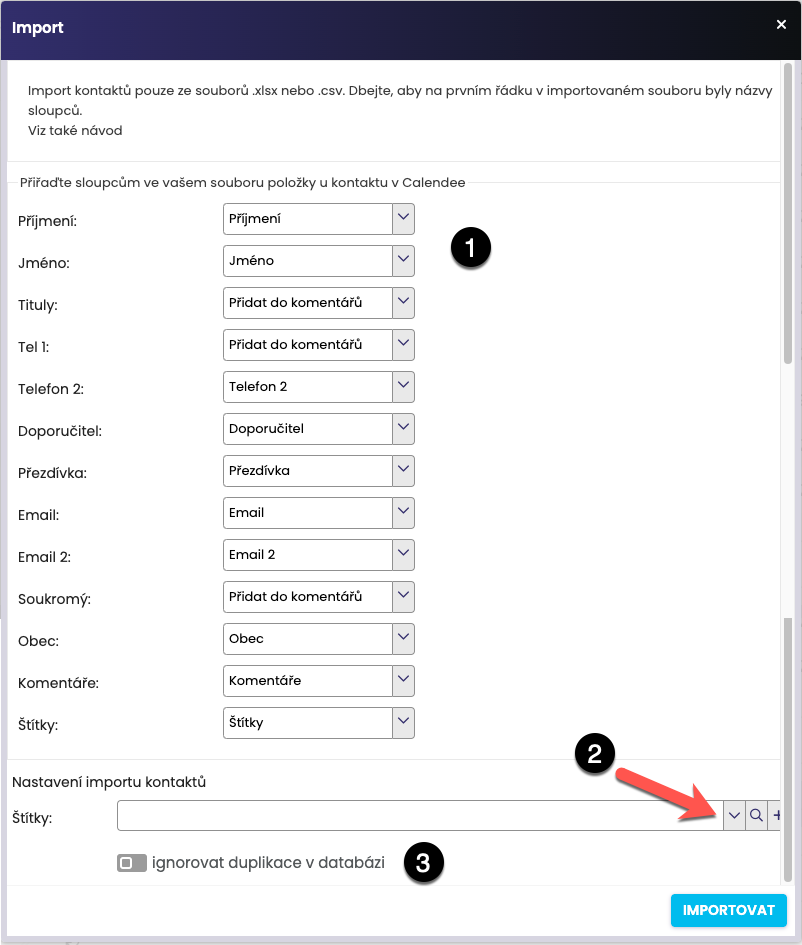
In this step, you assign the columns from your table to those in FreshFlow (1). You can also assign an existing label to your contacts (2) or create a brand new one by clicking on the plus icon. Under this label, you can easily filter out the imported contacts.
If you have any duplications in the database, these contacts will not be imported into FreshFlow. But if you want to import with duplications, you can set this option (3).
Confirm with the Import button. The contacts are entered into FreshFlow and then can be searched in the database.
Step No. 3 – check imported contacts

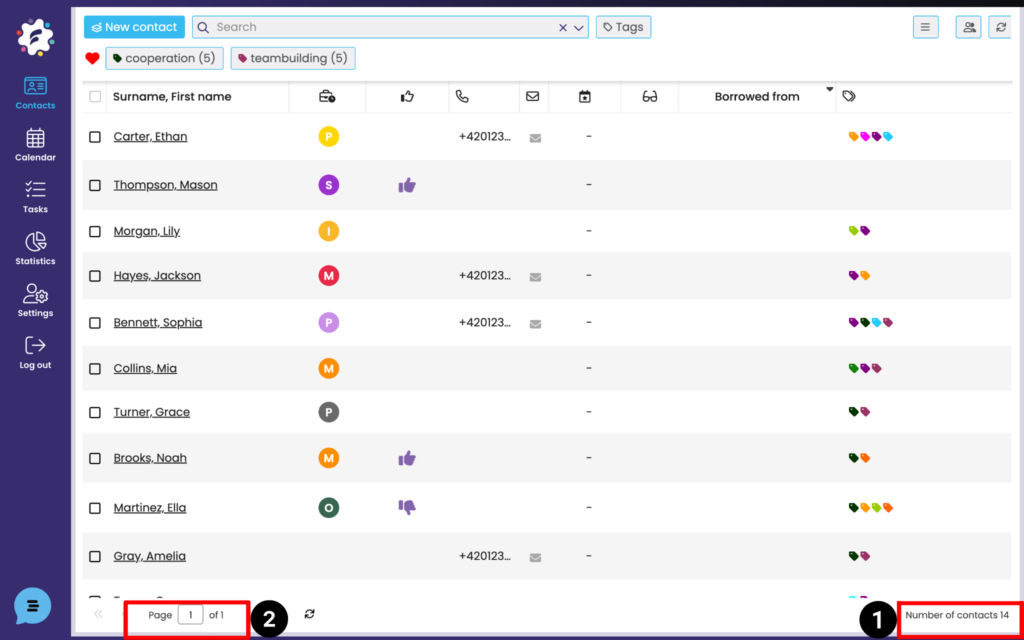
Now you can check the imported contacts directly in the system. Click on the Contacts module, where you will see your imported contacts. The system also shows you the total number of your contacts (1) and the total number of pages for displaying contacts (2). With multiple imported contacts, it may take some time to retrieve and display the contacts in the database. Contacts will appear in the database sequentially, and not all at once.