How to create a task?
You can create a task in several ways. It depends on whether you want to quickly enter multiple tasks at once. Or fill in all the attributes for an individual task. Possibly. create an entire project with tasks.
Create a task directly in your calendar
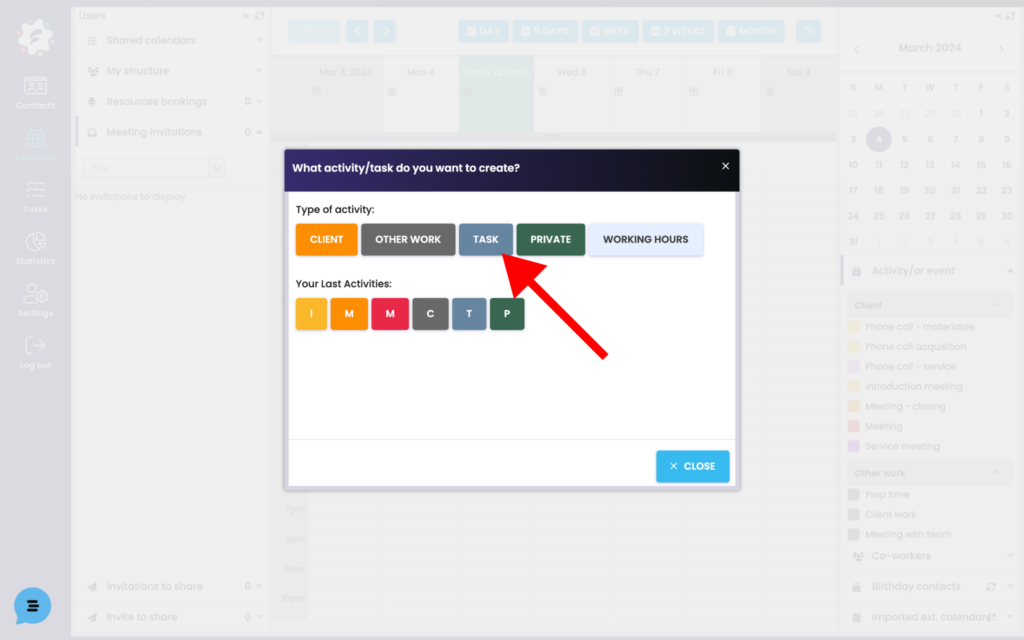
To create a task directly in the calendar, just click in the empty space of the calendar > you will see the activity menu > select Task. A window will open for you to enter a new task.
Quickly multitask at once
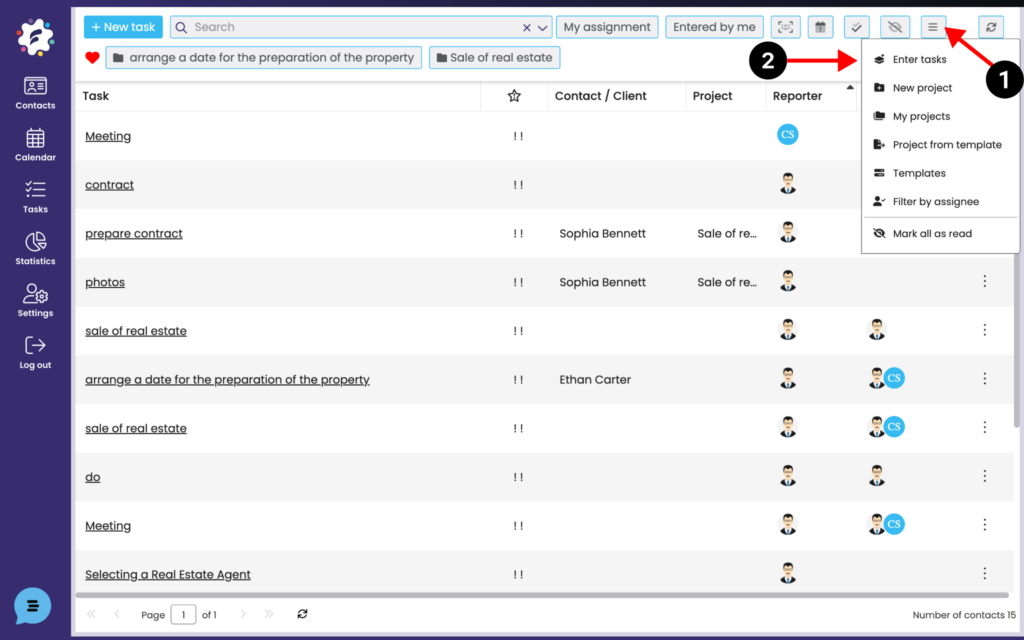
In the Tasks module, expand the “Actions” icon (1) and select Enter Tasks (2).
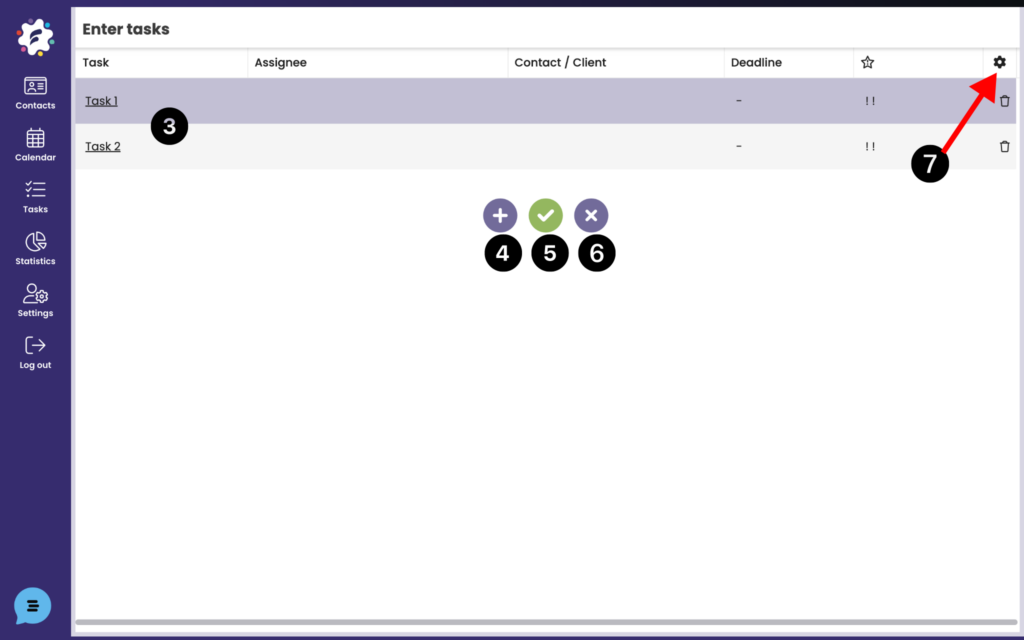
In each row, fill in the name of the task, solver, contact, deadline, etc. (3). To add rows in the table, click the + sign (4). To save tasks, click on the “check mark” icon (5). To close the task table, click the close icon (6).
Assignment of individual tasks
You can again edit the columns you wish to view (fill) by clicking on the gear (5) > “Columns” and select which you want to see and which you do not.
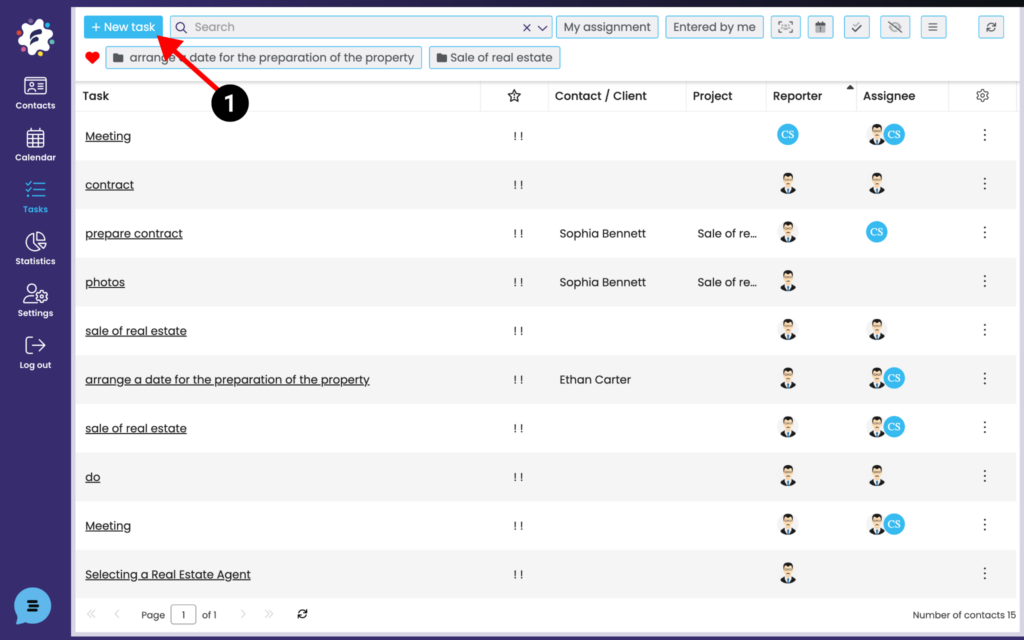
To enter a task individually (in the Tasks module), choose the + New Task button (1). A window will open for you to create a new task.
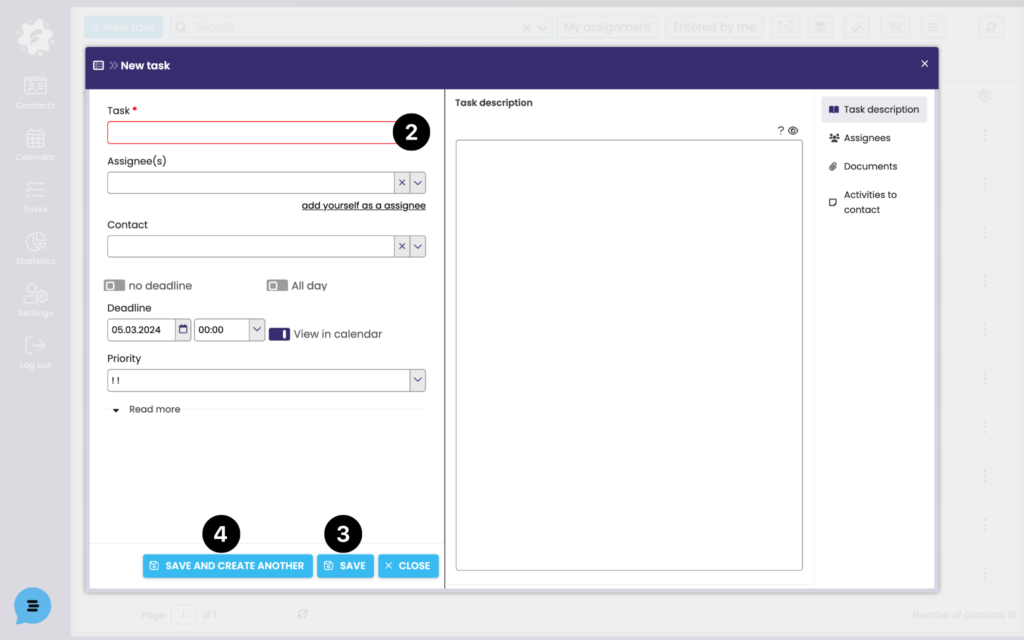
Enter a name for the task (required field) (2) and any other parameters. Put Save (3), respectively. it is possible to select “Save and create another” (4), in which case a window will immediately open for you to enter the next task.
How to create a project?
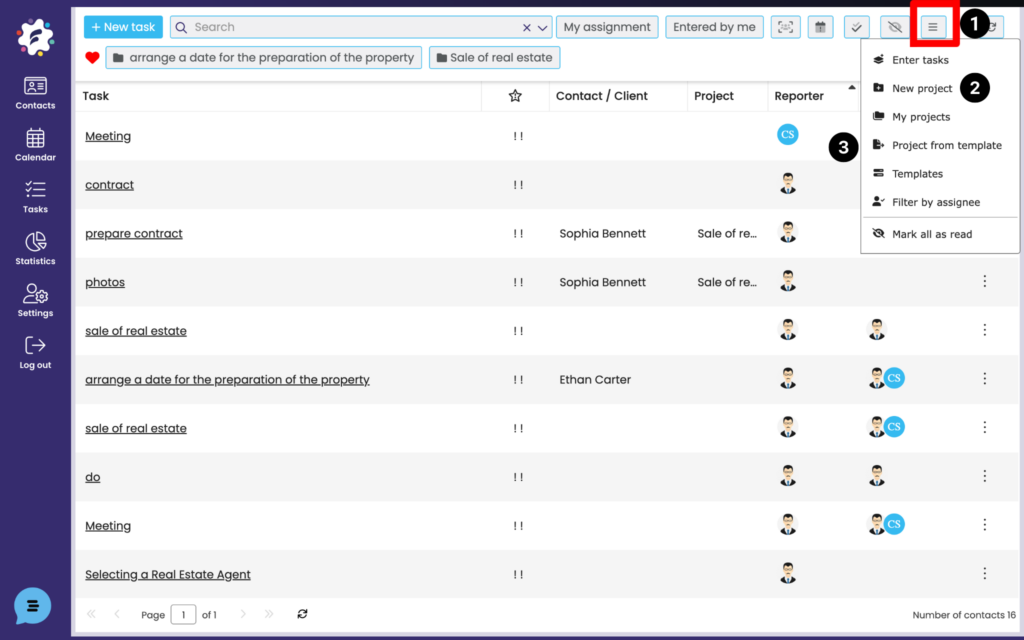
You can create a new project by clicking on the Actions icon (1) and choosing New Project (2) or Project from Template (3) that you have previously saved.
Create a new project
If you choose to create a new project, a window will open in which you will fill in the required information.
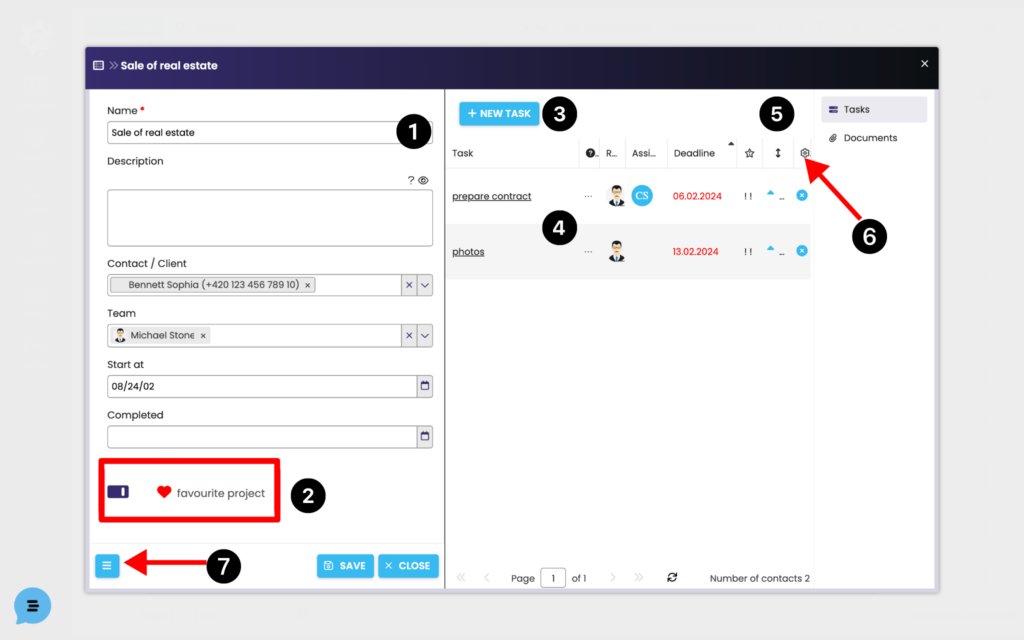
Project name (1) is a mandatory field. You can fill in the rest later. If you want to display the project directly on the main bar in the Tasks module, add the project to your favorites now (2).
It is also possible to start creating tasks directly when you create a project (3).
The individual tasks of the given project are then displayed in the right part (4), where they can be moved freely by dragging the mouse or arrows in the Order column (5).
You can also set the column view (6).
If the project is repeated, it is possible to create a template from it for further use (creating another project). Click on the icon at the bottom left (7) and the Create Template or Delete menu will expand.
Create a project from a template
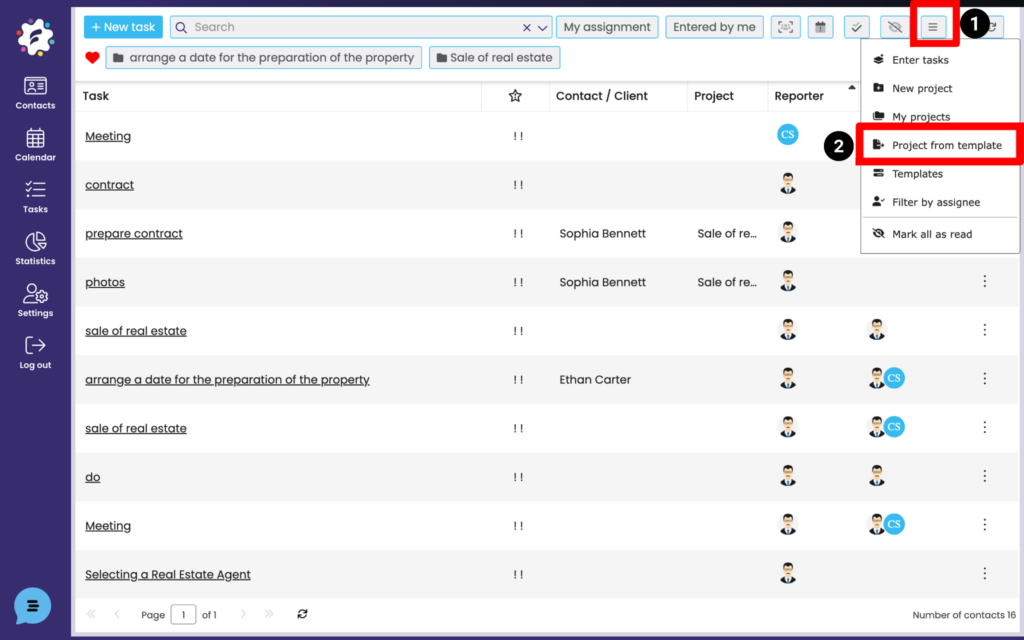
Choose the “Action” icon (1) and select Project from template (2).
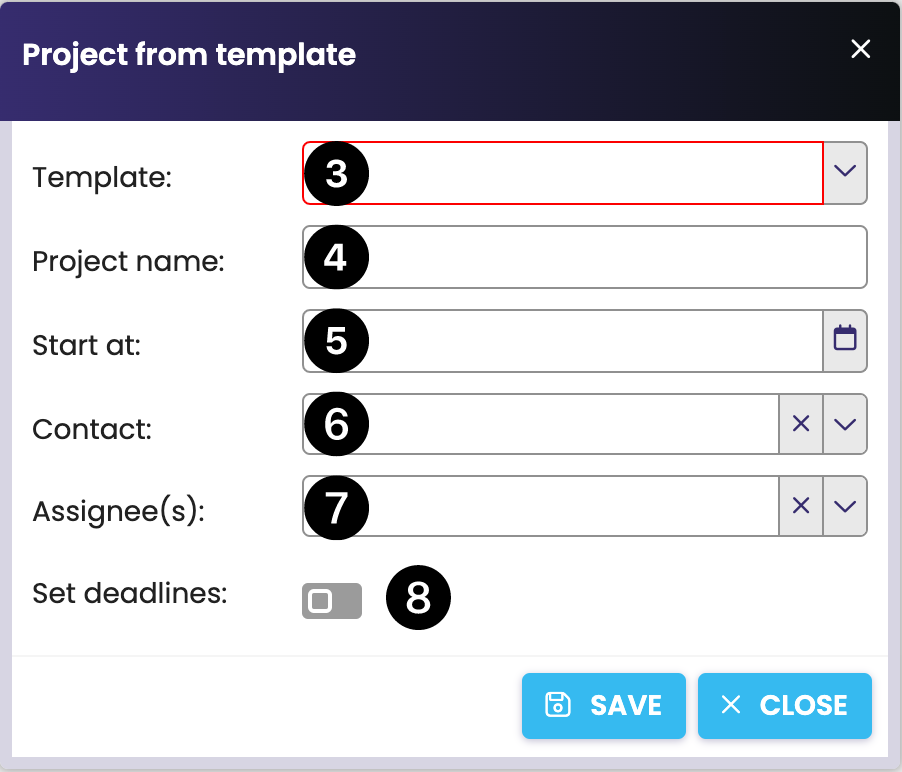
Select the desired template from the saved (3) and enter the project name (4), fill in the start date (5) and you can assign Contact (6), Solver (7), or set project deadlines (8). Put Save.
How to set task settings?
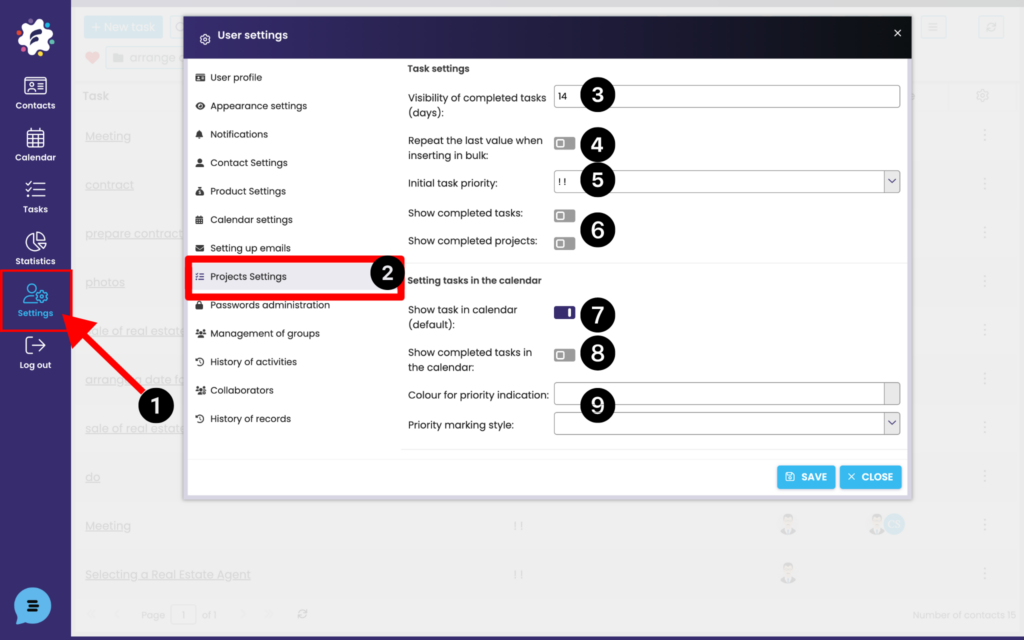
Open Settings (1) > Task Settings tab (2).
- Visibility of completed tasks (3) – set the number of days for which completed tasks will be displayed in the Tasks module.
- Repeat last value (4) when creating tasks using “Enter Tasks” in bulk, the value from the first row (task) in the Client, Solver, and Project fields is automatically saved for the next task.
- Default task priority (5) – Set the priority with which new tasks will be automatically created.
- Show completed tasks / projects (6) – completed (completed/canceled) tasks or projects will also be displayed in the task list
- Show task in calendar (default value) (7) – sets the display of tasks in the calendar, unless you check otherwise for an individual task
- Show completed tasks in the calendar (8) – After completing or canceling, tasks will continue to appear in the calendar
- Color for priority marking and priority marking style (9) – select from predefined how the priority for tasks will be displayed in the calendar.